주요 콘텐츠로 건너뛰기

Samsung POWERbot VR9000 Powerbrush Replacement

  1. Samsung POWERbot VR9000 Powerbrush Replacement, Powerbrush: 1 단계, 이미지 1/2 Samsung POWERbot VR9000 Powerbrush Replacement, Powerbrush: 1 단계, 이미지 2/2
    • Turn off the emergency switch located at the bottom right of the POWERbot.

  2. Samsung POWERbot VR9000 Powerbrush Replacement: 2 단계, 이미지 1/2 Samsung POWERbot VR9000 Powerbrush Replacement: 2 단계, 이미지 2/2
    • Press the two yellow tabs immediately below the POWERbrush.

  3. Samsung POWERbot VR9000 Powerbrush Replacement: 3 단계, 이미지 1/2 Samsung POWERbot VR9000 Powerbrush Replacement: 3 단계, 이미지 2/2
    • Lift the brush cover, indicated by the yellow strip located above the yellow tabs.

  4. Samsung POWERbot VR9000 Powerbrush Replacement: 4 단계, 이미지 1/2 Samsung POWERbot VR9000 Powerbrush Replacement: 4 단계, 이미지 2/2
    • Remove the power brush starting with the unhinged right side of the brush.

결론

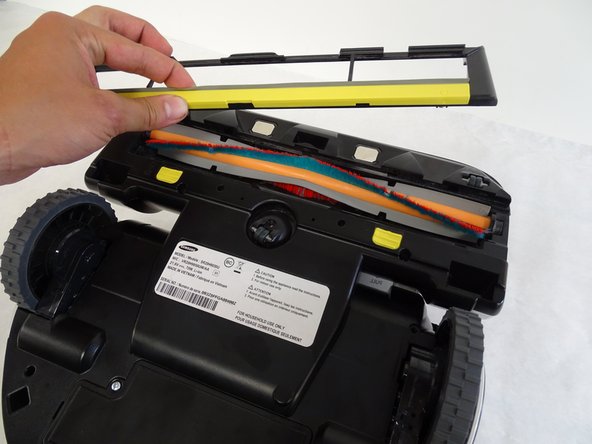
To reassemble your device, follow these instructions in reverse order.

Harrison Fugate

회원 가입일: 04/24/17

102 평판

안내서 1개 작성함

Cal Poly, Team S15-G3, Banghart Spring 2017 Cal Poly, Team S15-G3, Banghart Spring 2017 회원

CPSU-BANGHART-S17S15G3

4 회원들

안내서 14개 작성하였습니다

댓글 2개

The brush is wobbly in position. Is there an insert on the right side of the brush at the bearing. This position, the bearing look too small for the opening of the cover and the upper plastic.

Charlie nguyen - 답글

Did you lose the rubber cover/ washer that goes over the bearing? You can replace it from Samsung if you did.

hawkswhispertwh - 답글

댓글 쓰기

조회 통계:

24 시간 전: 0

7일 전: 1

30일 전: 5

전체 시간: 2,201