주요 콘텐츠로 건너뛰기

Samsung POWERbot VR9000 Right Driving Wheel Replacement

필요한 것

  1. Samsung POWERbot VR9000 Right Driving Wheel Replacement, Top Chassis: 1 단계, 이미지 1/2 Samsung POWERbot VR9000 Right Driving Wheel Replacement, Top Chassis: 1 단계, 이미지 2/2
    • Turn off the emergency switch located at the bottom right of the POWERbot.

  2. Samsung POWERbot VR9000 Right Driving Wheel Replacement: 2 단계, 이미지 1/2 Samsung POWERbot VR9000 Right Driving Wheel Replacement: 2 단계, 이미지 2/2
    • Insert the plastic opening tool under the black cover, near the Samsung logo on the back of the device, and partially pry open.

  3. Samsung POWERbot VR9000 Right Driving Wheel Replacement: 3 단계, 이미지 1/2 Samsung POWERbot VR9000 Right Driving Wheel Replacement: 3 단계, 이미지 2/2
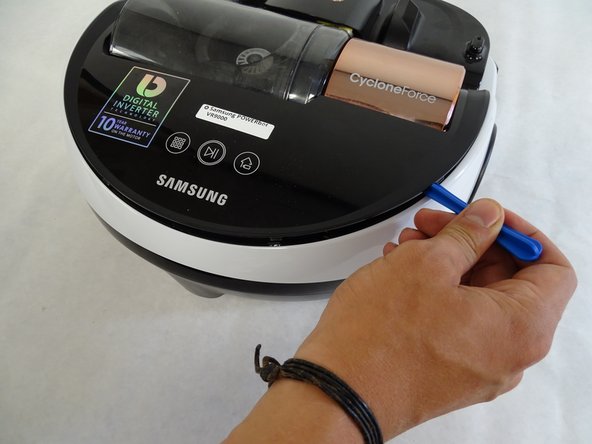
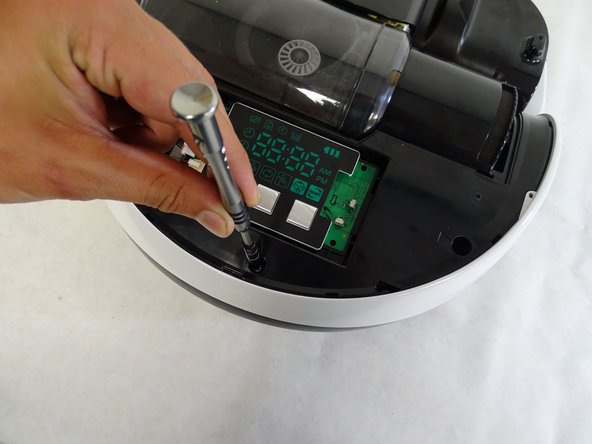
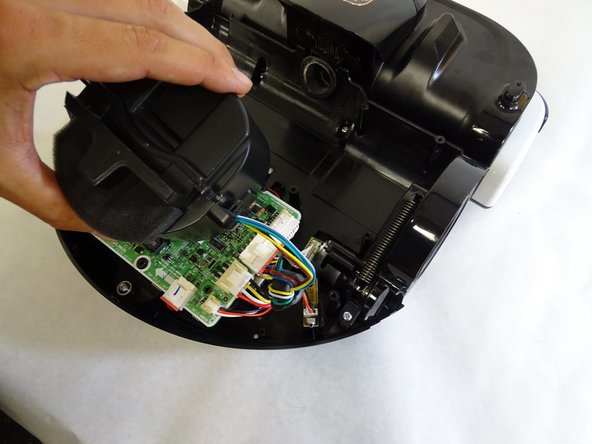
    • Slide the plastic opening tool to the left, remaining under the black cover, until two left side pins have been detached. Then slide the plastic opening tool to the right until two right side pins have been detached.

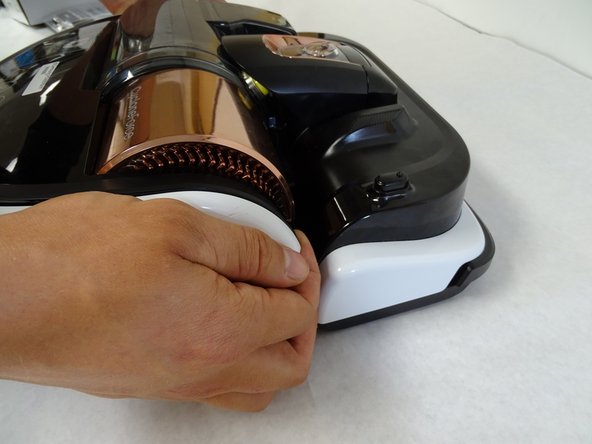
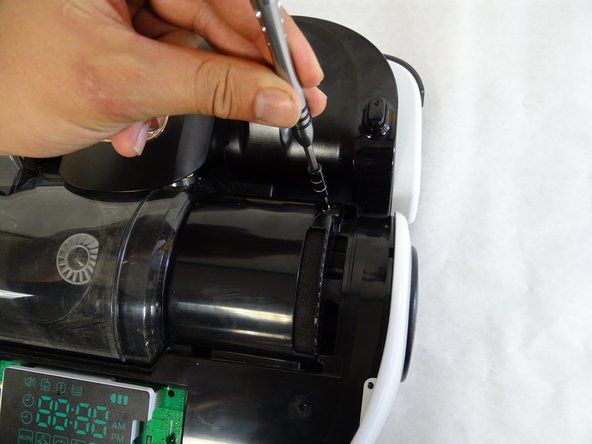
    • Grab the two clips near the front of the black cover, on in front of each wheel. Pull the clips away from the wheels.

  4. Samsung POWERbot VR9000 Right Driving Wheel Replacement: 4 단계, 이미지 1/3 Samsung POWERbot VR9000 Right Driving Wheel Replacement: 4 단계, 이미지 2/3 Samsung POWERbot VR9000 Right Driving Wheel Replacement: 4 단계, 이미지 3/3
    • Remove the black cover.

  5. Samsung POWERbot VR9000 Right Driving Wheel Replacement: 5 단계, 이미지 1/2 Samsung POWERbot VR9000 Right Driving Wheel Replacement: 5 단계, 이미지 2/2
    • Insert the plastic opening tool under copper-colored cover, under the words "CycloneForce," and pry open, applying a small rotation, until the two pins are released .

    • Grab the underside of the cover and lift upwards while pushing forward until the cover pops off.

  6. Samsung POWERbot VR9000 Right Driving Wheel Replacement: 6 단계, 이미지 1/2 Samsung POWERbot VR9000 Right Driving Wheel Replacement: 6 단계, 이미지 2/2
    • Remove the three 6mm Phillips #1 screws in the holes near the back of the device.

  7. Samsung POWERbot VR9000 Right Driving Wheel Replacement: 7 단계, 이미지 1/2 Samsung POWERbot VR9000 Right Driving Wheel Replacement: 7 단계, 이미지 2/2
    • Remove the 6mm Phillips #1 screw in the hole that was under the copper-colored vacuum cover.

  8. Samsung POWERbot VR9000 Right Driving Wheel Replacement: 8 단계, 이미지 1/2 Samsung POWERbot VR9000 Right Driving Wheel Replacement: 8 단계, 이미지 2/2
    • Flip the device over and remove the 6mm Phillips #1 screw in front of the left (from this perspective, right) wheel.

  9. Samsung POWERbot VR9000 Right Driving Wheel Replacement: 9 단계, 이미지 1/2 Samsung POWERbot VR9000 Right Driving Wheel Replacement: 9 단계, 이미지 2/2
    • Detach the wider circuit connector by pressing down gently on the left end of the clip and pulling the connector out.

    • Pull the connector out by the top and bottom of the white piece and not by the wires.

  10. Samsung POWERbot VR9000 Right Driving Wheel Replacement: 10 단계, 이미지 1/2 Samsung POWERbot VR9000 Right Driving Wheel Replacement: 10 단계, 이미지 2/2
    • Remove the top chassis from the POWERbot by grabbing the wheel covers and lifting upwards.

  11. Samsung POWERbot VR9000 Right Driving Wheel Replacement, Right Driving Wheel: 11 단계, 이미지 1/2 Samsung POWERbot VR9000 Right Driving Wheel Replacement, Right Driving Wheel: 11 단계, 이미지 2/2
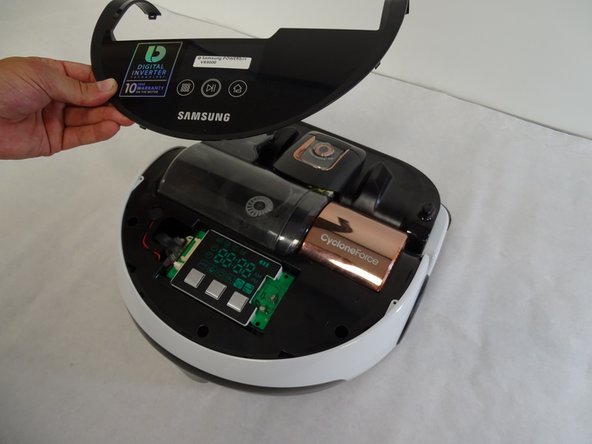
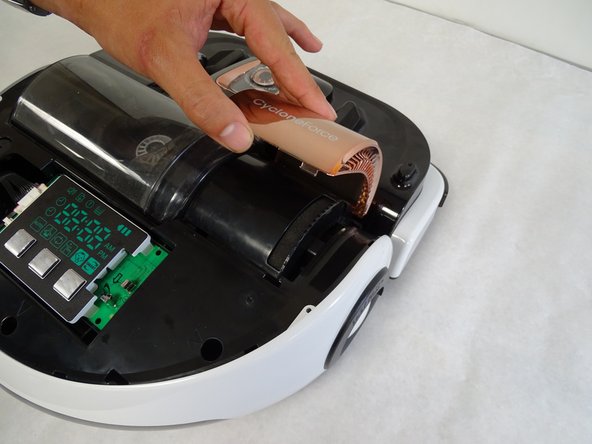
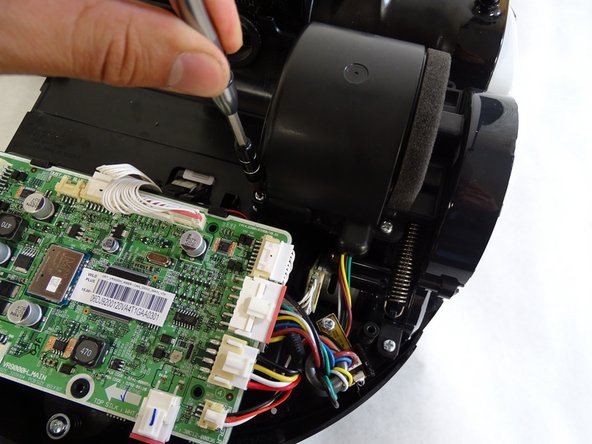
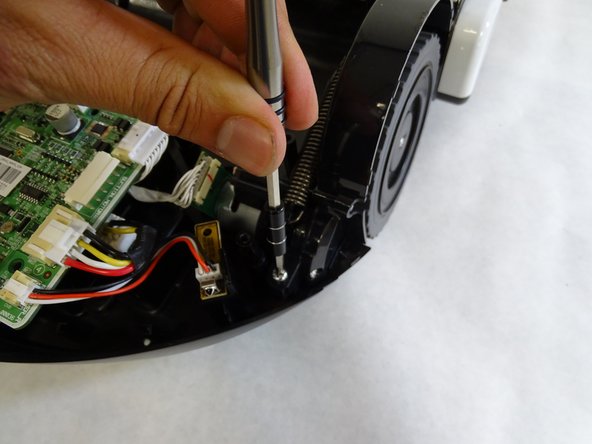
    • Remove the three 5mm Phillips #1 screws in the holes around the vacuum motor.

  12. Samsung POWERbot VR9000 Right Driving Wheel Replacement: 12 단계, 이미지 1/2 Samsung POWERbot VR9000 Right Driving Wheel Replacement: 12 단계, 이미지 2/2
    • Lift the vacuum motor by grabbing the body of the motor and pulling upward.

    • Set the vacuum motor down on the circuit board. Be sure not to strain the wires connecting the motor to the circuit board.

  13. Samsung POWERbot VR9000 Right Driving Wheel Replacement: 13 단계, 이미지 1/2 Samsung POWERbot VR9000 Right Driving Wheel Replacement: 13 단계, 이미지 2/2
    • Remove the two 5mm Phillips #1 screws in the holes closest to the right wheel.

  14. Samsung POWERbot VR9000 Right Driving Wheel Replacement: 14 단계, 이미지 1/2 Samsung POWERbot VR9000 Right Driving Wheel Replacement: 14 단계, 이미지 2/2
    • Detach the top-most circuit connector on the right side by pressing down gently on the right end of the clip and pulling the connector out.

    • Pull the connector out by the top and bottom of the white piece and not by the wires.

  15. Samsung POWERbot VR9000 Right Driving Wheel Replacement: 15 단계, 이미지 1/1
    • Remove the driving wheel assembly from the POWERbot by grabbing the wheel and lifting upwards.

결론

To reassemble your device, follow these instructions in reverse order.

다른 19명이 해당 안내서를 완성하였습니다.

Kyle Chin

회원 가입일: 04/24/17

1,919 평판

안내서 4개 작성하였습니다

Cal Poly, Team S15-G3, Banghart Spring 2017 Cal Poly, Team S15-G3, Banghart Spring 2017 회원

CPSU-BANGHART-S17S15G3

4 회원들

안내서 14개 작성하였습니다

댓글 18개

Great instructions, thank you. Would you happen to know where I can aquire this part or the gear wheels as that's what I think is the problem. Thanks Stephen Rawlings

Stephen Rawlings - 답글

GREAT INSTRUCTIONS!!! I would have to say there is a design flaw where the wheel spring attaches. I have two of these vacuums and they both have had the same problem now 4 times the small plastic peice that holds the spring snaps off and you can not reattach the spring. I would assume that there is no quick fix and samsung would sell you the whole drive wheel. Is there a place where you can purchase parts ???

David Rod - 답글

Did you find the answer to this question? Mine has had the same thing happen.

Amy Kurtz -

did you manage to fix ?

am i wanting the right wheel motor, are you willing to sell?

nique88 -

Very helpful, thank you!! My son has a 3d printer so may be able to create the part you are still looking for that part, @lightningrods

Amelia KD - 답글

댓글 쓰기

조회 통계:

24 시간 전: 2

7일 전: 16

30일 전: 64

전체 시간: 13,600