주요 콘텐츠로 건너뛰기

Samsung Propel Screen Replacement

보관된 가이드
해당 안내서는 단지 역사적인 목적으로 보관됩니다. 최신 버전 안내서를 사용하여 수리 하십시오.

필요한 것

  1. Samsung Propel Screen Replacement, Battery: 1 단계, 이미지 1/1
    • Press down the back and push up to remove back cover.

    • Insert finger into gap at the top left and remove battery.

  2. Samsung Propel Screen Replacement, Motherboard: 2 단계, 이미지 1/1
    • Use a flat-head screwdriver to remove the back lid.

  3. Samsung Propel Screen Replacement: 3 단계, 이미지 1/1
    • Locate the six screws and remove them with a Phillips #00 Screwdriver.

    • Insert the flat-head screwdriver into the crevice.

    • Slide and dislodge the snap-ons that are beneath the crevice.

    • Remove the back frame of the device.

  4. Samsung Propel Screen Replacement: 5 단계, 이미지 1/1
    • Locate and remove the six screws with a Phillips #00 Screwdriver.

    • Separate the black middle frame from the front frame.

    • Be careful not to tear the phone bus.

  5. Samsung Propel Screen Replacement: 6 단계, 이미지 1/1
    • Locate and remove the four screws with a Phillips #00 Screwdriver.

    • Insert the flat-head screwdriver into the crevice.

    • Slide the flat-head screwdriver and dislodge the snap-ons beneath the crevice.

    • Be careful not to rip the band.

  6. Samsung Propel Screen Replacement: 8 단계, 이미지 1/1
    • Use your hands to remove both the phone buses from the linkages and remove the motherboard.

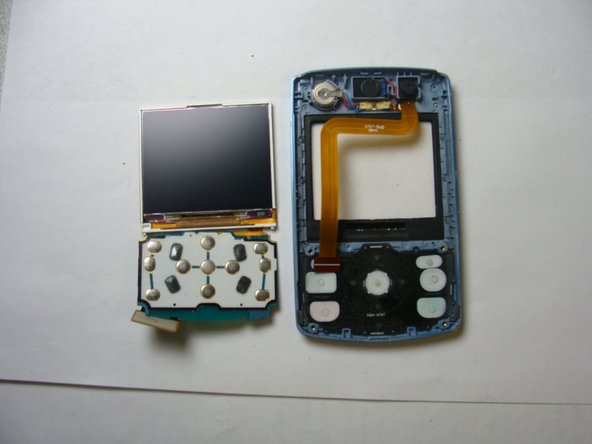
  7. Samsung Propel Screen Replacement, Screen: 9 단계, 이미지 1/2 Samsung Propel Screen Replacement, Screen: 9 단계, 이미지 2/2
    • Flip and pull eletric band from input.

    • Remove the screen from the front frame.

결론

To reassemble your device, follow these instructions in reverse order.

Jin

회원 가입일: 04/28/11

101 평판

안내서 1개 작성함

CSU Los Angeles, Team 1-3, Nelson Spring 2011 CSU Los Angeles, Team 1-3, Nelson Spring 2011 회원

CSULA-NELSON-S11S1G3

4 회원들

안내서 4개 작성하였습니다

댓글 0개

댓글 쓰기

조회 통계:

24 시간 전: 0

7일 전: 0

30일 전: 0

전체 시간: 1,735