주요 콘텐츠로 건너뛰기

Samsung RC512 HDD Replacement

필요한 것

  1. Samsung RC512 HDD Replacement, Battery: 1 단계, 이미지 1/1
    • Place the laptop upside down.

  2. Samsung RC512 HDD Replacement: 2 단계, 이미지 1/2 Samsung RC512 HDD Replacement: 2 단계, 이미지 2/2
    • Locate two notches above the battery.

    • Slide both battery locking notches to either side to remove the battery.

    • Pull the battery out.

  3. Samsung RC512 HDD Replacement, Back Panel: 3 단계, 이미지 1/3 Samsung RC512 HDD Replacement, Back Panel: 3 단계, 이미지 2/3 Samsung RC512 HDD Replacement, Back Panel: 3 단계, 이미지 3/3
    • Using the Phillips #0 screwdriver, unscrew the one 5mm screw.

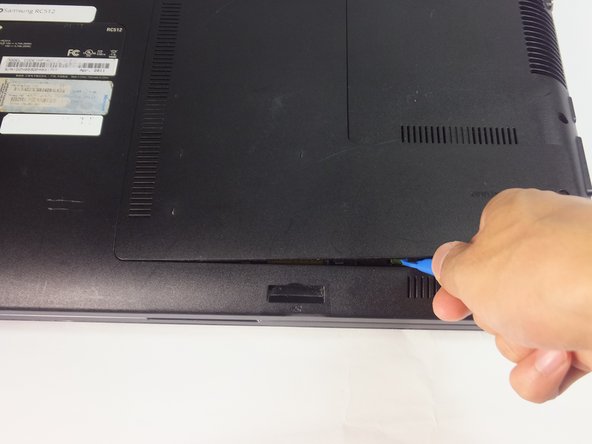
    • Using the blue plastic opening tools, wedge one in between the back panel and the laptop.

    • Carefully remove the back panel..

  4. Samsung RC512 HDD Replacement, HDD: 4 단계, 이미지 1/1
    • Carefully lift the HDD up using plastic opening tool.

  5. Samsung RC512 HDD Replacement: 5 단계, 이미지 1/1
    • Grab the HDD and connector.

    • Carefully pull the HDD away from the connector.

  6. Samsung RC512 HDD Replacement: 6 단계, 이미지 1/1
    • Take out the HDD and leave the connector in the laptop

결론

To reassemble your device, follow these instructions in reverse order.

jando

회원 가입일: 09/15/16

896 평판

안내서 8개 작성하였습니다

USF Tampa, Team 18-2, Blackwell Fall 2016 USF Tampa, Team 18-2, Blackwell Fall 2016 회원

USFT-BLACKWELL-F16S18G2

4 회원들

안내서 8개 작성하였습니다

댓글 0개

댓글 쓰기

조회 통계:

24 시간 전: 0

7일 전: 0

30일 전: 2

전체 시간: 1,001