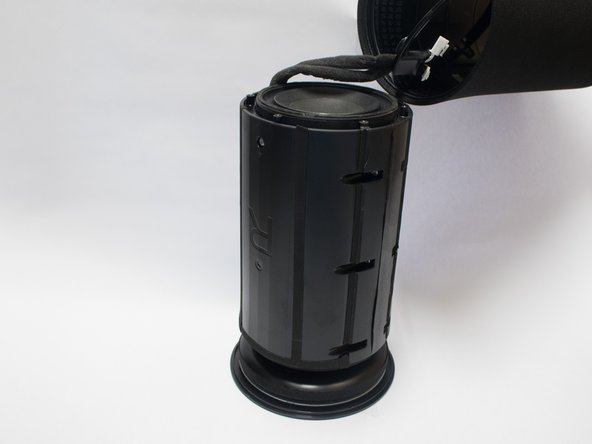
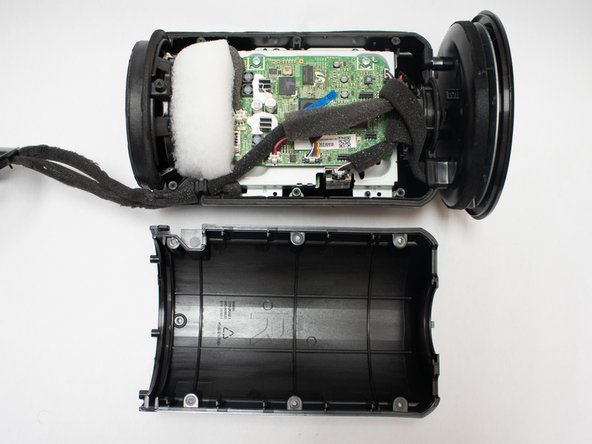
주요 콘텐츠로 건너뛰기

Samsung Radiant360 R3 Motherboard Replacement

필요한 것

  1. Samsung Radiant360 R3 Motherboard Replacement, Wireless Setup Button and USB Module: 1 단계, 이미지 1/3 Samsung Radiant360 R3 Motherboard Replacement, Wireless Setup Button and USB Module: 1 단계, 이미지 2/3 Samsung Radiant360 R3 Motherboard Replacement, Wireless Setup Button and USB Module: 1 단계, 이미지 3/3
    • Flip the device so that the bottom of the device is facing you. Remove these feet with a pair of tweezers.

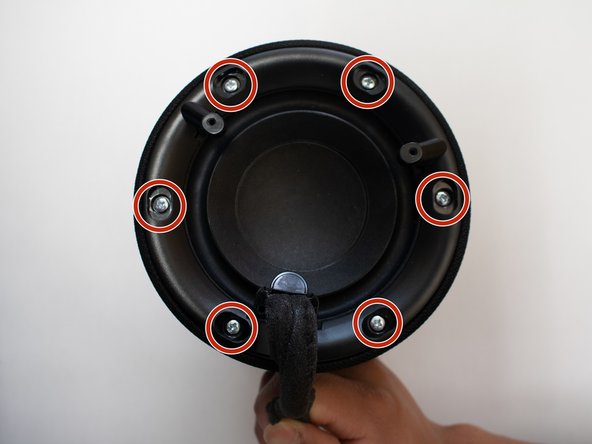
    • Remove the four 10mm long screws with the Phillips #1 screwdriver.

  2. Samsung Radiant360 R3 Motherboard Replacement: 2 단계, 이미지 1/1
    • Remove the bottom shell from the speaker.

  3. Samsung Radiant360 R3 Motherboard Replacement: 3 단계, 이미지 1/2 Samsung Radiant360 R3 Motherboard Replacement: 3 단계, 이미지 2/2
    • Remove the connector from the board by pressing down on the center tab while nudging the connector away with a spudger.

    • Be careful not to pull directly on the wires or apply too much pressure, or you risk breaking the connector.

  4. Samsung Radiant360 R3 Motherboard Replacement: 4 단계, 이미지 1/1
    • Remove the two 10mm long screws from the board utilizing the Phillips #1 screwdriver.

  5. Samsung Radiant360 R3 Motherboard Replacement: 5 단계, 이미지 1/1
    • Use a spudger to press the plastic tab away from the board until the board pops up.

    • Remove the board with the USB module from the device.

  6. Samsung Radiant360 R3 Motherboard Replacement, Wireless Module: 6 단계, 이미지 1/2 Samsung Radiant360 R3 Motherboard Replacement, Wireless Module: 6 단계, 이미지 2/2
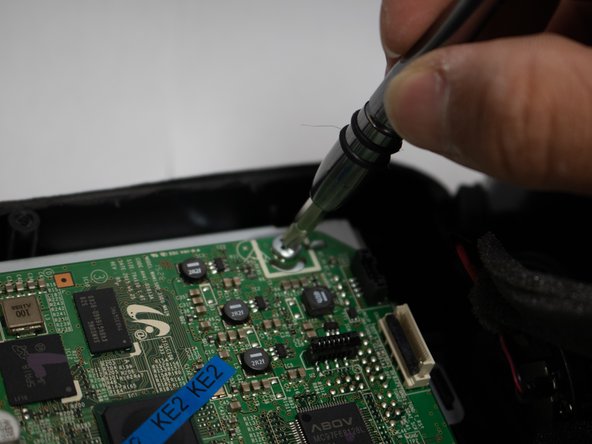
    • Remove the two 12mm long screws with the Phillips #1 screwdriver.

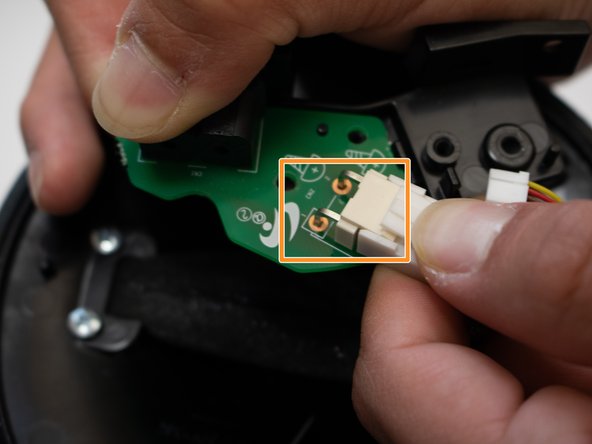
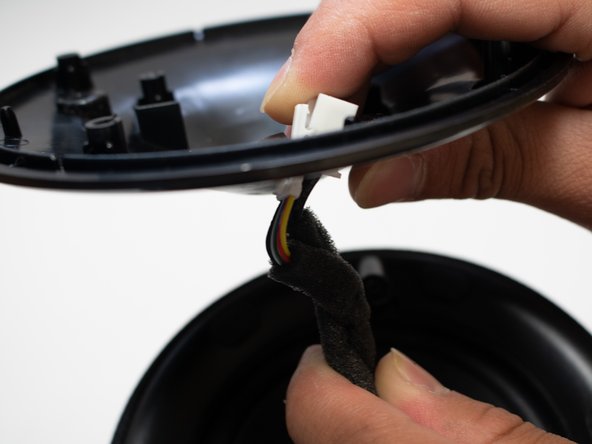
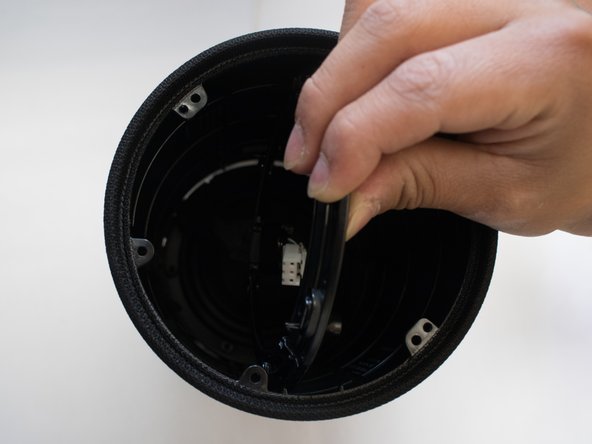
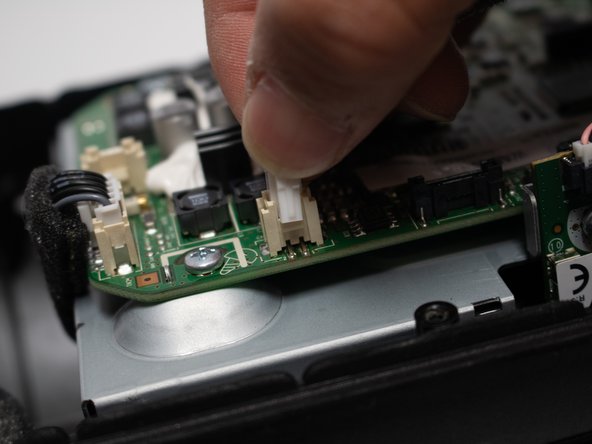
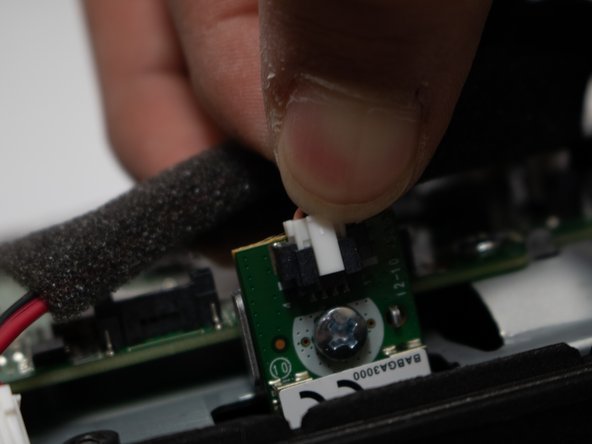
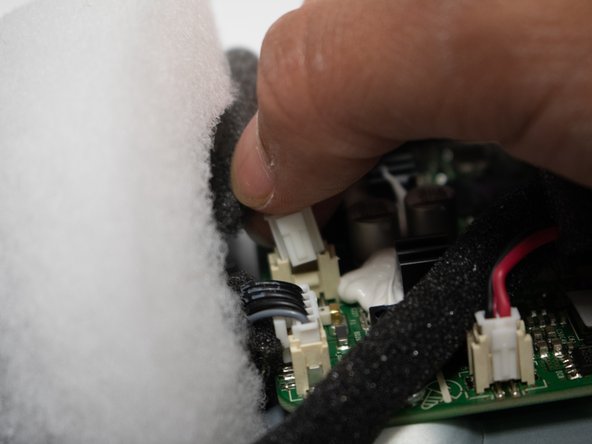
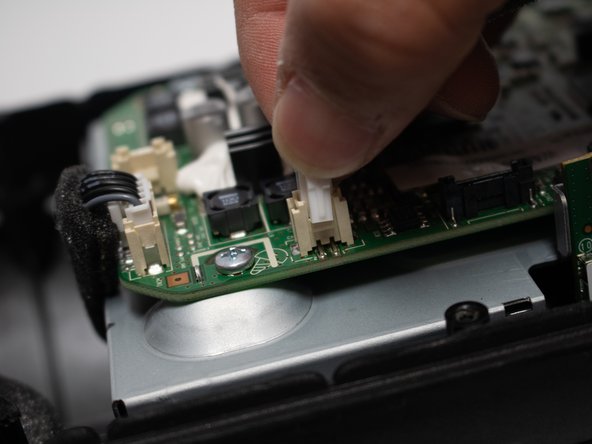
    • Unplug white plug connected to the green circuit board.

  7. Samsung Radiant360 R3 Motherboard Replacement: 7 단계, 이미지 1/2 Samsung Radiant360 R3 Motherboard Replacement: 7 단계, 이미지 2/2
    • Remove the four 12mm long screws with the Phillips #1 screwdriver.

    • Remove the cover, and slide the cord through the hole.

  8. Samsung Radiant360 R3 Motherboard Replacement: 8 단계, 이미지 1/3 Samsung Radiant360 R3 Motherboard Replacement: 8 단계, 이미지 2/3 Samsung Radiant360 R3 Motherboard Replacement: 8 단계, 이미지 3/3
    • Remove rubber covers covering the screws with pair of tweezers.

    • Remove the six 12mm screws that are under the rubber covers with the Phillips #1 screwdriver.

  9. Samsung Radiant360 R3 Motherboard Replacement: 9 단계, 이미지 1/1
    • Remove the unscrewed cover as much as possible.

    • It is very difficult to get plugs at the end of the cord through the cover without breaking, so just slide to the edge.

  10. Samsung Radiant360 R3 Motherboard Replacement: 10 단계, 이미지 1/3 Samsung Radiant360 R3 Motherboard Replacement: 10 단계, 이미지 2/3 Samsung Radiant360 R3 Motherboard Replacement: 10 단계, 이미지 3/3
    • Push the body out through the outer shell of device.

    • Carefully push the ring attached to the cable through the shell.

  11. Samsung Radiant360 R3 Motherboard Replacement: 11 단계, 이미지 1/3 Samsung Radiant360 R3 Motherboard Replacement: 11 단계, 이미지 2/3 Samsung Radiant360 R3 Motherboard Replacement: 11 단계, 이미지 3/3
    • Remove the eight 12mm long screws around the body with the Phillips #1 screwdriver.

  12. Samsung Radiant360 R3 Motherboard Replacement: 12 단계, 이미지 1/2 Samsung Radiant360 R3 Motherboard Replacement: 12 단계, 이미지 2/2
    • Pry the two halves of the body open using a metal spudger.

  13. Samsung Radiant360 R3 Motherboard Replacement: 13 단계, 이미지 1/3 Samsung Radiant360 R3 Motherboard Replacement: 13 단계, 이미지 2/3 Samsung Radiant360 R3 Motherboard Replacement: 13 단계, 이미지 3/3
    • Remove the plugs located topmost right and closest to the bottom in picture.

  14. Samsung Radiant360 R3 Motherboard Replacement: 14 단계, 이미지 1/1
    • Remove the four 12mm long screws with the Phillips #1 screwdriver .

  15. Samsung Radiant360 R3 Motherboard Replacement: 15 단계, 이미지 1/1
    • Unscrew the four 8mm screws on the side of the motherboard with the Phillips #1 screwdriver .

    • Remove the Wireless Module from the device.

  16. Samsung Radiant360 R3 Motherboard Replacement, Subwoofer: 16 단계, 이미지 1/2 Samsung Radiant360 R3 Motherboard Replacement, Subwoofer: 16 단계, 이미지 2/2
    • Disconnect the plug in the device.

  17. Samsung Radiant360 R3 Motherboard Replacement: 17 단계, 이미지 1/1
    • Slide the subwoofer out of the speaker.

  18. Samsung Radiant360 R3 Motherboard Replacement, Motherboard: 18 단계, 이미지 1/2 Samsung Radiant360 R3 Motherboard Replacement, Motherboard: 18 단계, 이미지 2/2
    • Disconnect the six plugs on the motherboard.

  19. Samsung Radiant360 R3 Motherboard Replacement: 19 단계, 이미지 1/1
    • Remove the ZIF cable.

    • Pull up the tab with a spudger, and life the cable.

  20. Samsung Radiant360 R3 Motherboard Replacement: 20 단계, 이미지 1/2 Samsung Radiant360 R3 Motherboard Replacement: 20 단계, 이미지 2/2
    • Remove the four 12mm screws with the Phillips #1 screwdriver .

    • Remove the motherboard from the device.

결론

To reassemble your device, follow these instructions in reverse order.

다른 한 분이 해당 안내서를 완성하였습니다.

Fadi Alzammar

회원 가입일: 04/22/18

782 평판

안내서 5개 작성하였습니다

Cal Poly, Team S25-G18, Maness Spring 2018 Cal Poly, Team S25-G18, Maness Spring 2018 회원

CPSU-MANESS-S18S25G18

4 회원들

안내서 5개 작성하였습니다

댓글 한 개

What kind of DAC is in the motherboard?

Gera Mare - 답글

댓글 쓰기

조회 통계:

24 시간 전: 0

7일 전: 2

30일 전: 4

전체 시간: 409