주요 콘텐츠로 건너뛰기

Samsung SGH-X105 Earpiece Speaker Replacement

필요한 것

  1. Samsung SGH-X105 Earpiece Speaker Replacement, Battery: 1 단계, 이미지 1/1
    • Rotate the phone onto its front side so that the LCD screen is facing away from you.

  2. Samsung SGH-X105 Earpiece Speaker Replacement: 2 단계, 이미지 1/3 Samsung SGH-X105 Earpiece Speaker Replacement: 2 단계, 이미지 2/3 Samsung SGH-X105 Earpiece Speaker Replacement: 2 단계, 이미지 3/3
    • Remove the battery by pressing down on the battery release button while sliding the battery downwards.

  3. Samsung SGH-X105 Earpiece Speaker Replacement, Front & Back Panels: 3 단계, 이미지 1/1
    • Remove the four small black screws that secure the back phone panel using the Phillips #00 screwdriver.

    • Complete removal of screws may not be necessary.

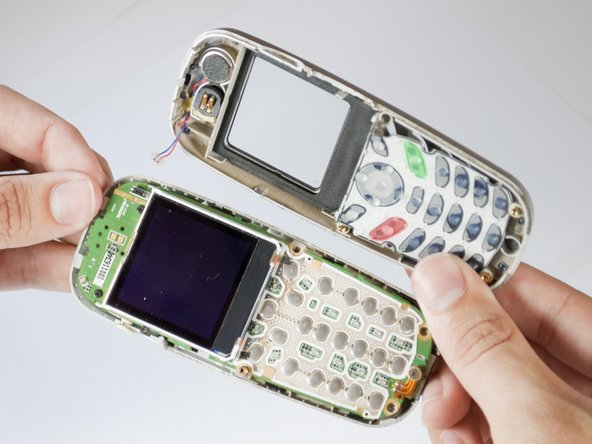
  4. Samsung SGH-X105 Earpiece Speaker Replacement: 4 단계, 이미지 1/3 Samsung SGH-X105 Earpiece Speaker Replacement: 4 단계, 이미지 2/3 Samsung SGH-X105 Earpiece Speaker Replacement: 4 단계, 이미지 3/3
    • Carefully separate the front and back panels by gently prying them apart. Start at the bottom of the phone (near the AC charger input).

    • Volume control button will be unsecured and may fall out as soon as the panels are separated.

    • Gentle force may be required to separate the panels at the top latch.

    • There are two wires connecting the front and back panels. Be careful not to rip these wires out when separating the panels.

  5. Samsung SGH-X105 Earpiece Speaker Replacement: 5 단계, 이미지 1/2 Samsung SGH-X105 Earpiece Speaker Replacement: 5 단계, 이미지 2/2
    • Using your nails, tweezers, or any precise grabbing tool, pinch the antenna wire connector (clear plastic plug) and pull gently. It should pop out rather easily.

  6. Samsung SGH-X105 Earpiece Speaker Replacement, Earpiece Speaker: 6 단계, 이미지 1/1
    • Put aside the back panel. You will only be working with the front panel from here on.

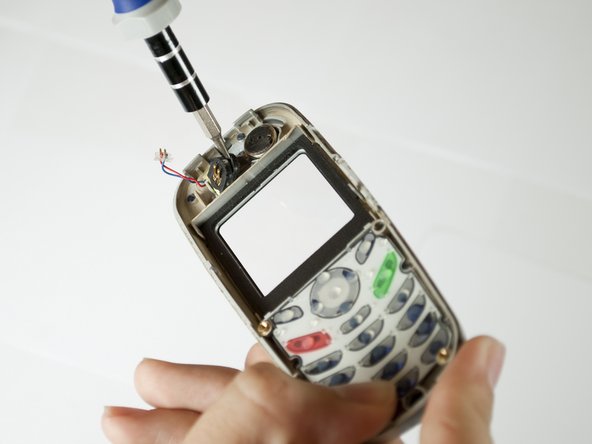
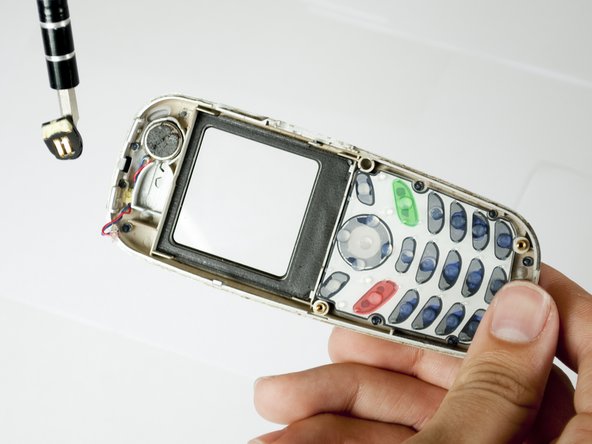
  7. Samsung SGH-X105 Earpiece Speaker Replacement: 7 단계, 이미지 1/3 Samsung SGH-X105 Earpiece Speaker Replacement: 7 단계, 이미지 2/3 Samsung SGH-X105 Earpiece Speaker Replacement: 7 단계, 이미지 3/3
    • Using a SL 1.5 flathead screwdriver (or any small prying tool), pry the speaker from the plastic front cover.

    • The earpiece speaker is magnetic so you can use a magnet to remove the earpiece speaker from the plastic front cover once loosened.

    • You can apply your own adhesive to secure your replaced speaker if desired during reassembly.

결론

To reassemble your device, follow these instructions in reverse order.

다른 한 분이 해당 안내서를 완성하였습니다.

Chris Lao

회원 가입일: 04/15/10

16 평판

안내서 1개 작성함

Cal Poly, Team 28-29, Regan Spring 2010 Cal Poly, Team 28-29, Regan Spring 2010 회원

CPSU-REGAN-S10S28G29

4 회원들

안내서 12개 작성하였습니다

댓글 한 개

Where can I get a replacement speaker?

NickyPhils - 답글

댓글 쓰기

조회 통계:

24 시간 전: 0

7일 전: 1

30일 전: 1

전체 시간: 1,940