이 버전에는 잘못된 편집 사항이 있을 수 있습니다. 최신 확인된 스냅샷으로 전환하십시오.
필요한 것
-
이 단계는 번역되지 않았습니다. 번역을 도와주십시오
-
First, remove the 2 silver stickers (as indicated by the circles) with a a safety or push pin to reveal 2 screws.
-
-
이 단계는 번역되지 않았습니다. 번역을 도와주십시오
-
Remove the 2 (5.6 mm) philips head screws with your safety or push pin.
-
-
-
이 단계는 번역되지 않았습니다. 번역을 도와주십시오
-
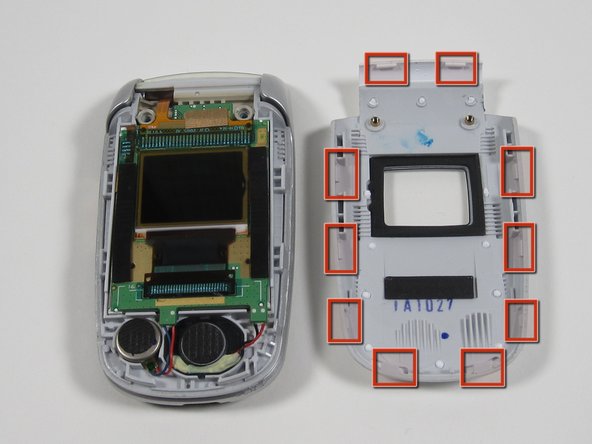
As shown above, with a plastic pry tool, begin working at the top corner and down each side. The face plate has 10 tabs that hook into the phone's body.
-
Before removing the 2 tabs on the bottom, the 3 tabs on either side must be free first.
-
Note: The bottom 2 are the most challenging to remove.
-
Note: When reassembling start with the bottom two tabs.
-
-
이 단계는 번역되지 않았습니다. 번역을 도와주십시오
-
Continue down each side toward the bottom with your pry tool.
-
Note: It may help to use multiple pry tools to help hold it open.
-
Second photo: location of the tabs.
-
-
이 단계는 번역되지 않았습니다. 번역을 도와주십시오
-
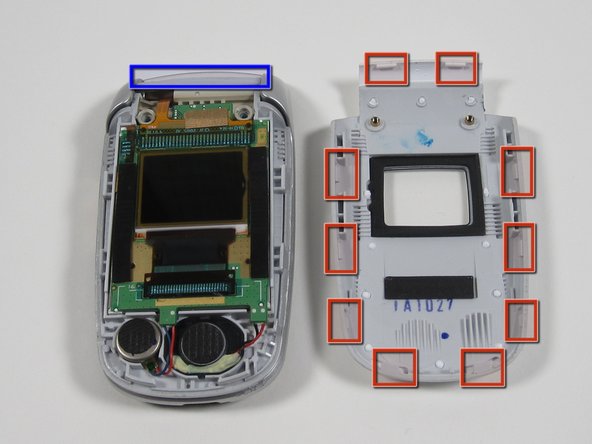
With 8 tabs released, the face plate is nearly free.
-
With the phone in your left hand, gently wiggle the face plate from side to side and push the face place upward.
-
Note: A strip of double sided tape holds the faceplate, so expect some resistance
-


팀

Cal Poly, Team 3-40, Regan Winter 2011 Cal Poly, Team 3-40, Regan Winter 2011 회원
CPSU-REGAN-W11S3G40
4 회원들
안내서 20개 작성하였습니다