이 버전에는 잘못된 편집 사항이 있을 수 있습니다. 최신 확인된 스냅샷으로 전환하십시오.
필요한 것
-
-
이 단계는 번역되지 않았습니다. 번역을 도와주십시오
-
Begin by inserting the pry tool near the charger jack.
-
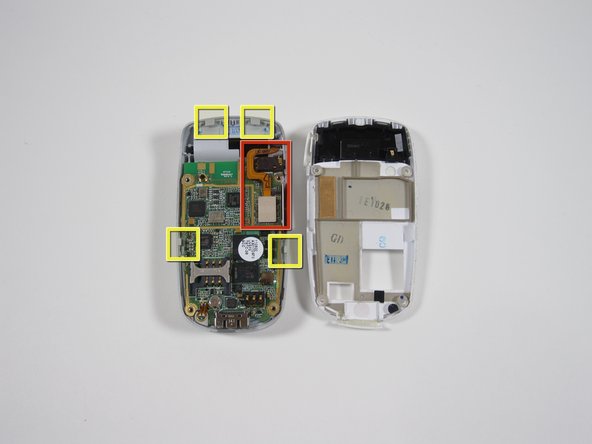
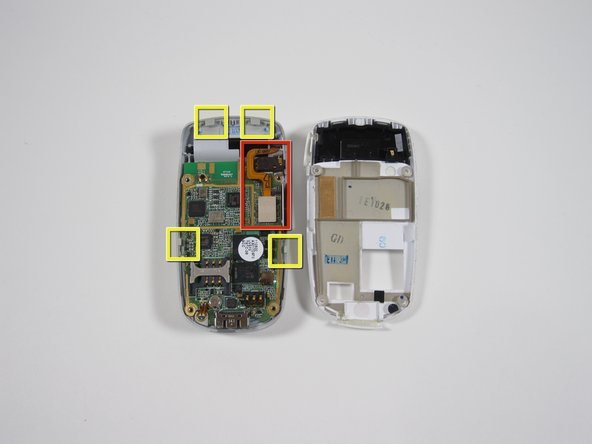
There are 4 tabs to release.
-
Start at the bottom and slide the tool up, lifting the silver front of the phone away from the white backing.
-
Loosen the 2 side tabs before moving on to the top two.
-
See the second photo to see location of the tabs.
-
Be careful of the ribbon wires shown in second photo.
-
-
이 단계는 번역되지 않았습니다. 번역을 도와주십시오
-
Once the two side tabs are free; gently pry the white backing down to release the top two tabs.
-
Hold the phone with the left hand as shown
-
Wiggle the white backplate from side to side while pulling down with the right hand.
-
Be careful of the ribbon wires shown in second photo.
-
-
이 단계는 번역되지 않았습니다. 번역을 도와주십시오
-
2 tabs hold the motherboard in place.
-
Release the labeled tabs with the pry tool from the location shown.
-


팀

Cal Poly, Team 3-40, Regan Winter 2011 Cal Poly, Team 3-40, Regan Winter 2011 회원
CPSU-REGAN-W11S3G40
4 회원들
안내서 20개 작성하였습니다