주요 콘텐츠로 건너뛰기

Samsung SPH-M360 Logic Board Replacement

필요한 것

  1. Samsung SPH-M360 Logic Board Replacement, Battery: 1 단계, 이미지 1/3 Samsung SPH-M360 Logic Board Replacement, Battery: 1 단계, 이미지 2/3 Samsung SPH-M360 Logic Board Replacement, Battery: 1 단계, 이미지 3/3
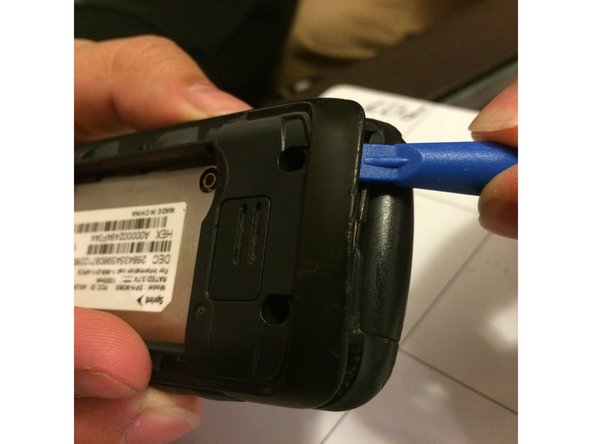
    • Locate the arrow on the panel of the rear side of the phone.

    • Use one or two fingers to apply light pressure downwards on the rear panel and push or pull in the direction of the arrow.

  2. Samsung SPH-M360 Logic Board Replacement: 2 단계, 이미지 1/3 Samsung SPH-M360 Logic Board Replacement: 2 단계, 이미지 2/3 Samsung SPH-M360 Logic Board Replacement: 2 단계, 이미지 3/3
    • Place finger inside the small semi-spherical slot near the top of the battery.

    • Lightly pull the battery away from the phone. This should not require much effort.

  3. Samsung SPH-M360 Logic Board Replacement, Casing: 3 단계, 이미지 1/1
    • Remove the four screws on the corners of the casing.

    • The volume and camera buttons may fall out

  4. Samsung SPH-M360 Logic Board Replacement: 4 단계, 이미지 1/2 Samsung SPH-M360 Logic Board Replacement: 4 단계, 이미지 2/2
    • Starting near the top of the casing, use the plastic opening tool to gently pry the casing open.

    • The case should require some effort to pry open, but do not use excessive force for risk of breaking the rear panel.

    • Slowly work the plastic opening tool around the edge of the casing, gently prying it around at all sides.

  5. Samsung SPH-M360 Logic Board Replacement: 5 단계, 이미지 1/2 Samsung SPH-M360 Logic Board Replacement: 5 단계, 이미지 2/2
    • Once the casing has been fully pried off of the phone, it should be easily removed by hand.

    • The buttons for the camera and volume may fall out while removing the casing. Be careful not to lose the small pieces.

  6. Samsung SPH-M360 Logic Board Replacement, Logic Board: 6 단계, 이미지 1/1
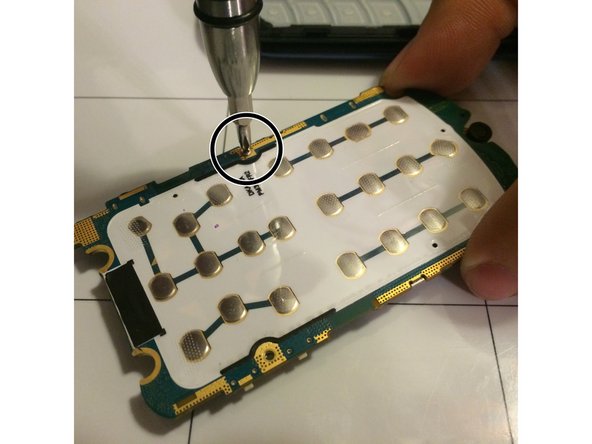
    • Use the plastic opening tool to gently detach the golden strip from the logic board.

    • The strip should detach easily with little force required.

  7. Samsung SPH-M360 Logic Board Replacement: 7 단계, 이미지 1/1
    • Use the plastic opening tool to pry the logic board out of the phone case from the bottom area of the phone.

  8. Samsung SPH-M360 Logic Board Replacement: 8 단계, 이미지 1/2 Samsung SPH-M360 Logic Board Replacement: 8 단계, 이미지 2/2
    • Flip the logic board over and locate the three screws along the edges.

    • Carefully unscrew the three screws to remove the panel covering the logic board.

    • Be careful with the screws after unscrewing them because they are small and easy to lose.

  9. Samsung SPH-M360 Logic Board Replacement: 9 단계, 이미지 1/2 Samsung SPH-M360 Logic Board Replacement: 9 단계, 이미지 2/2
    • Flip the logic board back over and use the plastic opening tool to remove the metal cover on the logic board.

    • This will not require much force, so be gentle.

결론

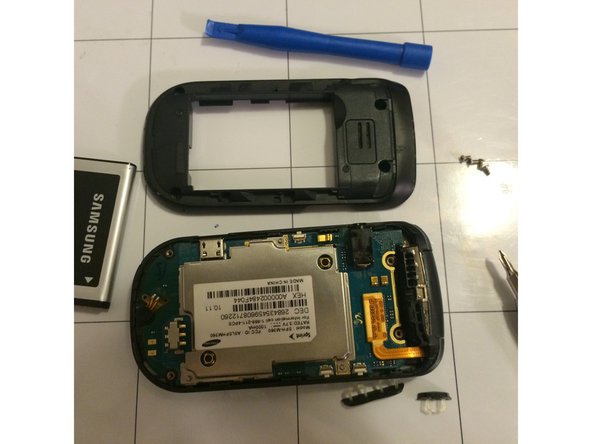
To reassemble your device, follow these instructions in reverse order.

다른 한 분이 해당 안내서를 완성하였습니다.

Ashraf Nasser

회원 가입일: 10/22/15

126 평판

안내서 1개 작성함

University of Memphis, Team 3-5, Kim Fall 2015 University of Memphis, Team 3-5, Kim Fall 2015 회원

UM-KIM-F15S3G5

4 회원들

안내서 10개 작성하였습니다

댓글 0개

댓글 쓰기

조회 통계:

24 시간 전: 0

7일 전: 1

30일 전: 4

전체 시간: 201