소개
This guide will show how to fix a broken screen on the Samsung Series 5 Ultrabook. This can be difficult, and care should be used not to injure one's self on the old screen and not to break the new screen.
필요한 것
-
-
Using a sharp object, pry the screen away from the back cover. Make sure to pry over the rubber rather than underneath as this can cause screws to break out.
-
-
-
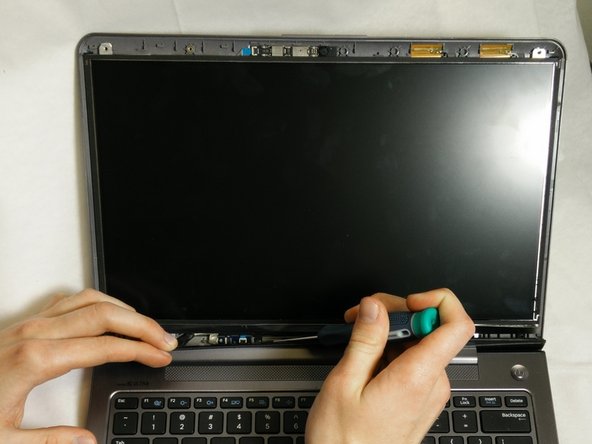
There is a small, skinny wire leading from the bottom of the touchscreen to the joint of the laptop. Remove carefully with tweezers.
-
-
-
-
Remove the frame by unscrewing the two 3.7 mm screws at the top.
-
-
-
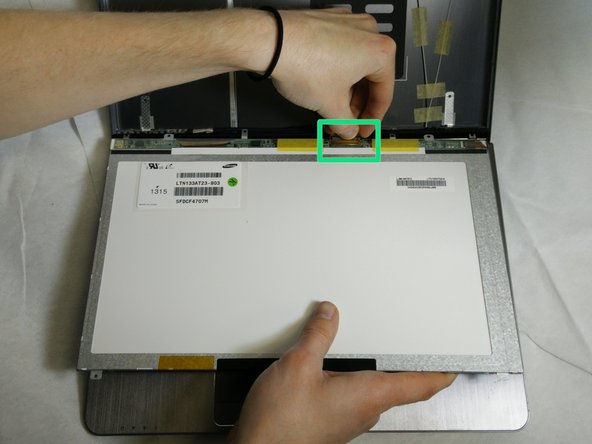
Pull the screen down and remove the tape over the video connection.
-
Remove the video cables from the screen. This is easiest with tweezers.
-


To reassemble your device, follow these instructions in reverse order.
To reassemble your device, follow these instructions in reverse order.
다른 8명이 해당 안내서를 완성하였습니다.
팀

USF Tampa, Team 16-3, Watkins Winter 2015 USF Tampa, Team 16-3, Watkins Winter 2015 회원
USFT-WATKINS-W15S16G3
4 회원들
안내서 5개 작성하였습니다
댓글 3개
In order to access the screens 2 lower screws, using a plastic tool unclip the plastic hinge at its join.There are a few further clips at the far edges. The plastic cover can now be removed and will reveal the lcd and touchscreen connectors. This is best done BEFORE attempting to loosen the touchscreen. The top screen frame does not have to be removed in order to remove the lcd.
Guide proved useful when I needed to change the lcd cable due to hinge abrasion damage.
Is it possible to remove the plastic hinge to access the lcd connectors without taking the lcd screen off? I have an issue with intermittant screen graphics and think its a connector problem but can;t get to it
Hi
What do I need to do in order to connect the new touch screen? Is there an adhesive material behind?
ziflingus - 답글