주요 콘텐츠로 건너뛰기

Samsung Solstice Rear Facing Camera Replacement

필요한 것

  1. Samsung Solstice Rear Facing Camera Replacement, Removing the back cover: 1 단계, 이미지 1/3 Samsung Solstice Rear Facing Camera Replacement, Removing the back cover: 1 단계, 이미지 2/3 Samsung Solstice Rear Facing Camera Replacement, Removing the back cover: 1 단계, 이미지 3/3
    • Gently slide the cover off of the phone by pushing it upwards, in the direction of the small arrow on the back cover.

    • Set the cover off to the side once you have removed it.

  2. Samsung Solstice Rear Facing Camera Replacement, Removing the battery: 2 단계, 이미지 1/3 Samsung Solstice Rear Facing Camera Replacement, Removing the battery: 2 단계, 이미지 2/3 Samsung Solstice Rear Facing Camera Replacement, Removing the battery: 2 단계, 이미지 3/3
    • This step can be accomplished without the need of a plastic opening tool. Just use your finger if you want to.

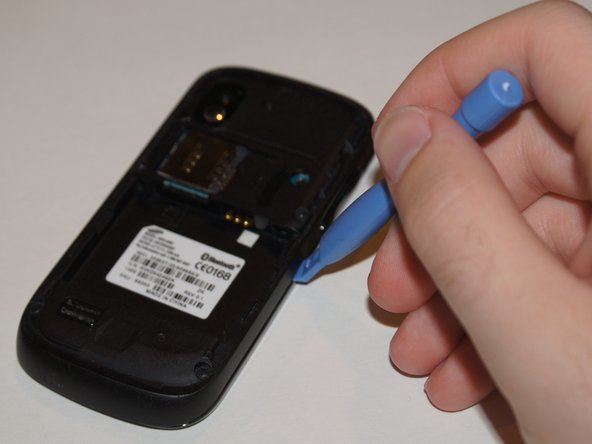
    • Wedge a plastic opening tool in between the rear end of the battery and the plastic frame.

    • Pry the battery up out of its recess and away from the phone.

  3. Samsung Solstice Rear Facing Camera Replacement, Remove the back cover: 3 단계, 이미지 1/2 Samsung Solstice Rear Facing Camera Replacement, Remove the back cover: 3 단계, 이미지 2/2
    • Remove the back cover by sliding the cover off of the phone by pushing it upwards, in the direction of the small arrow on the back cover.

    • Set the cover off to the side once you have removed it.

  4. Samsung Solstice Rear Facing Camera Replacement, Removing existing SIM Card: 4 단계, 이미지 1/3 Samsung Solstice Rear Facing Camera Replacement, Removing existing SIM Card: 4 단계, 이미지 2/3 Samsung Solstice Rear Facing Camera Replacement, Removing existing SIM Card: 4 단계, 이미지 3/3
    • Locate the SIM Card slot directly above the battery and below the phone camera

    • Place your thumb on the SIM Card in the slot, press down gently and slide the card away from the slot, until it comes out of the slot entirely

  5. Samsung Solstice Rear Facing Camera Replacement, Set SIM Card aside: 5 단계, 이미지 1/1
    • Once you have removed the SIM card, set it aside from the phone.

  6. Samsung Solstice Rear Facing Camera Replacement, Removing the plastic mid-frame: 6 단계, 이미지 1/3 Samsung Solstice Rear Facing Camera Replacement, Removing the plastic mid-frame: 6 단계, 이미지 2/3 Samsung Solstice Rear Facing Camera Replacement, Removing the plastic mid-frame: 6 단계, 이미지 3/3
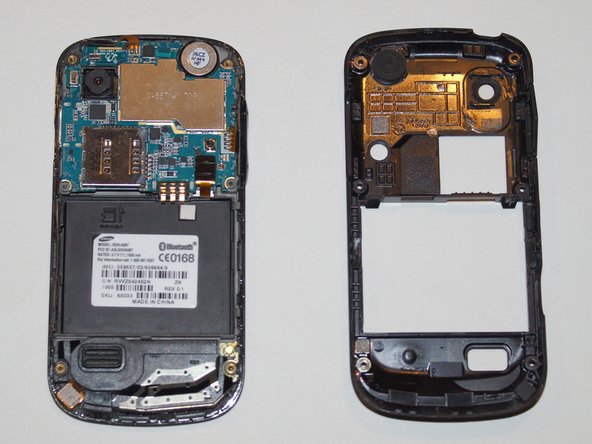
    • Remove the six 0.4mm Phillips screws securing the midframe to the front panel assembly.

    • Grasp the the plastic midframe with your thumb and forefinger and lift it away from the phone.

  7. Samsung Solstice Rear Facing Camera Replacement, Motherboard Assembly: 7 단계, 이미지 1/2 Samsung Solstice Rear Facing Camera Replacement, Motherboard Assembly: 7 단계, 이미지 2/2
    • This step can be accomplished without the need of a plastic opening tool. Just use your finger if you want to.

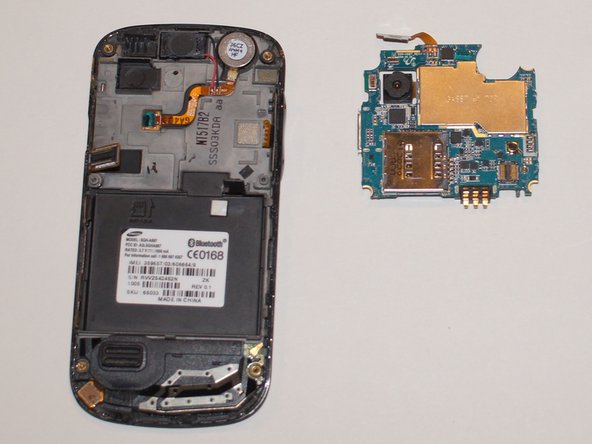
    • Use a plastic opening tool to pry the connectors from their sockets on the motherboard.

    • Gently remove the motherboard from the phone

    • Set the motherboard aside once it is free and separated from the phone

  8. Samsung Solstice Rear Facing Camera Replacement: 8 단계, 이미지 1/2 Samsung Solstice Rear Facing Camera Replacement: 8 단계, 이미지 2/2
    • This step can be accomplished without the need of a plastic opening tool. Just use your finger if you want to.

    • Use a plastic opening tool to carefully pry the camera connector from its socket on the motherboard.

결론

To reassemble your device, follow these instructions in reverse order.

Colton Glyder

회원 가입일: 09/05/14

301 평판

안내서 3개 작성하였습니다

USF Sarasota-Manatee, Team 1-2, Stewart Fall 2014 USF Sarasota-Manatee, Team 1-2, Stewart Fall 2014 회원

USFSM-STEWART-F14S1G2

3 회원들

안내서 17개 작성하였습니다

댓글 0개

댓글 쓰기

조회 통계:

24 시간 전: 1

7일 전: 7

30일 전: 10

전체 시간: 169