주요 콘텐츠로 건너뛰기

Samsung UBD-K8500 Circuit Board Replacement

필요한 것

  1. Samsung UBD-K8500 Circuit Board Replacement, Top Panel: 1 단계, 이미지 1/2 Samsung UBD-K8500 Circuit Board Replacement, Top Panel: 1 단계, 이미지 2/2
    • Remove the six 10 mm screws from the back of the unit using a Phillips #0 screwdriver.

  2. Samsung UBD-K8500 Circuit Board Replacement: 2 단계, 이미지 1/2 Samsung UBD-K8500 Circuit Board Replacement: 2 단계, 이미지 2/2
    • Carefully lift up the top panel.

    • There is a cables that must be disconnected before completely removing the panel.

    • Detach the cable connecting the top panel to the motherboard.

    • Take the top off and set it to the side.

  3. Samsung UBD-K8500 Circuit Board Replacement, Circuit Board: 3 단계, 이미지 1/1
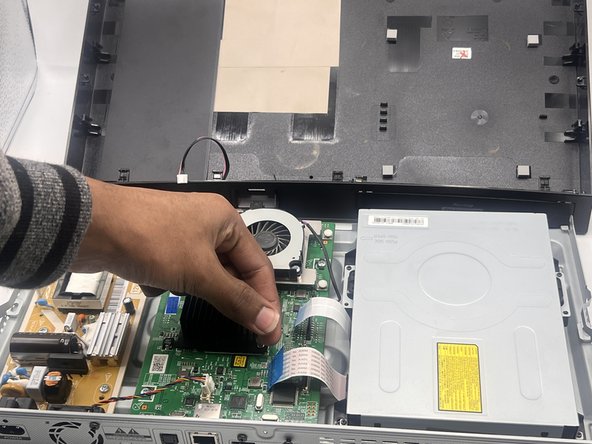
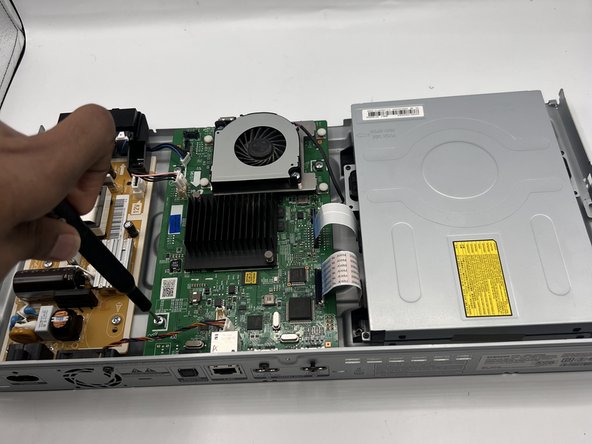
    • Using your fingers, carefully pinch the clipping part of the four connectors and gently pull them out of their sockets.

  4. Samsung UBD-K8500 Circuit Board Replacement: 4 단계, 이미지 1/2 Samsung UBD-K8500 Circuit Board Replacement: 4 단계, 이미지 2/2
    • Gently pull out the two blue tabs of the ribbon connectors.

  5. Samsung UBD-K8500 Circuit Board Replacement: 5 단계, 이미지 1/2 Samsung UBD-K8500 Circuit Board Replacement: 5 단계, 이미지 2/2
    • Remove the three 7 mm screws from the circuit board using a Phillips #0 screwdriver.

  6. Samsung UBD-K8500 Circuit Board Replacement: 6 단계, 이미지 1/2 Samsung UBD-K8500 Circuit Board Replacement: 6 단계, 이미지 2/2
    • Gently pull out the circuit board.

결론

To reassemble your device, follow these instructions in reverse order.

다른 한 분이 해당 안내서를 완성하였습니다.

Syeda Zainab

회원 가입일: 09/12/23

264 평판

안내서 2개 작성하였습니다

University of North Texas, Team 2-7, Harold Fall 2023 University of North Texas, Team 2-7, Harold Fall 2023 회원

UNT-HAROLD-F23S2G7

4 회원들

안내서 5개 작성하였습니다

댓글 0개

댓글 쓰기

조회 통계:

24 시간 전: 0

7일 전: 0

30일 전: 6

전체 시간: 112