주요 콘텐츠로 건너뛰기

Samsung Watch Active Motherboard Replacement

필요한 것

  1. Samsung Watch Active Motherboard Replacement, Turn off the watch: 1 단계, 이미지 1/2 Samsung Watch Active Motherboard Replacement, Turn off the watch: 1 단계, 이미지 2/2
    • Turn off the Galaxy Watch Active by pushing and holding the bottom button for approximately 3 seconds. You should feel a short vibration.

    • When the "Power off" symbol appears tap the center of the screen to make it shut down. You should feel a longer vibration for confirmation.

  2. Samsung Watch Active Motherboard Replacement, Remove the rear screws: 2 단계, 이미지 1/1
    • Use a Tri-point Y00 screwdriver to remove the four 4 mm-long screws on the back of the watch.

  3. Samsung Watch Active Motherboard Replacement, Separate the back cover from the housing: 3 단계, 이미지 1/3 Samsung Watch Active Motherboard Replacement, Separate the back cover from the housing: 3 단계, 이미지 2/3 Samsung Watch Active Motherboard Replacement, Separate the back cover from the housing: 3 단계, 이미지 3/3
    • Use an opening tool and place it between the plastic back cover and the metal housing near the buttons.

    • Push the tip of the opening tool into the gap to separate the back cover from the housing.

    • Don’t remove the back cover all the way yet. There is a cable connecting it to the motherboard.

  4. Samsung Watch Active Motherboard Replacement, Disconnect the sensor array: 4 단계, 이미지 1/2 Samsung Watch Active Motherboard Replacement, Disconnect the sensor array: 4 단계, 이미지 2/2
    • Carefully lift the back cover approximately 2 cm to access the sensor array connector near the two buttons.

    • Use a spudger to disconnect the sensor array from the motherboard.

  5. Samsung Watch Active Motherboard Replacement, Remove the back cover: 5 단계, 이미지 1/1
    • Remove the back cover.

  6. Samsung Watch Active Motherboard Replacement, Disconnect the motherboard: 6 단계, 이미지 1/3 Samsung Watch Active Motherboard Replacement, Disconnect the motherboard: 6 단계, 이미지 2/3 Samsung Watch Active Motherboard Replacement, Disconnect the motherboard: 6 단계, 이미지 3/3
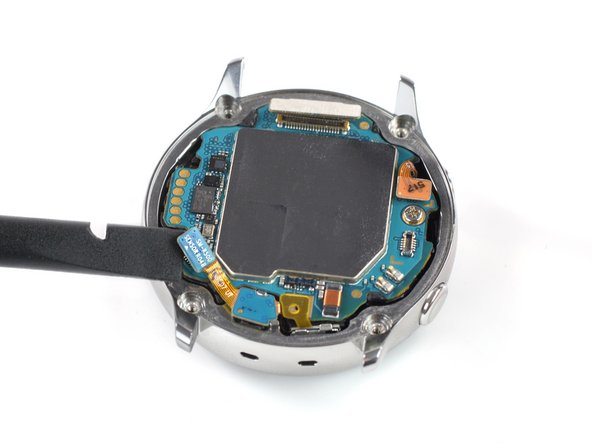
    • Use the flat end of a spudger to disconnect the display assembly, the microphone and pressure sensor array, and side button.

  7. Samsung Watch Active Motherboard Replacement, Undo the mic tape: 7 단계, 이미지 1/3 Samsung Watch Active Motherboard Replacement, Undo the mic tape: 7 단계, 이미지 2/3 Samsung Watch Active Motherboard Replacement, Undo the mic tape: 7 단계, 이미지 3/3
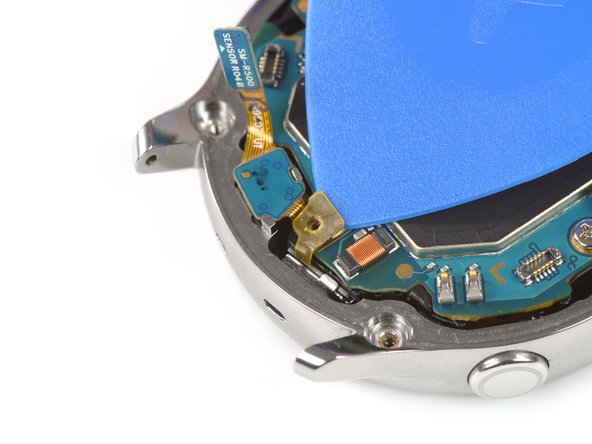
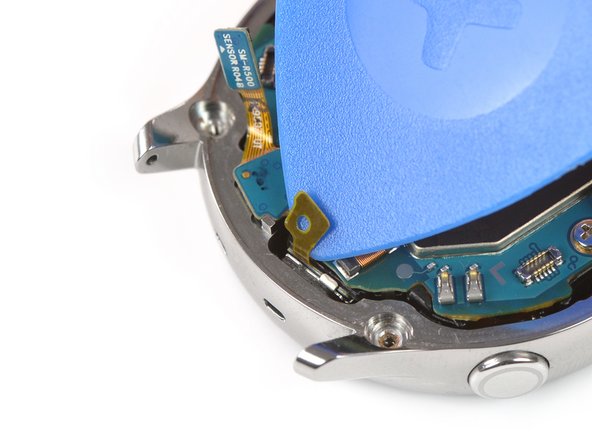
    • Use an opening pick to peel back the thin tape belonging to the microphone array.

    • When re-assembling make sure this tape properly sticks to the motherboard by pressing it down with the flat end of a spudger.

  8. Samsung Watch Active Motherboard Replacement, Remove the motherboard screw: 8 단계, 이미지 1/1
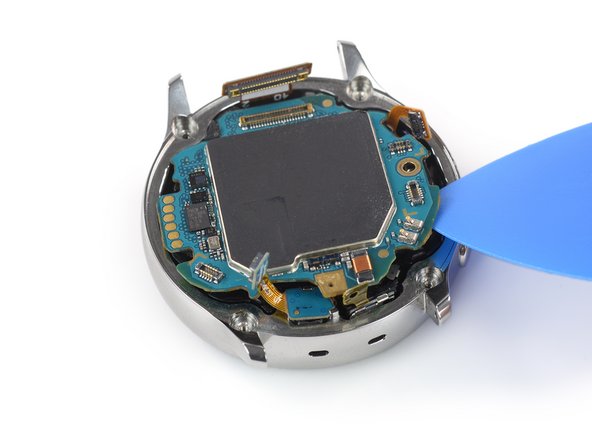
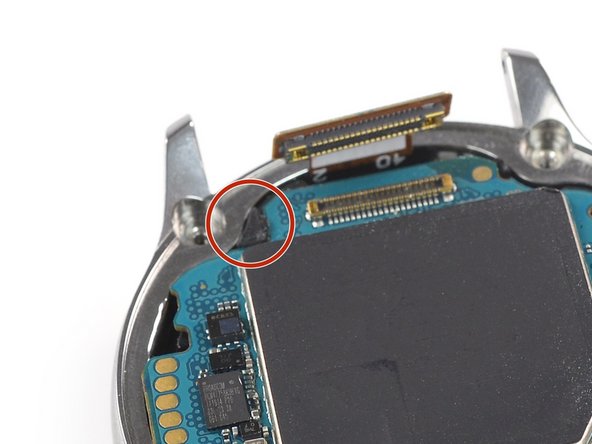
    • Use a Phillips screwdriver to remove the 4.4 mm-long screw holding the motherboard in place.

  9. Samsung Watch Active Motherboard Replacement, Loosen the motherboard: 9 단계, 이미지 1/3 Samsung Watch Active Motherboard Replacement, Loosen the motherboard: 9 단계, 이미지 2/3 Samsung Watch Active Motherboard Replacement, Loosen the motherboard: 9 단계, 이미지 3/3
    • Use an opening pick to loosen the motherboard from the core assembly.

    • The plastic tab holding the motherboard in place is fragile, so don't lift the motherboard up until it has cleared the tab.

  10. Samsung Watch Active Motherboard Replacement, Remove the motherboard: 10 단계, 이미지 1/3 Samsung Watch Active Motherboard Replacement, Remove the motherboard: 10 단계, 이미지 2/3 Samsung Watch Active Motherboard Replacement, Remove the motherboard: 10 단계, 이미지 3/3
    • Slide the motherboard out from under the plastic tab to remove it.

결론

Compare your new replacement part to the original part—you may need to transfer remaining components or remove adhesive backings from the new part before installing.

To reassemble your device, follow these instructions in reverse order.

Take your e-waste to an R2 or e-Stewards certified recycler.

Repair didn’t go as planned? Try some basic troubleshooting, or ask our Answers community for help.

다른 3명이 해당 안내서를 완성하였습니다.

Tobias Isakeit

회원 가입일: 03/31/14

117,598 평판

안내서 188개 작성하였습니다

Master Techs Master Techs 회원

Community

322 회원들

안내서 2,535개 작성하였습니다

댓글 한 개

Sir can you help ME with power switch lines

Tupper Mendoza - 답글

댓글 쓰기

조회 통계:

24 시간 전: 1

7일 전: 5

30일 전: 38

전체 시간: 2,210