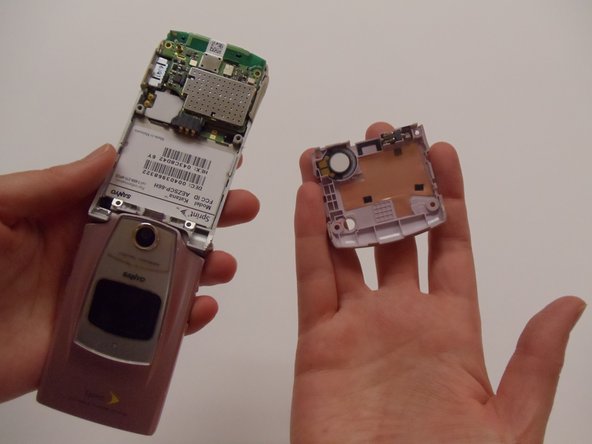
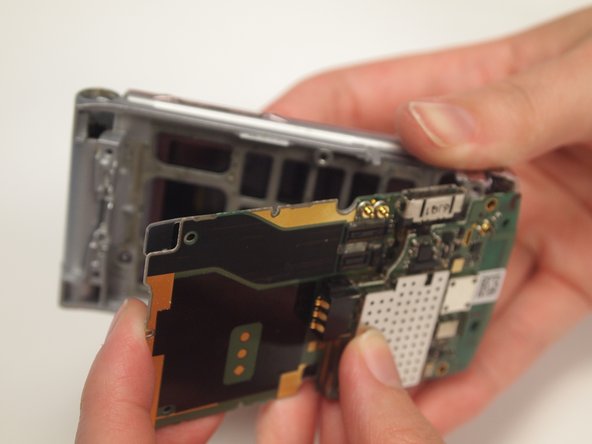
주요 콘텐츠로 건너뛰기

Sanyo Katana Keypad Replacement

필요한 것

  1. Sanyo Katana Keypad Replacement, Battery: 1 단계, 이미지 1/3 Sanyo Katana Keypad Replacement, Battery: 1 단계, 이미지 2/3 Sanyo Katana Keypad Replacement, Battery: 1 단계, 이미지 3/3
    • Place thumb on the tab located at the back of the phone and slide button towards your hand and away from phone.

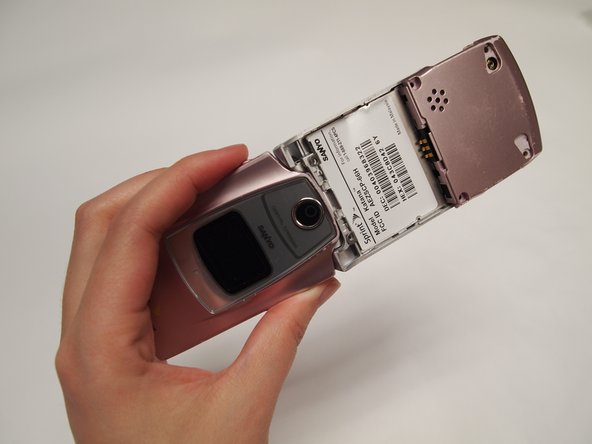
    • While holding down the button, pull cover off with other hand.

  2. Sanyo Katana Keypad Replacement: 2 단계, 이미지 1/3 Sanyo Katana Keypad Replacement: 2 단계, 이미지 2/3 Sanyo Katana Keypad Replacement: 2 단계, 이미지 3/3
    • Use fingers to grip the battery and remove it from the phone.

  3. Sanyo Katana Keypad Replacement, Back Casing: 3 단계, 이미지 1/1
    • Using a spudger, remove the four rubber coverings on the lower back plate.

  4. Sanyo Katana Keypad Replacement: 4 단계, 이미지 1/3 Sanyo Katana Keypad Replacement: 4 단계, 이미지 2/3 Sanyo Katana Keypad Replacement: 4 단계, 이미지 3/3
    • Using a Tri-wing Y0 screwdriver, remove the four 4.4mm screws securing the back plate.

  5. Sanyo Katana Keypad Replacement: 5 단계, 이미지 1/3 Sanyo Katana Keypad Replacement: 5 단계, 이미지 2/3 Sanyo Katana Keypad Replacement: 5 단계, 이미지 3/3
    • Remove the lower back cover to reveal part of the motherboard and the circular speaker housed in the back cover plate.

  6. Sanyo Katana Keypad Replacement, Motherboard: 6 단계, 이미지 1/2 Sanyo Katana Keypad Replacement, Motherboard: 6 단계, 이미지 2/2
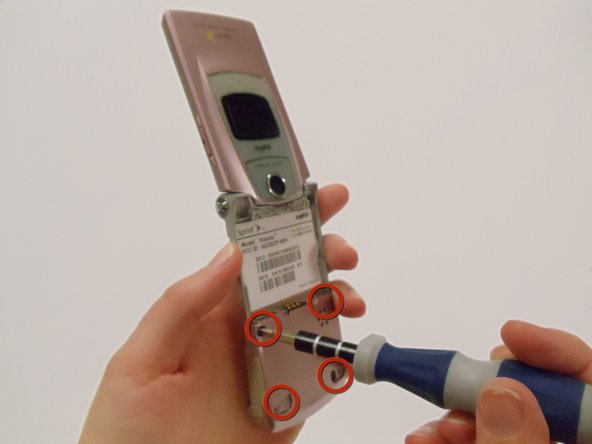
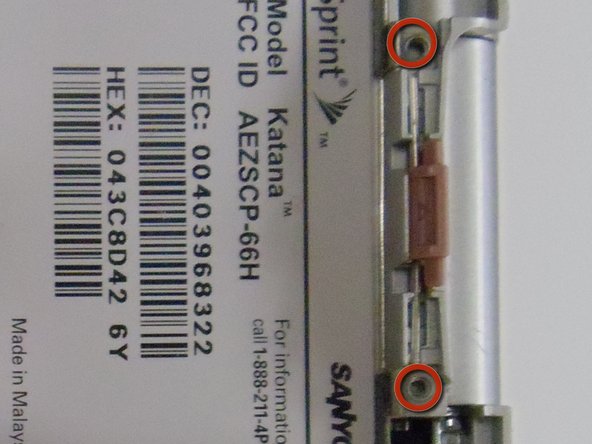
    • Unscrew the 4.4mm screws at the top of the phone with the Tri-wing Y0 Screwdriver.

  7. Sanyo Katana Keypad Replacement: 7 단계, 이미지 1/3 Sanyo Katana Keypad Replacement: 7 단계, 이미지 2/3 Sanyo Katana Keypad Replacement: 7 단계, 이미지 3/3
    • For the following steps, the phone is shown closed to make manipulating the parts easier.

    • Using a spudger, remove the thin aluminum plate to access the upper motherboard.

    • This will most likely be difficult to pry off and will take a considerable amount of force. Stay clear of the piece to avoid injury when it comes free of the device.

  8. Sanyo Katana Keypad Replacement: 8 단계, 이미지 1/1
    • Use the flat end of the spudger to remove two ribbon cables from the back of the motherboard.

  9. Sanyo Katana Keypad Replacement: 9 단계, 이미지 1/3 Sanyo Katana Keypad Replacement: 9 단계, 이미지 2/3 Sanyo Katana Keypad Replacement: 9 단계, 이미지 3/3
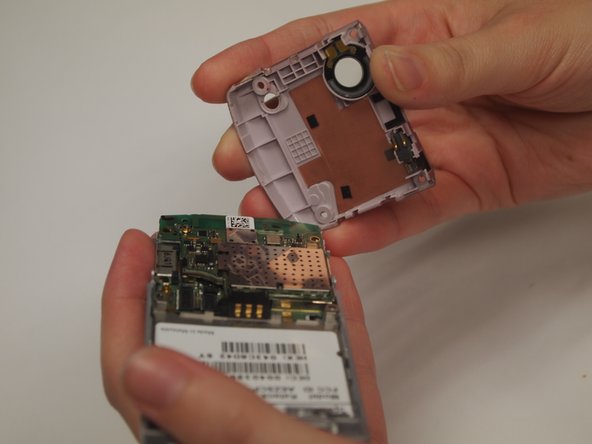
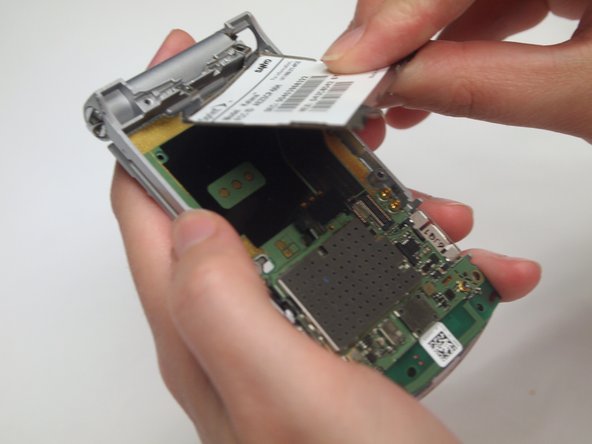
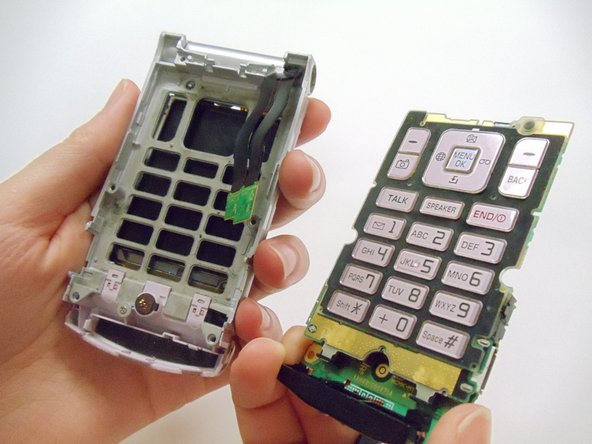
    • Open the phone and firmly hold the phone casing with one hand and push the motherboard out of the case with the other by pushing on the keys.

    • Once the keys are free from the casing, close the phone and pull the motherboard from the back of the phone the remainder of the way with your fingers.

  10. Sanyo Katana Keypad Replacement, Keypad: 10 단계, 이미지 1/2 Sanyo Katana Keypad Replacement, Keypad: 10 단계, 이미지 2/2
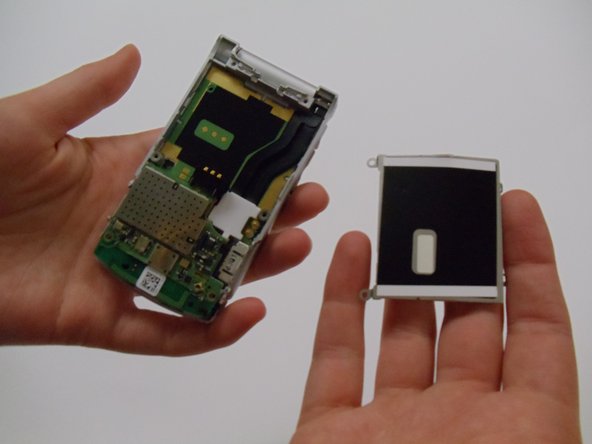
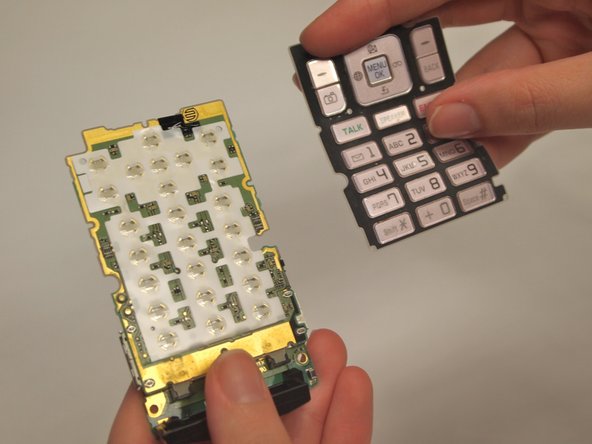
    • Carefully peel the rubber keypad mat off of the motherboard. The keypad is secured with an adhesive material, so there will be slight resistance.

결론

To reassemble your device, follow these instructions in reverse order.

Preston

회원 가입일: 03/11/13

216 평판

안내서 5개 작성하였습니다

Clemson, Team 12-1, Benson Spring 2013 Clemson, Team 12-1, Benson Spring 2013 회원

CLEM-BENSON-S13S12G1

4 회원들

안내서 20개 작성하였습니다

댓글 0개

댓글 쓰기

조회 통계:

24 시간 전: 0

7일 전: 1

30일 전: 1

전체 시간: 278