주요 콘텐츠로 건너뛰기

Sanyo VPC-X1200 LCD Screen Replacement

필요한 것

  1. Sanyo VPC-X1200 LCD Screen Replacement, Back Case: 1 단계, 이미지 3개 중 1개 Sanyo VPC-X1200 LCD Screen Replacement, Back Case: 1 단계, 이미지 3개 중 2개 Sanyo VPC-X1200 LCD Screen Replacement, Back Case: 1 단계, 이미지 3개 중 3개
    • Remove the five case screws with a Phillips #00 Screwdriver.

    • Five 3.5mm Phillips Screws

  2. Sanyo VPC-X1200 LCD Screen Replacement: 2 단계, 이미지 1개 중 1개
    • Gently lift up the back cover and set aside.

  3. Sanyo VPC-X1200 LCD Screen Replacement, LCD Screen: 3 단계, 이미지 2개 중 1개 Sanyo VPC-X1200 LCD Screen Replacement, LCD Screen: 3 단계, 이미지 2개 중 2개
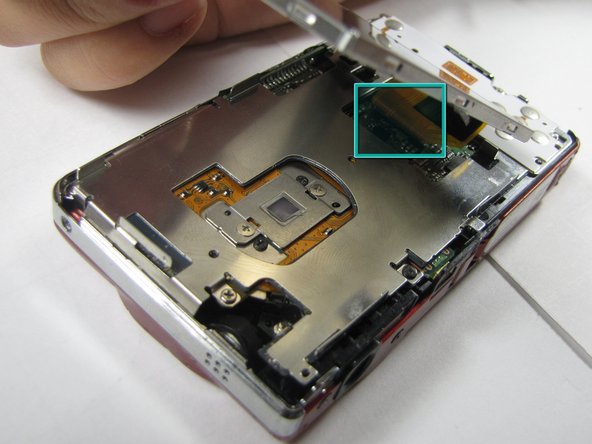
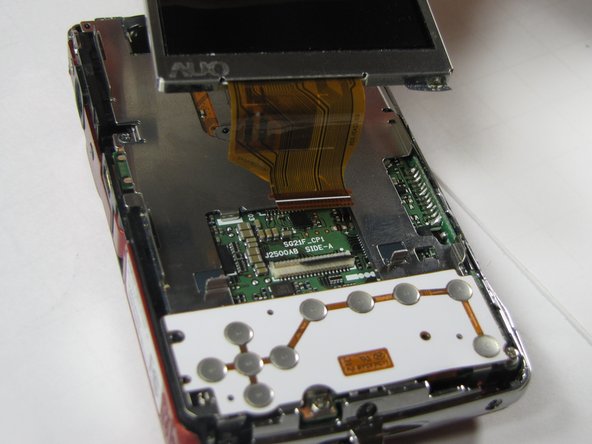
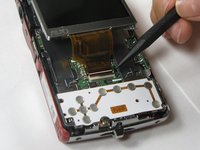
    • Gently lift up on the left side of the LCD and slowly pull it to the left side of the camera but do not remove entirely, there is a ribbon connector.

    • Be careful not to rip out the ribbon connector.

  4. Sanyo VPC-X1200 LCD Screen Replacement: 4 단계, 이미지 2개 중 1개 Sanyo VPC-X1200 LCD Screen Replacement: 4 단계, 이미지 2개 중 2개
    • To clear the ribbon connection underneath the screen, lift up the black ribbon gate with the spudger.

    • Gently lift ribbon out of the gate and set screen aside.

결론

To reassemble your device, follow these instructions in reverse order.

작성자

5다른 기여자 명과 함께

Anthony Giardina

회원 가입일: 04/19/10

20 평판

안내서 7개를 작성함

Cal Poly, Team 7-10, Maness Spring 2010 Cal Poly, Team 7-10, Maness Spring 2010 회원

CPSU-MANESS-S10S7G10

4 회원들

안내서 15개를 작성함

0가이드 댓글

댓글 쓰기

조회 통계:

지난 24시간: 0

지난 7일: 3

지난 30일: 6

전체 시간: 5,239