이 버전에는 잘못된 편집 사항이 있을 수 있습니다. 최신 확인된 스냅샷으로 전환하십시오.
필요한 것
-
이 단계는 번역되지 않았습니다. 번역을 도와주십시오
-
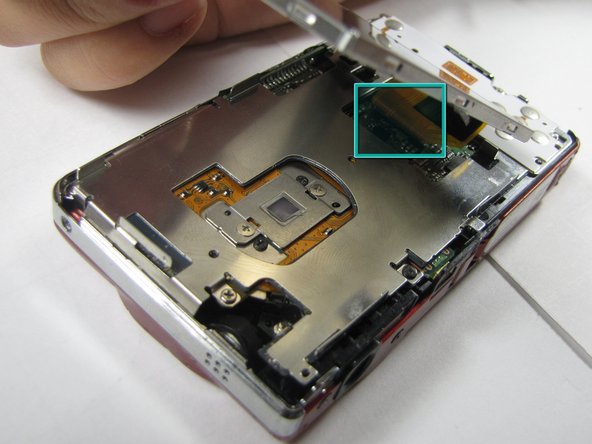
Remove the five case screws with a Phillips #00 Screwdriver.
-
Five 3.5mm Phillips Screws
-
-
이 단계는 번역되지 않았습니다. 번역을 도와주십시오
-
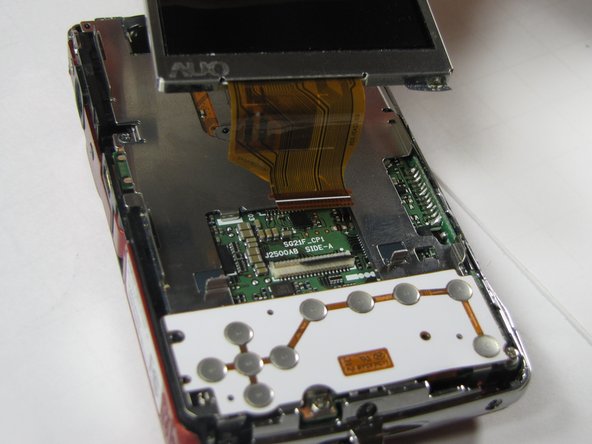
Gently lift up on the left side of the LCD and slowly pull it to the left side of the camera but do not remove entirely, there is a ribbon connector.
-
-
-
이 단계는 번역되지 않았습니다. 번역을 도와주십시오
-
To clear the ribbon connection underneath the screen, lift up the black ribbon gate with the spudger.
-
Gently lift ribbon out of the gate and set screen aside.
-
-
이 단계는 번역되지 않았습니다. 번역을 도와주십시오
-
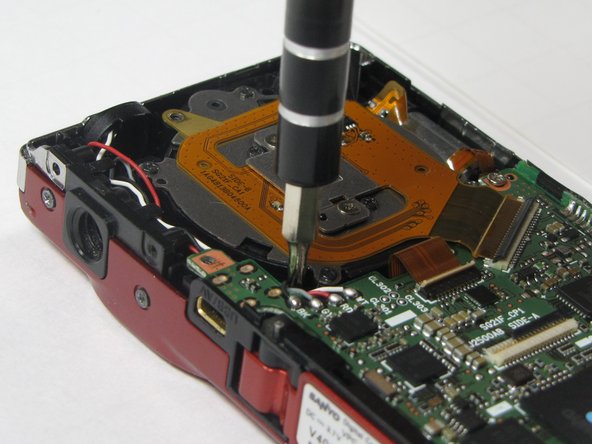
There are five screws of three different sizes which need removal.
-
One 4.5mm screw
-
Four 3.5mm screws, one on the button side
-
One 5.5mm screws
-
-
이 단계는 번역되지 않았습니다. 번역을 도와주십시오
-
Slowly lift metal tray to the right.
-
Remove ribbon cable by using the spudger to lift up the black ribbon gate to release the ribbon
-
-
이 단계는 번역되지 않았습니다. 번역을 도와주십시오
-
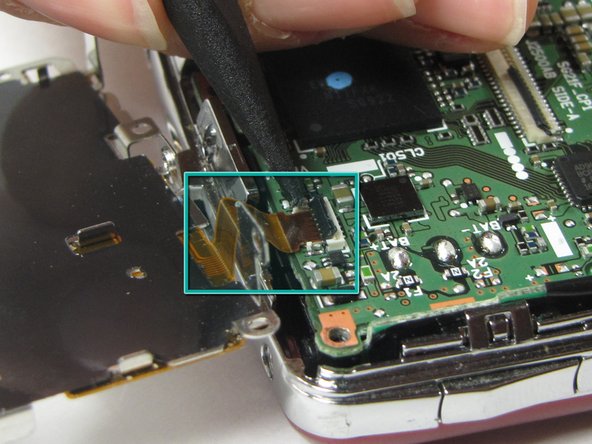
Disconnect the two ribbon cables from the lens unit by using the spudger to lift the ribbon gates.
-
-
이 단계는 번역되지 않았습니다. 번역을 도와주십시오
-
Lift the lens unit free of the camera. A spudger can be used to separate the lens unit if necessary.
-


팀

Cal Poly, Team 7-10, Maness Spring 2010 Cal Poly, Team 7-10, Maness Spring 2010 회원
CPSU-MANESS-S10S7G10
4 회원들
안내서 14개 작성하였습니다