주요 콘텐츠로 건너뛰기

Screwless Light Switch Wall Plate Replacement

필요한 것

  1. Screwless Light Switch Wall Plate Replacement, Light Switch Wall Plate: 1 단계, 이미지 1/3 Screwless Light Switch Wall Plate Replacement, Light Switch Wall Plate: 1 단계, 이미지 2/3 Screwless Light Switch Wall Plate Replacement, Light Switch Wall Plate: 1 단계, 이미지 3/3
    • Caution: Before beginning this guide, turn the light switch off and turn off power to the switch at the circuit breaker.

    • They are usually labeled by the area of the house to which they belong.

  2. Screwless Light Switch Wall Plate Replacement: 2 단계, 이미지 1/3 Screwless Light Switch Wall Plate Replacement: 2 단계, 이미지 2/3 Screwless Light Switch Wall Plate Replacement: 2 단계, 이미지 3/3
    • Insert a prying tool into the two catches on the top of the light switch.

    • Slowly turn the prying tool or use it as a lever to push the outer plate away from the wall.

  3. Screwless Light Switch Wall Plate Replacement: 3 단계, 이미지 1/1
    • Remove the outer layer of the faceplate.

  4. Screwless Light Switch Wall Plate Replacement: 4 단계, 이미지 1/2 Screwless Light Switch Wall Plate Replacement: 4 단계, 이미지 2/2
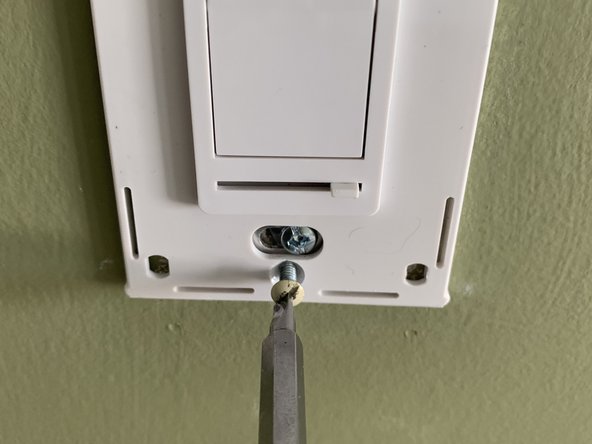
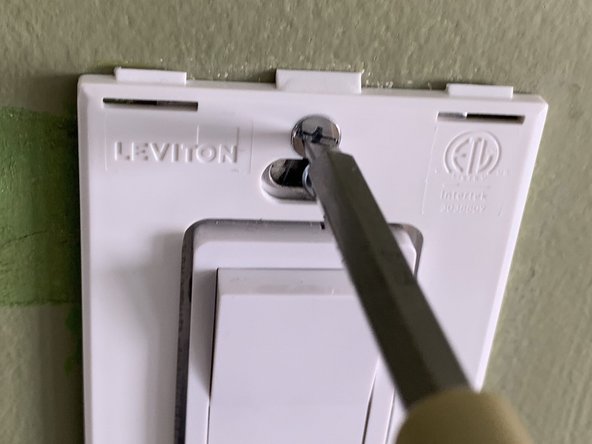
    • Remove the inner part of the faceplate by unscrewing the two screws on the top and the bottom.

    • Different faceplates use different screws. Use the screwdriver that works with your screws.

  5. Screwless Light Switch Wall Plate Replacement: 5 단계, 이미지 1/3 Screwless Light Switch Wall Plate Replacement: 5 단계, 이미지 2/3 Screwless Light Switch Wall Plate Replacement: 5 단계, 이미지 3/3
    • Unbox the new faceplate.

    • Just like Step 2, remove the outer layer of the new faceplate by inserting a prying tool in the catches on its top and bottom, pushing the two layers away from each other.

  6. Screwless Light Switch Wall Plate Replacement: 6 단계, 이미지 1/3 Screwless Light Switch Wall Plate Replacement: 6 단계, 이미지 2/3 Screwless Light Switch Wall Plate Replacement: 6 단계, 이미지 3/3
    • Hold the inner layer of the faceplate against the wall.

    • Align the holes in the plate with the existing holes on the light switch or power outlet.

    • Tighten the two screws on the top and bottom.

  7. Screwless Light Switch Wall Plate Replacement: 7 단계, 이미지 1/3 Screwless Light Switch Wall Plate Replacement: 7 단계, 이미지 2/3 Screwless Light Switch Wall Plate Replacement: 7 단계, 이미지 3/3
    • Attach the outer layer of the faceplate by putting it on top of the inner layer and slightly pushing it until you hear a click sound.

결론

You can follow this guide to replace a power outlet faceplate as the procedure is essentially the same.

다른 한 분이 해당 안내서를 완성하였습니다.

Davood Dehghani Firoozabadi

회원 가입일: 09/20/20

404 평판

안내서 2개 작성하였습니다

York University, Team S1-G7, Woodhouse Winter 2021 York University, Team S1-G7, Woodhouse Winter 2021 회원

YORK-WOODHOUSE-W21S1G7

1 회원

안내서 2개 작성하였습니다

댓글 0개

댓글 쓰기

조회 통계:

24 시간 전: 5

7일 전: 45

30일 전: 231

전체 시간: 9,296