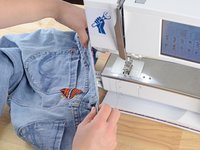
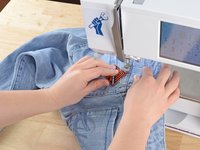
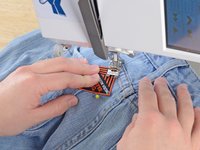
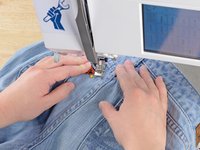
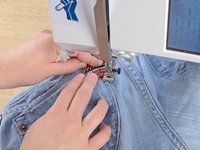
주요 콘텐츠로 건너뛰기

Sew-on Patch

필요한 것

  1. Sew-on Patch, Sew-on Patch: 1 단계, 이미지 1/2 Sew-on Patch, Sew-on Patch: 1 단계, 이미지 2/2
    • Examine the damage. Clip any loose threads and remove any debris from the tear.

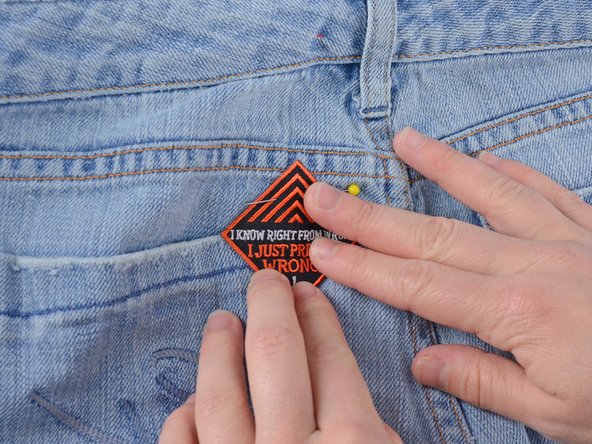
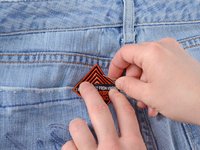
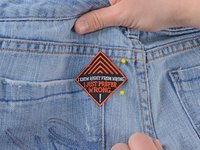
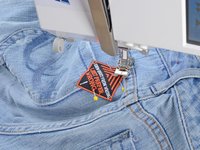
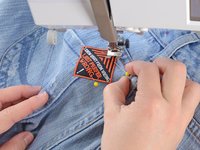
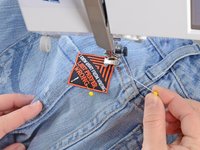
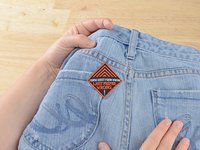
    • Grab a trendy patch.

  2. Sew-on Patch: 2 단계, 이미지 1/2 Sew-on Patch: 2 단계, 이미지 2/2
    • Position the patch over the hole.

    • Any patch you use should overlap the damage by at least 1/8".

  3. Sew-on Patch: 3 단계, 이미지 1/3 Sew-on Patch: 3 단계, 이미지 2/3 Sew-on Patch: 3 단계, 이미지 3/3
    • Pin the patch to the jeans.

    • Be sure to only pin the patch to one layer of denim, or you will sew the pants shut.

  4. Sew-on Patch: 4 단계, 이미지 1/3 Sew-on Patch: 4 단계, 이미지 2/3 Sew-on Patch: 4 단계, 이미지 3/3
    • Slide the jeans into the sewing machine, positioning the needle over the edge of the patch.

    • Be sure you only have one layer of the jeans between the needle and the sewing machine arm, or you will sew the pants shut.

  5. Sew-on Patch: 5 단계, 이미지 1/2 Sew-on Patch: 5 단계, 이미지 2/2
    • Lower the pressor foot.

    • Sew along the edge of the patch.

    • Remove the pins before you get to them.

    • Sewing over a pin can bend or break the needle.

  6. Sew-on Patch: 6 단계, 이미지 1/2 Sew-on Patch: 6 단계, 이미지 2/2
    • Continue sewing around the patch, lifting the pressor foot to turn at corners of the patch.

  7. Sew-on Patch: 7 단계, 이미지 1/3 Sew-on Patch: 7 단계, 이미지 2/3 Sew-on Patch: 7 단계, 이미지 3/3
    • When you come all the way around, overlap the first two or three stitches.

    • Lift the needle and pressor foot.

    • Slide the jeans out of the sewing machine.

    • Clip any threads, and admire your work.

결승점

다른 3명이 해당 안내서를 완성하였습니다.

Brittany McCrigler

회원 가입일: 03/05/12

88,913 평판

안내서 131개 작성하였습니다

iFixit iFixit 회원

Staff

136 회원들

안내서 16,579개 작성하였습니다

댓글 0개

댓글 쓰기

조회 통계:

24 시간 전: 1

7일 전: 28

30일 전: 100

전체 시간: 6,914