주요 콘텐츠로 건너뛰기

이 버전에는 잘못된 편집 사항이 있을 수 있습니다. 최신 확인된 스냅샷으로 전환하십시오.

필요한 것

  1. 이 단계는 번역되지 않았습니다. 번역을 도와주십시오

    : 1 단계, 이미지 1/2 : 1 단계, 이미지 2/2
    • Squeeze Dust Cup release buttons on either side of the component.

    • Pull up to release Dust Cup.

  2. 이 단계는 번역되지 않았습니다. 번역을 도와주십시오

    : 2 단계, 이미지 1/2 : 2 단계, 이미지 2/2
    • Remove the pre-motor filter with your hands.

  3. 이 단계는 번역되지 않았습니다. 번역을 도와주십시오

    : 3 단계, 이미지 1/1
    • Remove the post-motor filter.

  4. 이 단계는 번역되지 않았습니다. 번역을 도와주십시오

    : 4 단계, 이미지 1/1
    • Remove the two 15 mm screws by twisting counterclockwise with the T10 Torx screwdriver.

  5. 이 단계는 번역되지 않았습니다. 번역을 도와주십시오

    : 5 단계, 이미지 1/2 : 5 단계, 이미지 2/2
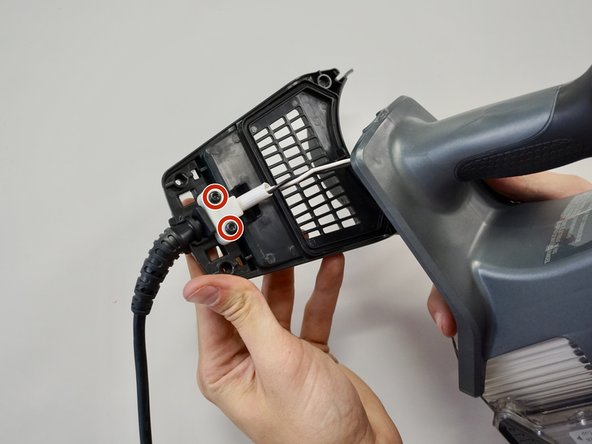
    • Remove the two 12 mm screws by twisting counterclockwise with the T15 Torx screwdriver.

    • To fully remove the power cord, cut the wires using a wire cutter.

    • For reassembly, use the soldering guide in the Introduction.

결승점

다른 2명이 해당 안내서를 완성하였습니다.

caoimhe

회원 가입일: 10/08/18

979 평판

안내서 4개 작성하였습니다

Cal Poly, Team S17-G5, White Fall 2018 Cal Poly, Team S17-G5, White Fall 2018 회원

CPSU-WHITE-F18S17G5

4 회원들

안내서 14개 작성하였습니다

댓글 한 개

I found with further dissasembly, uncrimping and recrimping the wiring loom saved having to add more connections.

qwazew - 답글

댓글 쓰기

조회 통계:

24 시간 전: 3

7일 전: 11

30일 전: 28

전체 시간: 1,396