주요 콘텐츠로 건너뛰기

Shark ION Robot 750 Motor Replacement

필요한 것

  1. Shark ION Robot 750 Motor Replacement, Outer Shell: 1 단계, 이미지 1/3 Shark ION Robot 750 Motor Replacement, Outer Shell: 1 단계, 이미지 2/3 Shark ION Robot 750 Motor Replacement, Outer Shell: 1 단계, 이미지 3/3
    • Make sure the device is completely powered off before working.

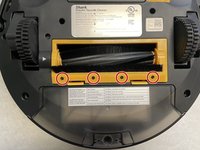
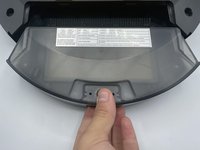
    • Flip over the vacuum on a flat and uncluttered service with the bottom facing upwards.

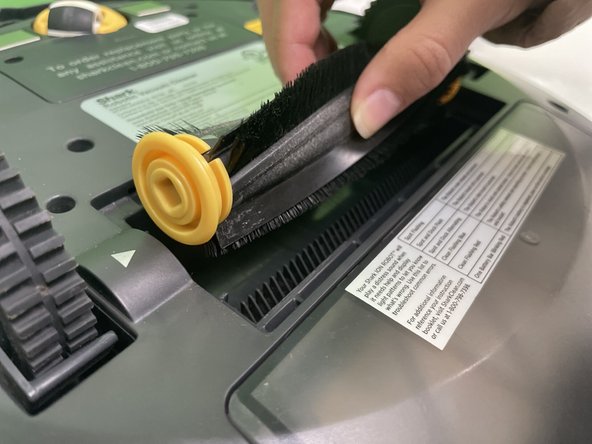
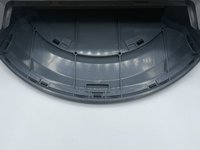
    • Remove all seven 9.1mm Torx T15 screws from the device’s front bumper.

    • Remove the nine 9.1mm Torx T6 bolts from outer shell.

  2. Shark ION Robot 750 Motor Replacement: 2 단계, 이미지 1/2 Shark ION Robot 750 Motor Replacement: 2 단계, 이미지 2/2
    • Slightly pull front bumper to expose internal wiring.

    • Unplug the device’s front bumper wiring and completely remove front bumper.

  3. Shark ION Robot 750 Motor Replacement: 3 단계, 이미지 1/2 Shark ION Robot 750 Motor Replacement: 3 단계, 이미지 2/2
    • Remove the four 9.5mm Torx T6 bolts on the yellow brush frame.

    • Gently depress the two tabs on the frame, then lift the frame to remove it.

  4. Shark ION Robot 750 Motor Replacement: 4 단계, 이미지 1/2 Shark ION Robot 750 Motor Replacement: 4 단계, 이미지 2/2
    • Pick up the brush and remove it from the vacuum.

    • Push the brush to your right and lift it.

  5. Shark ION Robot 750 Motor Replacement: 5 단계, 이미지 1/3 Shark ION Robot 750 Motor Replacement: 5 단계, 이미지 2/3 Shark ION Robot 750 Motor Replacement: 5 단계, 이미지 3/3
    • Press and hold the dust bin removal button to slide out the dust bin.

  6. Shark ION Robot 750 Motor Replacement: 6 단계, 이미지 1/1
    • Lift the outer shell to expose the Shark’s interior.

  7. Shark ION Robot 750 Motor Replacement, Motor: 7 단계, 이미지 1/2 Shark ION Robot 750 Motor Replacement, Motor: 7 단계, 이미지 2/2
    • Be sure to disconnect any source of power related to your vacuum for safety purposes.

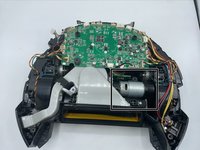
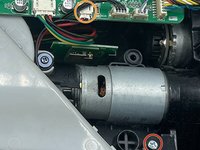
    • Remove the bolt to detach the motor by using the Phillips #0 screwdriver.

    • The motor is connected to the motherboard by this group of wires. Gently pull on the white plug to disconnect the wires.

결론

To reassemble your device, follow these instructions in reverse order.

corieon downing

회원 가입일: 09/13/23

181 평판

안내서 2개 작성하였습니다

University of North Texas, Team 1-7, Kilpatrick Fall 2023 University of North Texas, Team 1-7, Kilpatrick Fall 2023 회원

UNT-KILPATRICK-F23S1G7

4 회원들

안내서 5개 작성하였습니다

댓글 0개

댓글 쓰기

조회 통계:

24 시간 전: 1

7일 전: 16

30일 전: 44

전체 시간: 171