주요 콘텐츠로 건너뛰기

Shark NV352 Filter Replacement

  1. Shark NV352 Filter Replacement, Filter: 1 단계, 이미지 1/1
    • Ensure that you are removing the filters from the vacuum in an area that you don't mind getting dirty because the filters will be very dusty.

    • Lift the latches on both sides of the vacuum to release the dust canister.

  2. Shark NV352 Filter Replacement: 2 단계, 이미지 1/2 Shark NV352 Filter Replacement: 2 단계, 이미지 2/2
    • Tilt the dust canister forward to release it from its position.

    • Carefully lift away the dust canister and set it aside.

  3. Shark NV352 Filter Replacement: 3 단계, 이미지 1/3 Shark NV352 Filter Replacement: 3 단계, 이미지 2/3 Shark NV352 Filter Replacement: 3 단계, 이미지 3/3
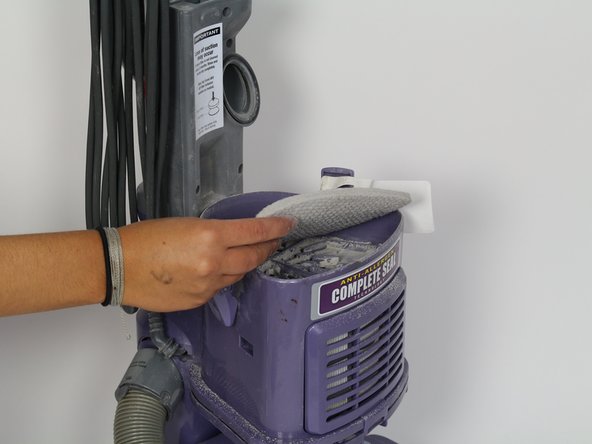
    • Remove the upper filter by lifting upwards on it.

    • Now that the lower filter is exposed, remove it by pulling it upwards.

결론

To reassemble your device, follow these instructions in reverse order.

다른 4명이 해당 안내서를 완성하였습니다.

Vincent Leuzze

회원 가입일: 09/25/17

300 평판

안내서 1개 작성함

Cal Poly, Team S18-G5, Forte Fall 2017 Cal Poly, Team S18-G5, Forte Fall 2017 회원

CPSU-FORTE-F17S18G5

4 회원들

안내서 10개 작성하였습니다

댓글 0개

댓글 쓰기

조회 통계:

24 시간 전: 0

7일 전: 9

30일 전: 20

전체 시간: 966