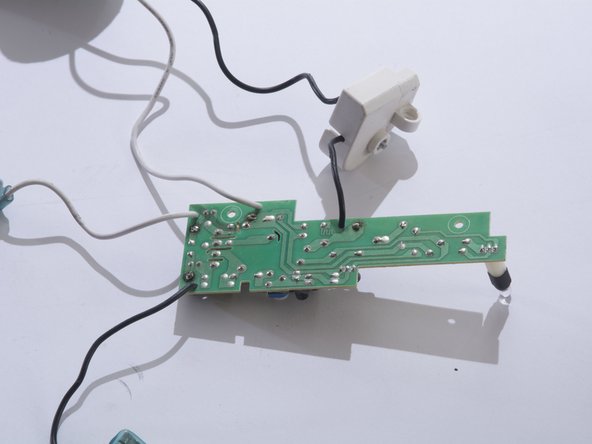
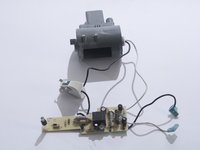
주요 콘텐츠로 건너뛰기

Shark Navigator Lightweight Upright Motherboard Replacement

필요한 것

  1. Shark Navigator Lightweight Upright Motherboard Replacement, Head Shell: 1 단계, 이미지 2개 중 1개 Shark Navigator Lightweight Upright Motherboard Replacement, Head Shell: 1 단계, 이미지 2개 중 2개
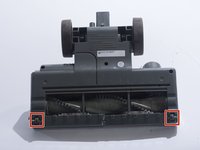
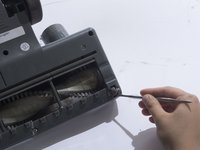
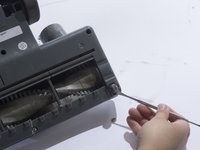
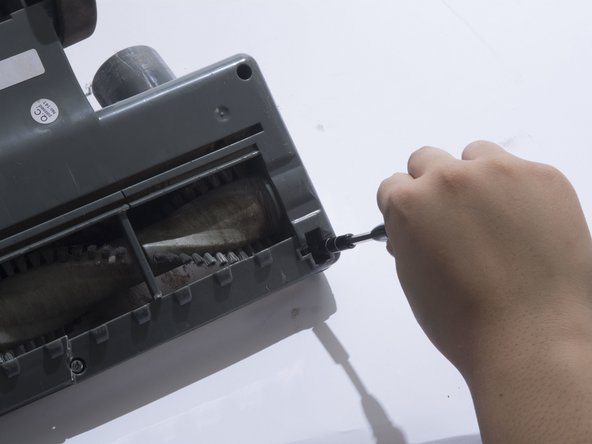
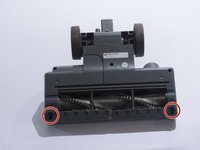
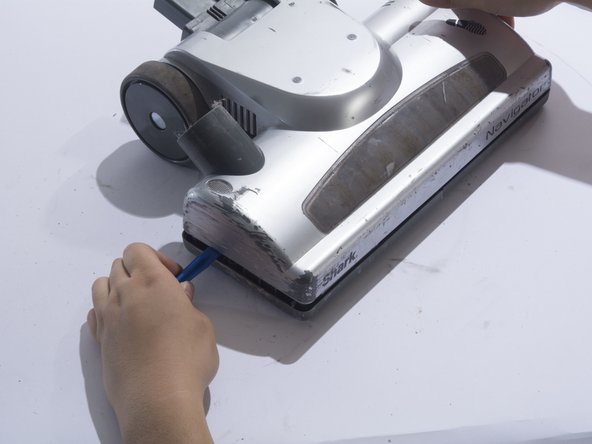
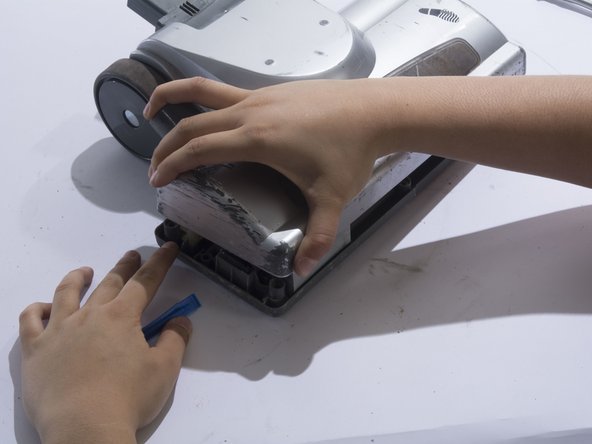
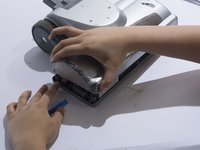
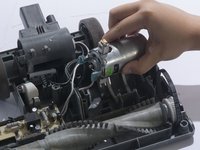
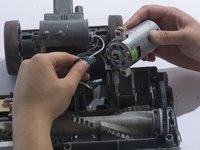
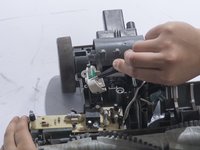
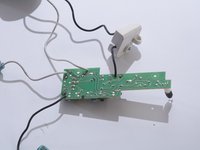
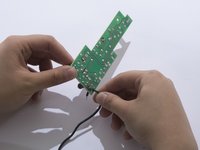
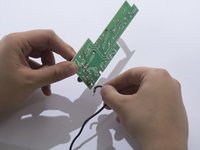
    • Detach the hose connected on the bottom of the vacuum by pulling it out of the casing.

  2. Shark Navigator Lightweight Upright Motherboard Replacement: 2 단계, 이미지 2개 중 1개 Shark Navigator Lightweight Upright Motherboard Replacement: 2 단계, 이미지 2개 중 2개
    • Lay the vacuum on its side.

    • Press in the black, rubberish button located on the back of the vacuum to detach the vacuum head from the body.

  3. Shark Navigator Lightweight Upright Motherboard Replacement: 3 단계, 이미지 1개 중 1개
    • Flip over the vacuum head so the brush head is facing up.

  4. Shark Navigator Lightweight Upright Motherboard Replacement: 4 단계, 이미지 3개 중 1개 Shark Navigator Lightweight Upright Motherboard Replacement: 4 단계, 이미지 3개 중 2개 Shark Navigator Lightweight Upright Motherboard Replacement: 4 단계, 이미지 3개 중 3개
    • Remove the small front wheels with a metal spudger by inserting the metal spudger in front of the wheel and slowly prying up. This will free the wheel and reveal the screw beneath it.

    • Repeat this for the other wheel.

  5. Shark Navigator Lightweight Upright Motherboard Replacement: 5 단계, 이미지 2개 중 1개 Shark Navigator Lightweight Upright Motherboard Replacement: 5 단계, 이미지 2개 중 2개
    • Remove the two 18mm screws with a JIS 1 screwdriver.

  6. Shark Navigator Lightweight Upright Motherboard Replacement: 6 단계, 이미지 2개 중 1개 Shark Navigator Lightweight Upright Motherboard Replacement: 6 단계, 이미지 2개 중 2개
    • Remove the four 18mm screws located on the top corners and the bottom/middle of the vacuum head using a JIS 1 screwdriver.

  7. Shark Navigator Lightweight Upright Motherboard Replacement: 7 단계, 이미지 2개 중 1개 Shark Navigator Lightweight Upright Motherboard Replacement: 7 단계, 이미지 2개 중 2개
    • Remove the two 18mm screws located on the inside of the large wheels using a JIS 1 screwdriver.

  8. Shark Navigator Lightweight Upright Motherboard Replacement: 8 단계, 이미지 3개 중 1개 Shark Navigator Lightweight Upright Motherboard Replacement: 8 단계, 이미지 3개 중 2개 Shark Navigator Lightweight Upright Motherboard Replacement: 8 단계, 이미지 3개 중 3개
    • Remove the plastic cover by prying the plastic cover up using a plastic opening tool.

    • Prying in multiple locations may be necessary to create separation.

  9. Shark Navigator Lightweight Upright Motherboard Replacement, Motor: 9 단계, 이미지 1개 중 1개
    • Locate the motor on the top right corner of the vacuum head shell.

  10. Shark Navigator Lightweight Upright Motherboard Replacement: 10 단계, 이미지 3개 중 1개 Shark Navigator Lightweight Upright Motherboard Replacement: 10 단계, 이미지 3개 중 2개 Shark Navigator Lightweight Upright Motherboard Replacement: 10 단계, 이미지 3개 중 3개
    • Remove the belt from the motor gear by sliding the belt to the right.

  11. Shark Navigator Lightweight Upright Motherboard Replacement: 11 단계, 이미지 3개 중 1개 Shark Navigator Lightweight Upright Motherboard Replacement: 11 단계, 이미지 3개 중 2개 Shark Navigator Lightweight Upright Motherboard Replacement: 11 단계, 이미지 3개 중 3개
    • Remove the white metal wire connector from the motor.

    • The white cable is positive.

  12. Shark Navigator Lightweight Upright Motherboard Replacement: 12 단계, 이미지 2개 중 1개 Shark Navigator Lightweight Upright Motherboard Replacement: 12 단계, 이미지 2개 중 2개
    • Remove the black metal wire connector from the motor.

    • The black cable is negative.

  13. Shark Navigator Lightweight Upright Motherboard Replacement, Motherboard: 13 단계, 이미지 2개 중 1개 Shark Navigator Lightweight Upright Motherboard Replacement, Motherboard: 13 단계, 이미지 2개 중 2개
    • Remove the two 12mm screws using a JIS 1 screwdriver.

  14. Shark Navigator Lightweight Upright Motherboard Replacement: 14 단계, 이미지 1개 중 1개
    • Remove the wire housing by removing one 12mm screw using a JIS 1 screwdriver.

  15. Shark Navigator Lightweight Upright Motherboard Replacement: 15 단계, 이미지 2개 중 1개 Shark Navigator Lightweight Upright Motherboard Replacement: 15 단계, 이미지 2개 중 2개
    이 단계에 사용된 도구:
    Tweezers
    $4.99
    • Lift up the wire housing from the plastic base using tweezers.

  16. Shark Navigator Lightweight Upright Motherboard Replacement: 16 단계, 이미지 2개 중 1개 Shark Navigator Lightweight Upright Motherboard Replacement: 16 단계, 이미지 2개 중 2개
    • Free the black and white cables that were previously attached to the motor from their slot.

  17. Shark Navigator Lightweight Upright Motherboard Replacement: 17 단계, 이미지 2개 중 1개 Shark Navigator Lightweight Upright Motherboard Replacement: 17 단계, 이미지 2개 중 2개
    • Free the motherboard and its connecting parts from the rest of the vacuum.

    • Turn the motherboard upside-down and spread wires out.

  18. Shark Navigator Lightweight Upright Motherboard Replacement: 18 단계, 이미지 2개 중 1개 Shark Navigator Lightweight Upright Motherboard Replacement: 18 단계, 이미지 2개 중 2개
    • Heat the wire connection's solder joint until the joint looks wet and liquidy.

    • While maintaining contact with the solder iron, free the wire end by pulling the wire away from the board with the tweezers.

    • For instructions on how to solder properly please refer to this soldering technique guide. 연결부 납땜 및 납제거 방법

    • Remember which cables were soldered onto where. You will have to re-solder the cables back onto the same joint.

    • Solder iron is extremely hot and should be handled with care. Always wear eye protection when soldering.

  19. Shark Navigator Lightweight Upright Motherboard Replacement: 19 단계, 이미지 3개 중 1개 Shark Navigator Lightweight Upright Motherboard Replacement: 19 단계, 이미지 3개 중 2개 Shark Navigator Lightweight Upright Motherboard Replacement: 19 단계, 이미지 3개 중 3개
    • Completely free the cable by pulling it out of the board.

    • Repeat for the remaining cables. There are 4 total.

결론

To reassemble your device, follow these instructions in reverse order.

작성자

4다른 기여자 명과 함께

Suzie

회원 가입일: 10/02/17

534 평판

안내서 4개를 작성함

Cal Poly, Team S4-G6, Livingston Fall 2017 Cal Poly, Team S4-G6, Livingston Fall 2017 회원

CPSU-LIVINGSTON-F17S4G6

3 회원들

안내서 12개를 작성함

0가이드 댓글

댓글 쓰기

조회 통계:

지난 24시간: 0

지난 7일: 2

지난 30일: 14

전체 시간: 1,760