주요 콘텐츠로 건너뛰기

Shark Rocket HV381 Motor Replacement

필요한 것

  1. Shark Rocket HV381 Motor Replacement, Roller: 1 단계, 이미지 1/2 Shark Rocket HV381 Motor Replacement, Roller: 1 단계, 이미지 2/2
    • On the right-bottom of the body, pull down the black switch. You will hear an audible click when you detach the body from the vacuum head.

  2. Shark Rocket HV381 Motor Replacement: 2 단계, 이미지 1/1
    • Laying the vacuum head on the its right side, push the orange "Eject Roller" switch down. The Roller can now be removed with ease.

  3. Shark Rocket HV381 Motor Replacement, Brush: 3 단계, 이미지 1/2 Shark Rocket HV381 Motor Replacement, Brush: 3 단계, 이미지 2/2
    • On the top of the vacuum head is two grey "Brush Roller Access" buttons. Simultaneously press both buttons to eject the Roller Cover. Remove the Roller Cover by pulling it towards you and up.

  4. Shark Rocket HV381 Motor Replacement: 4 단계, 이미지 1/3 Shark Rocket HV381 Motor Replacement: 4 단계, 이미지 2/3 Shark Rocket HV381 Motor Replacement: 4 단계, 이미지 3/3
    • The "Pull Tab" tab is located at the right. Pull the Tab up and to the right for removal.

    • The Brush is sticky so hold the vacuum head with one hand and give the tab a moderate tug.

  5. Shark Rocket HV381 Motor Replacement, Wheel: 5 단계, 이미지 1/2 Shark Rocket HV381 Motor Replacement, Wheel: 5 단계, 이미지 2/2
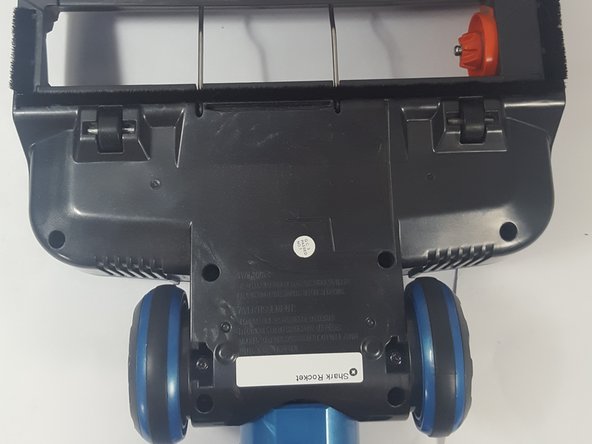
    • On the back of the vacuum head, locate and unscrew the four T15 screws. Once done the wheels can be removed.

  6. Shark Rocket HV381 Motor Replacement, LED: 6 단계, 이미지 1/2 Shark Rocket HV381 Motor Replacement, LED: 6 단계, 이미지 2/2
    • On the back of the vacuum head, located near the bottom, should be a row of screws. Using the T15 Screwdriver, remove all the screws on the bottom and the sides.

  7. Shark Rocket HV381 Motor Replacement: 7 단계, 이미지 1/1
    • On the top side of the vacuum head, where the LED is located, use the Small Flathead screwdriver to pry open the cover. There should be no resistance.

  8. Shark Rocket HV381 Motor Replacement: 8 단계, 이미지 1/3 Shark Rocket HV381 Motor Replacement: 8 단계, 이미지 2/3 Shark Rocket HV381 Motor Replacement: 8 단계, 이미지 3/3
    • Picking the LED from the side, pull upwards to unwind the wires from their tracks.

    • Make sure that you are gentle because the wires are very fragile. One strong pull could easily snap them from the LED.

  9. Shark Rocket HV381 Motor Replacement, Motor: 9 단계, 이미지 1/2 Shark Rocket HV381 Motor Replacement, Motor: 9 단계, 이미지 2/2
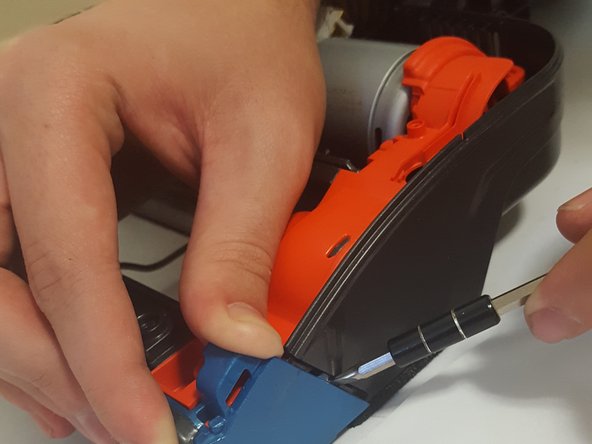
    • On the top of the vacuum head, to the tight of the 'Brush Roller Access' buttons, locate the two screws parallel to each other. Using the T15 to unscrew these two, lift up the panel by the flap as shown.

    • Careful while lifting up the panel! There are wires that are connected to it as shown below which are fragile.

  10. Shark Rocket HV381 Motor Replacement: 10 단계, 이미지 1/1
    • Using the T10 screwdriver, unscrew the screw as shown. This should free the panel from the wires. Place the panel to the side.

  11. Shark Rocket HV381 Motor Replacement: 11 단계, 이미지 1/3 Shark Rocket HV381 Motor Replacement: 11 단계, 이미지 2/3 Shark Rocket HV381 Motor Replacement: 11 단계, 이미지 3/3
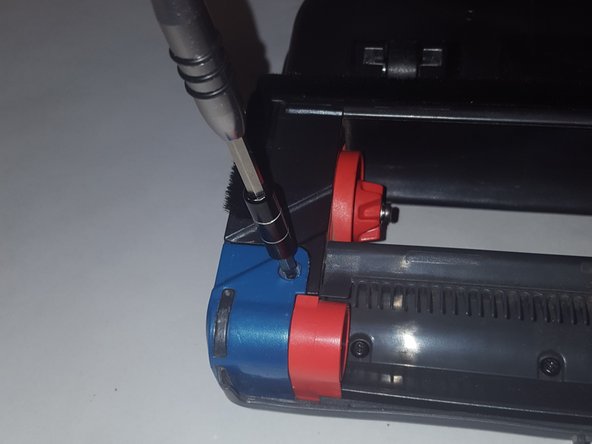
    • Using the T10 screwdriver, unscrew the three screws as shown in the picture. It is important that you take your time to unscrew all three at the same pace. We found that increments of half a turn worked best.

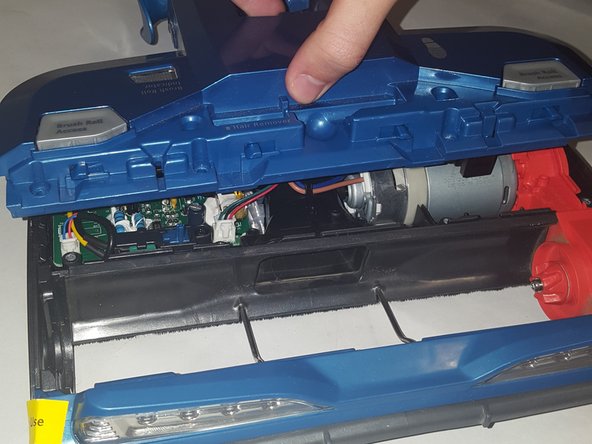
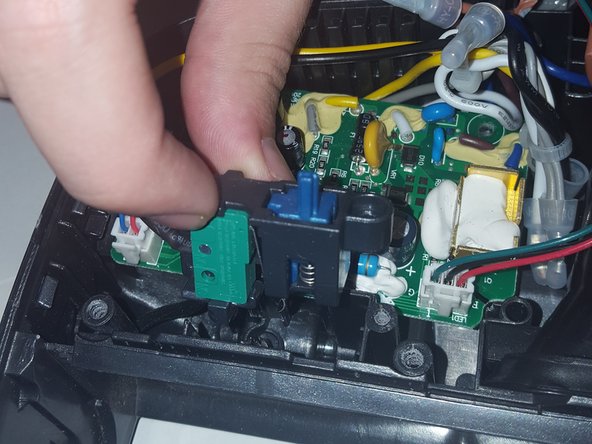
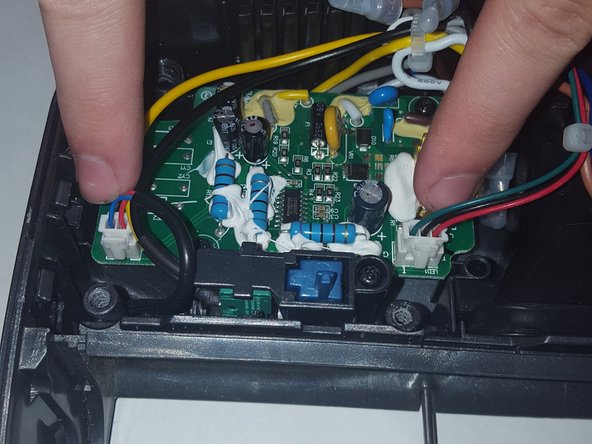
    • The decision to unclip the wires from the motherboard or remove the blue device doesn't matter on order. Complete both steps before proceeding.

    • As easy as unclipping the wires may sound, you must be careful to avoid breaking them.

  12. Shark Rocket HV381 Motor Replacement: 12 단계, 이미지 1/3 Shark Rocket HV381 Motor Replacement: 12 단계, 이미지 2/3 Shark Rocket HV381 Motor Replacement: 12 단계, 이미지 3/3
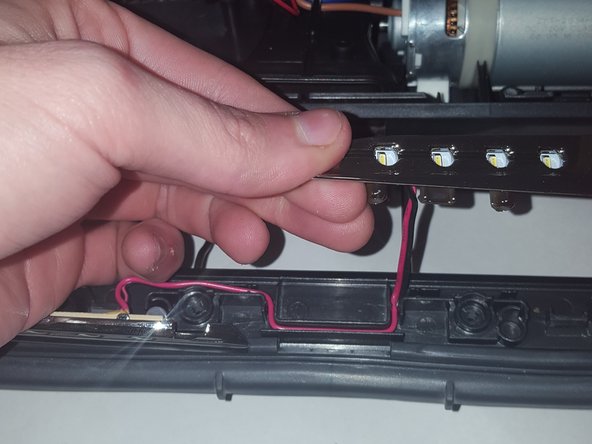
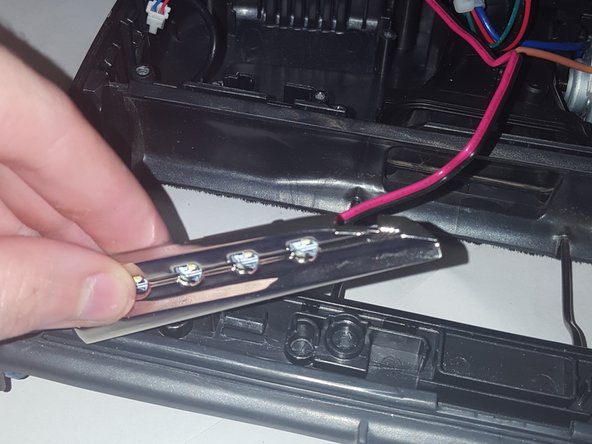
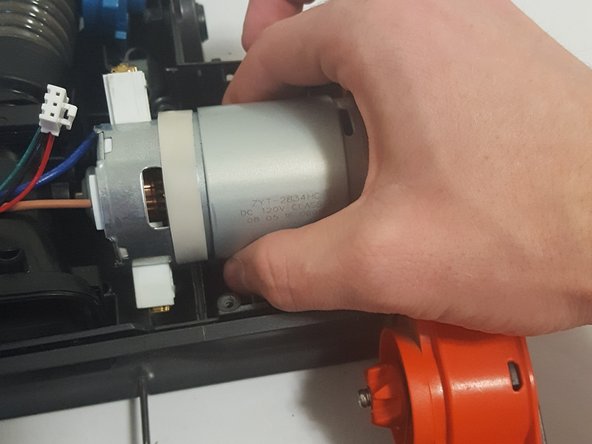
    • Set the freed motherboard off to the side, but take note of the wires connected to the motherboard. On the bottom of the vacuum head, while you should have removed these four screws while dissembling the wheels double check then remove the panel. Doing this will expose the engine. Using your fingers and the flat head, push the blue piece forward.

    • The only way we could push the blue piece forward without difficulty was to put the Flathead in the center of the part mentioned above and push with your thumb. It comes right out if done correctly.

  13. Shark Rocket HV381 Motor Replacement: 13 단계, 이미지 1/1
    • Slowly pull the thin wire from the front of the vacuum cleaner out of the way. It will still be connected to the vacuum cleaner but now out of your way.

  14. Shark Rocket HV381 Motor Replacement: 14 단계, 이미지 1/1
    • Pinch the hose, move it upwards, and out of your way as shown. The wires will not offer any problems, however, despite how the picture.

  15. Shark Rocket HV381 Motor Replacement: 15 단계, 이미지 1/3 Shark Rocket HV381 Motor Replacement: 15 단계, 이미지 2/3 Shark Rocket HV381 Motor Replacement: 15 단계, 이미지 3/3
    • Firmly grasping the engine, pull it upwards until you hear either a soft click or loud crack. We experience both yet the vacuum was able to function just fine afterward. Keep moving it upwards until you can take the engine, motherboard, and hose out.

  16. Shark Rocket HV381 Motor Replacement: 16 단계, 이미지 1/1
    • You now have access to the engine! This step is entirely optional, but the orange rotary piece can be removed using the T10 Screwdriver on the screws shown here.

결론

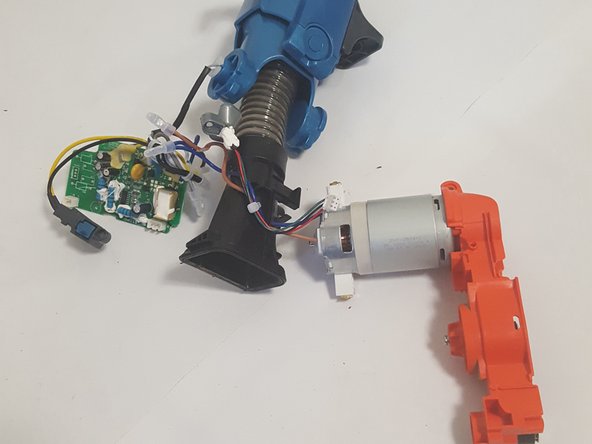
To reassemble your device, follow these instructions in reverse order.

다른 한 분이 해당 안내서를 완성하였습니다.

Dandre Porter

회원 가입일: 08/22/17

528 평판

안내서 5개 작성하였습니다

Arkansas State University, Team S1-G5, Chamberlain Fall 2017 Arkansas State University, Team S1-G5, Chamberlain Fall 2017 회원

ARSU-CHAMBERLAIN-F17S1G5

3 회원들

안내서 10개 작성하였습니다

댓글 2개

where can I buy the engine with the rotary pieces

HERIBERTO GARCIA - 답글

Worst vacuum i have ever purchased. Do a video on how to throw it in trash.

Chuck's poke - 답글

댓글 쓰기

조회 통계:

24 시간 전: 1

7일 전: 6

30일 전: 23

전체 시간: 3,005