주요 콘텐츠로 건너뛰기

Shark Rocket Powerhead AH401 Motor Replacement

필요한 것

  1. Shark Rocket Powerhead AH401 Motor Replacement, Brushroll: 1 단계, 이미지 1/3 Shark Rocket Powerhead AH401 Motor Replacement, Brushroll: 1 단계, 이미지 2/3 Shark Rocket Powerhead AH401 Motor Replacement, Brushroll: 1 단계, 이미지 3/3
    • Ensure the device is turned off and unplugged from any power source before beginning work.

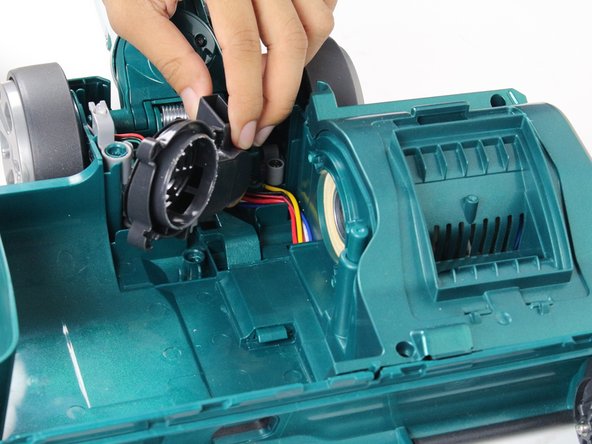
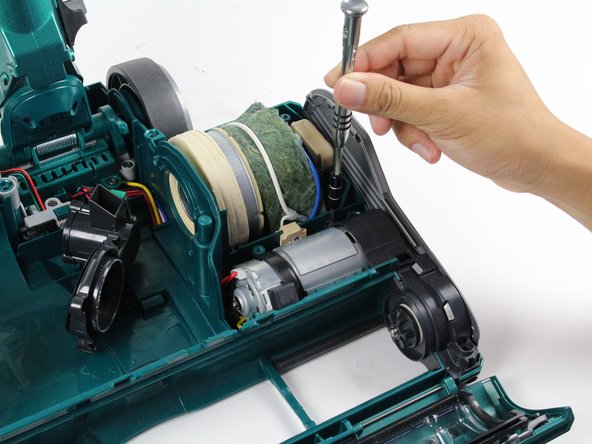
    • Locate the two tabs with white arrows on them. They are located on either side of the brushroll cover.

    • Slide the tabs away from the center of the vacuum to unlock the brushroll cover.

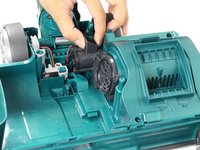
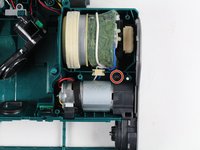
    • Lift the brushroll cover upward.

  2. Shark Rocket Powerhead AH401 Motor Replacement: 2 단계, 이미지 1/2 Shark Rocket Powerhead AH401 Motor Replacement: 2 단계, 이미지 2/2
    • Lift the brushroll out by pulling the tab labeled "pull".

  3. Shark Rocket Powerhead AH401 Motor Replacement, Back Panel Screws: 3 단계, 이미지 1/2 Shark Rocket Powerhead AH401 Motor Replacement, Back Panel Screws: 3 단계, 이미지 2/2
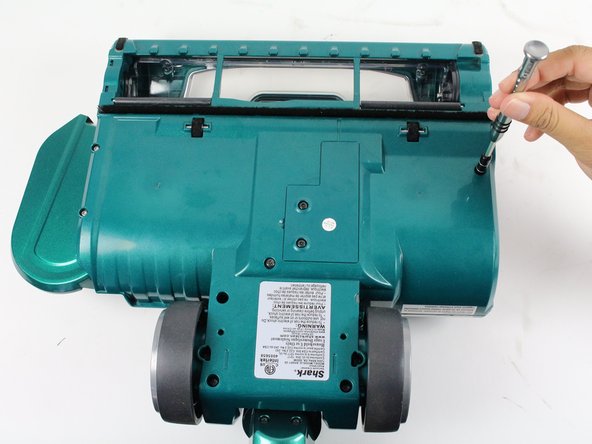
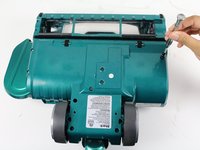
    • Flip the device over so that the bottom is face up.

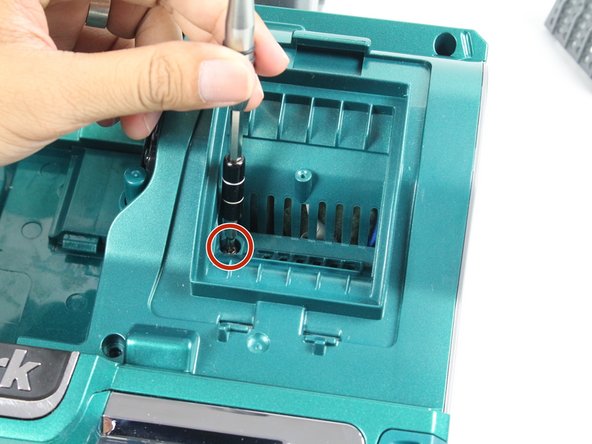
    • Remove the eight screws shown by rotating counter-clockwise with a T15 Torx screwdriver.

    • Two 14 mm Torx screws

    • Two 16 mm Torx screws

    • Four 21 mm Torx screws

  4. Shark Rocket Powerhead AH401 Motor Replacement, Filter Grille: 4 단계, 이미지 1/2 Shark Rocket Powerhead AH401 Motor Replacement, Filter Grille: 4 단계, 이미지 2/2
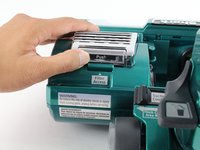
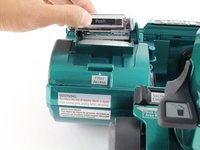
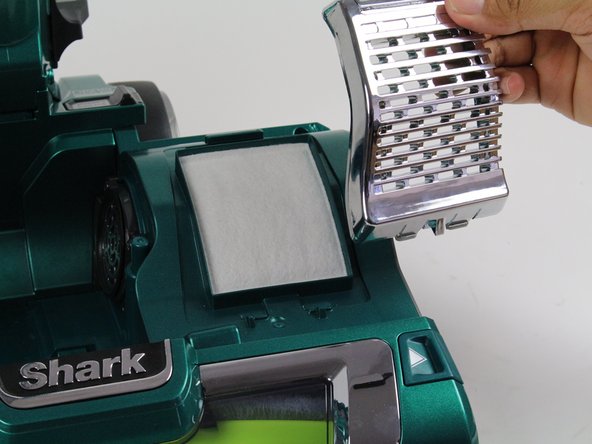
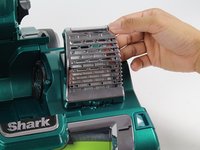
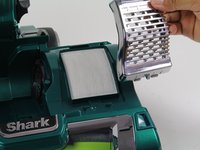
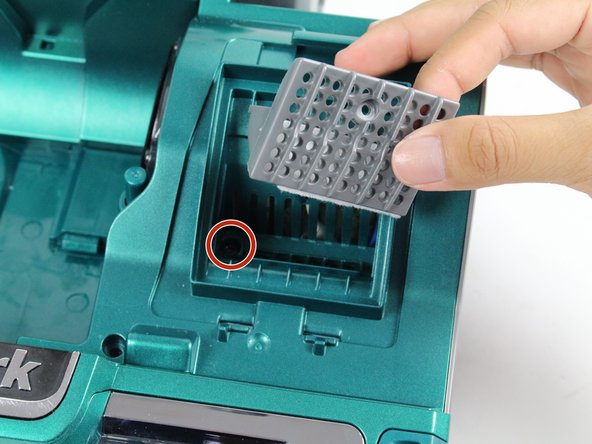
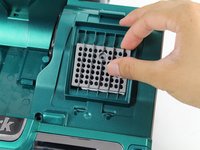
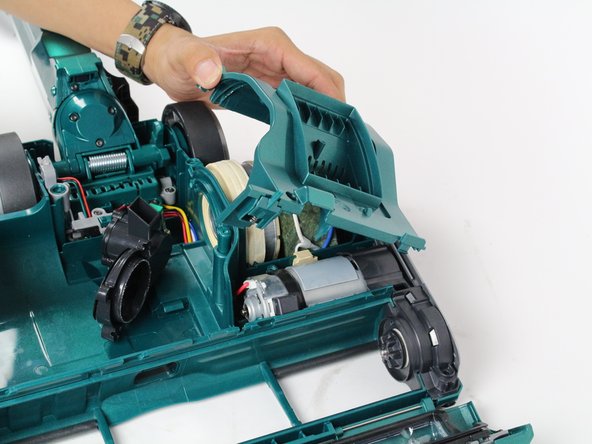
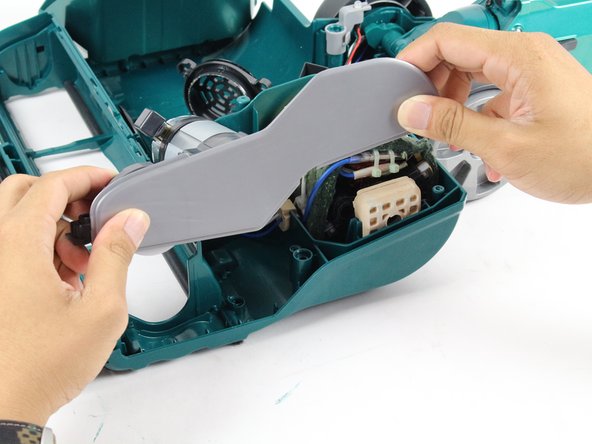
    • Push inward on the top of the filter grille where it says "Push."

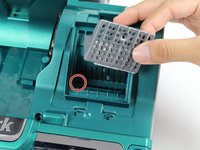
    • Lift the filter grille upward.

  5. Shark Rocket Powerhead AH401 Motor Replacement: 5 단계, 이미지 1/2 Shark Rocket Powerhead AH401 Motor Replacement: 5 단계, 이미지 2/2
    • Lift gently and pull the grille up towards you until it releases.

    • The post-motor filter is underneath the filter grille.

  6. Shark Rocket Powerhead AH401 Motor Replacement, Belt: 6 단계, 이미지 1/1
    • Remove the four screws by rotating counter-clockwise:

    • One 12 mm screw with a T10 Torx screwdriver

    • Three 14 mm screw with a T15 Torx screwdriver

  7. Shark Rocket Powerhead AH401 Motor Replacement: 7 단계, 이미지 1/3 Shark Rocket Powerhead AH401 Motor Replacement: 7 단계, 이미지 2/3 Shark Rocket Powerhead AH401 Motor Replacement: 7 단계, 이미지 3/3
    • Remove the grey filter plate by simply lifting upward.

    • Remove the 14mm screw by rotating counter clockwise with a T10 Torx screwdriver.

  8. Shark Rocket Powerhead AH401 Motor Replacement: 8 단계, 이미지 1/1
    • Remove three 10mm screws by rotating counter-clockwise with a T15 Torx screwdriver.

  9. Shark Rocket Powerhead AH401 Motor Replacement: 9 단계, 이미지 1/2 Shark Rocket Powerhead AH401 Motor Replacement: 9 단계, 이미지 2/2
    • Remove the airpath grille from the side of the motor compartment by pulling out and away from the attached area.

  10. Shark Rocket Powerhead AH401 Motor Replacement: 10 단계, 이미지 1/2 Shark Rocket Powerhead AH401 Motor Replacement: 10 단계, 이미지 2/2
    • Remove the motor compartment panel by lifting up and away from the device.

  11. Shark Rocket Powerhead AH401 Motor Replacement: 11 단계, 이미지 1/2 Shark Rocket Powerhead AH401 Motor Replacement: 11 단계, 이미지 2/2
    • Remove one 14mm screw by rotating counter-clockwise with a T15 Torx screwdriver.

  12. Shark Rocket Powerhead AH401 Motor Replacement: 12 단계, 이미지 1/2 Shark Rocket Powerhead AH401 Motor Replacement: 12 단계, 이미지 2/2
    • Disconnect the motor side panel by lifting the motor and panel up and out.

    • This step may require some wiggling to loosen the panel before it becomes free.

  13. Shark Rocket Powerhead AH401 Motor Replacement: 13 단계, 이미지 1/1
    • Remove one 9mm screw by rotating counter-clockwise with a Phillips #2 screwdriver.

    • This screw allows the side panel to be removed.

  14. Shark Rocket Powerhead AH401 Motor Replacement: 14 단계, 이미지 1/2 Shark Rocket Powerhead AH401 Motor Replacement: 14 단계, 이미지 2/2
    • Remove the side panel by pulling the panel out and away from the motor.

    • The side panel is connected with clips which connect near the brushroll axle.

  15. Shark Rocket Powerhead AH401 Motor Replacement: 15 단계, 이미지 1/2 Shark Rocket Powerhead AH401 Motor Replacement: 15 단계, 이미지 2/2
    • Loosen the two screws by rotating counter clockwise with a T15 Torx screwdriver.

    • The screws only need to be loosened in order to free the belt.

  16. Shark Rocket Powerhead AH401 Motor Replacement: 16 단계, 이미지 1/2 Shark Rocket Powerhead AH401 Motor Replacement: 16 단계, 이미지 2/2
    • Remove the belt by pulling the belt away from the axle.

  17. Shark Rocket Powerhead AH401 Motor Replacement, Motor: 17 단계, 이미지 1/1
    • Remove two 16mm screws by rotating counter-clockwise with a T15 Torx screwdriver.

  18. Shark Rocket Powerhead AH401 Motor Replacement: 18 단계, 이미지 1/2 Shark Rocket Powerhead AH401 Motor Replacement: 18 단계, 이미지 2/2
    • Remove the belt-assembly unit by pulling the belt-assembly unit away from the motor.

  19. Shark Rocket Powerhead AH401 Motor Replacement: 19 단계, 이미지 1/2 Shark Rocket Powerhead AH401 Motor Replacement: 19 단계, 이미지 2/2
    • Rotate the motor unit over so that the wires are exposed.

    • Cut wires with cutting pliers to release the motor.

결론

To reassemble your device, follow these instructions in reverse order.

다른 4명이 해당 안내서를 완성하였습니다.

Shobhit Dabral

회원 가입일: 01/24/18

913 평판

안내서 6개 작성하였습니다

Cal Poly, Team S19-G3, Livingston Winter 2018 Cal Poly, Team S19-G3, Livingston Winter 2018 회원

CPSU-LIVINGSTON-W18S19G3

4 회원들

안내서 18개 작성하였습니다

댓글 0개

댓글 쓰기

조회 통계:

24 시간 전: 0

7일 전: 4

30일 전: 27

전체 시간: 3,961