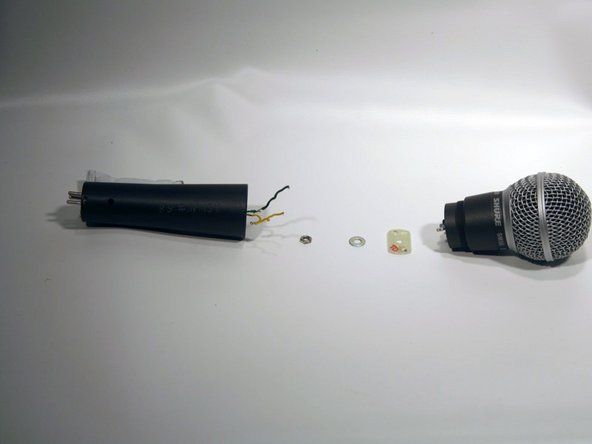
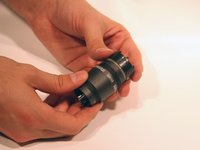
주요 콘텐츠로 건너뛰기

Shure SM58 Capsule Installation Replacement

필요한 것

  1. Shure SM58 Capsule Installation Replacement, Collar: 1 단계, 이미지 1/3 Shure SM58 Capsule Installation Replacement, Collar: 1 단계, 이미지 2/3 Shure SM58 Capsule Installation Replacement, Collar: 1 단계, 이미지 3/3
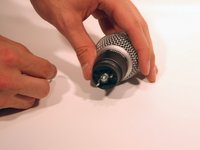
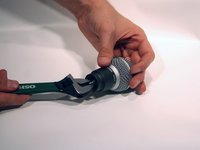
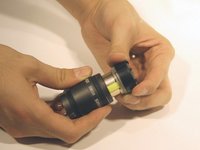
    • Grab the microphone base with one hand. With the other hand, grab just below the grille (the collar). Twist the collar clockwise to loosen it.

    • Be careful to not pull on the collar or you may rip the wires from the faceplate.

  2. Shure SM58 Capsule Installation Replacement, Faceplate: 2 단계, 이미지 1/1
    • Remove the yellow and green wires from the face plate.

    • Note which side the yellow and green wires connect to.

  3. Shure SM58 Capsule Installation Replacement: 3 단계, 이미지 1/2 Shure SM58 Capsule Installation Replacement: 3 단계, 이미지 2/2
    • Never open the microphone capsule. Attempting to open the capsule will likely result in permanent damage and make the microphone unusable.

    • Using an adjustable crescent wrench, remove the nut and washer from the face plate by twisting the nut counterclockwise.

  4. Shure SM58 Capsule Installation Replacement: 4 단계, 이미지 1/2 Shure SM58 Capsule Installation Replacement: 4 단계, 이미지 2/2
    • Slide the face plate over the connector.

  5. Shure SM58 Capsule Installation Replacement, Capsule Installation: 5 단계, 이미지 1/2 Shure SM58 Capsule Installation Replacement, Capsule Installation: 5 단계, 이미지 2/2
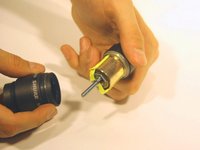
    • Using an adjustable wrench, remove the nut and the washer behind the face plate by twisting the nut counterclockwise.

  6. Shure SM58 Capsule Installation Replacement: 6 단계, 이미지 1/1
    • Hold the body of the microphone, right below the grille, in one hand. Using your other hand, rotate the grille clockwise.

  7. Shure SM58 Capsule Installation Replacement: 7 단계, 이미지 1/1
    • Slide the grille off the top of the microphone once it is all the way loosened.

  8. Shure SM58 Capsule Installation Replacement: 8 단계, 이미지 1/3 Shure SM58 Capsule Installation Replacement: 8 단계, 이미지 2/3 Shure SM58 Capsule Installation Replacement: 8 단계, 이미지 3/3
    • Hold the black plastic piece under the grille in one hand. In the other hand, hold the microphone collar.

    • Slowly, pull upward while twisting the black plastic piece clockwise.

    • Be careful not to scratch the copper microphone capsule. Another face plate may fall out when removing capsule.

    • Never open the microphone capsule. Attempting to repair the capsule will result in permanent damage.

결론

Once installed, reassemble the microphone following the steps in reverse.

다른 7명이 해당 안내서를 완성하였습니다.

nat coll

회원 가입일: 09/27/12

642 평판

안내서 14개 작성하였습니다

Cal Poly, Team 7-53, Forte Fall 2012 Cal Poly, Team 7-53, Forte Fall 2012 회원

CPSU-FORTE-F12S7G53

5 회원들

안내서 20개 작성하였습니다

댓글 5개

Thanks for that,

Can i just replace the capsule as seen in the last picture?

Has it to be resoldered? Where do those very fine copper wires go?

Eanoid - 답글

It's been a few years since I made the guide and no longer have any microphones nearby to examen, but if I remember correctly, there is no soldering between the capsule and the housing. I believe the housing is soldered to the rest of the body with the silver leads at the bottom left of the picture.

Daniel Berger -

Somehow the grill got really stuck and I want to replace it. It it screwed or is it as you've said - slidable?

arnold - 답글

You can unscrew just the grill.

Burke McQuinn - 답글

Hi, a bit unrelated but I accidentally twisted the black plastic piece slightly while everything was still intact. I turned it back though, did I damage the SM58 in any way?

Emje De - 답글

댓글 쓰기

조회 통계:

24 시간 전: 2

7일 전: 53

30일 전: 235

전체 시간: 39,222