이 버전에는 잘못된 편집 사항이 있을 수 있습니다. 최신 확인된 스냅샷으로 전환하십시오.
필요한 것
-
이 단계는 번역되지 않았습니다. 번역을 도와주십시오
-
Push the brass bar, located in the top of the device, out of the carbonating block.
-
-
이 단계는 번역되지 않았습니다. 번역을 도와주십시오
-
Slide the yellow battery cover up and away to remove it from the device.
-
-
이 단계는 번역되지 않았습니다. 번역을 도와주십시오
-
Lift the top of the plastic arm with the spudger and remove it on both sides.
-
-
이 단계는 번역되지 않았습니다. 번역을 도와주십시오
-
Remove the plastic piece, located near the front of the carbonating block, from both sides of the device using a plastic opening tool or nylon spudger.
-
-
-
이 단계는 번역되지 않았습니다. 번역을 도와주십시오
-
Pull the loader tab cover down and away from the rest of the carbonating block.
-
-
이 단계는 번역되지 않았습니다. 번역을 도와주십시오
-
Unhook the four clips on the top of the carbonating block and remove the plastic cover.
-
-
이 단계는 번역되지 않았습니다. 번역을 도와주십시오
-
Lift the clips located on both sides with the plastic spudger. Slide the front cover off.
-
-
이 단계는 번역되지 않았습니다. 번역을 도와주십시오
-
Unhook the silver spring arms on both sides of the device by pushing down.
-
-
이 단계는 번역되지 않았습니다. 번역을 도와주십시오
-
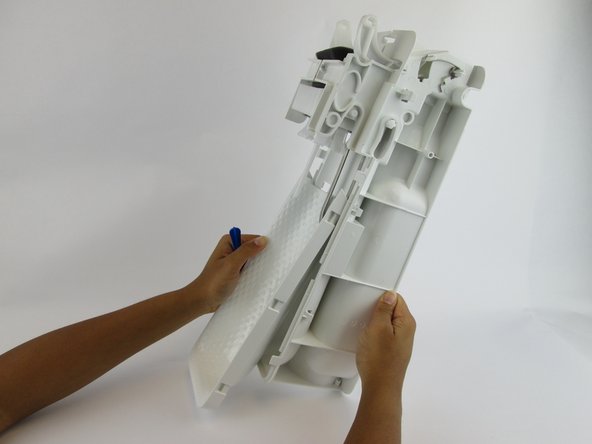
Grip the right and left sides of the device and pull it into two identical halves.
-
-
이 단계는 번역되지 않았습니다. 번역을 도와주십시오
-
Pull the foam pad up and remove it from the front side of the carbonation component.
-
-
이 단계는 번역되지 않았습니다. 번역을 도와주십시오
-
Remove the six 17.7 mm screws from the underside of the loader tab piece.
-


다른 한 분이 해당 안내서를 완성하였습니다.
팀

USF Tampa, Team S1-G4, Leahy Spring 2017 USF Tampa, Team S1-G4, Leahy Spring 2017 회원
USFT-LEAHY-S17S1G4
3 회원들
안내서 40개 작성하였습니다
댓글 2개
Bonjour j'ai une pièce à l'intérieur dont je ne retrouve pas du tout la position au remontage.
Pouvez vous m'aider ?
De quelle partie s'agit-il, peux-tu prendre une photo ?