주요 콘텐츠로 건너뛰기

Solio Rocsta Internal Components Replacement

보관된 가이드
해당 안내서는 단지 역사적인 목적으로 보관됩니다. 최신 버전 안내서를 사용하여 수리 하십시오.

필요한 것

  1. Solio Rocsta Internal Components Replacement, Internal Components: 1 단계, 이미지 1/1
    • Remove the three 7mm Torx T7 screws.

  2. Solio Rocsta Internal Components Replacement: 2 단계, 이미지 1/3 Solio Rocsta Internal Components Replacement: 2 단계, 이미지 2/3 Solio Rocsta Internal Components Replacement: 2 단계, 이미지 3/3
    • Insert the flat end of the spudger between the top panel and the body.

    • Use the spudger as a lever to carefully pry apart the two panels.

    • As you pry, take care not to break the small orange clip holding the top to the body.

    • Lift the panel above and away to disconnect the panel from the body.

    • Be careful when lifting because you could break the wiring connecting the motherboard to the panel.

  3. Solio Rocsta Internal Components Replacement: 3 단계, 이미지 1/2 Solio Rocsta Internal Components Replacement: 3 단계, 이미지 2/2
    • Lift the panel off the body and set it next to the device.

    • Remember to use caution when lifting because you could break the wiring connecting the motherboard to the panel.

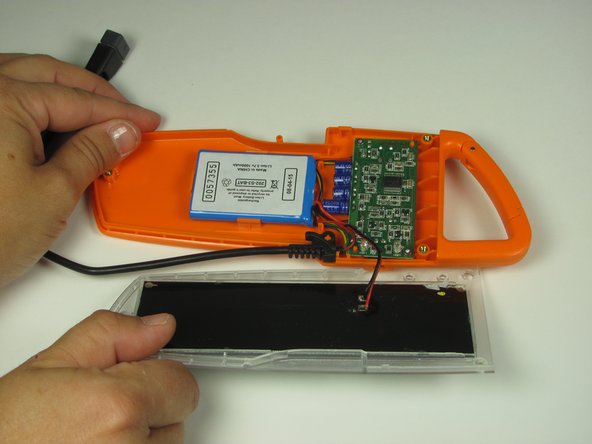
  4. Solio Rocsta Internal Components Replacement: 4 단계, 이미지 1/1
    • Remove the two 6mm Torx T6 screws from the motherboard.

  5. Solio Rocsta Internal Components Replacement: 5 단계, 이미지 1/2 Solio Rocsta Internal Components Replacement: 5 단계, 이미지 2/2
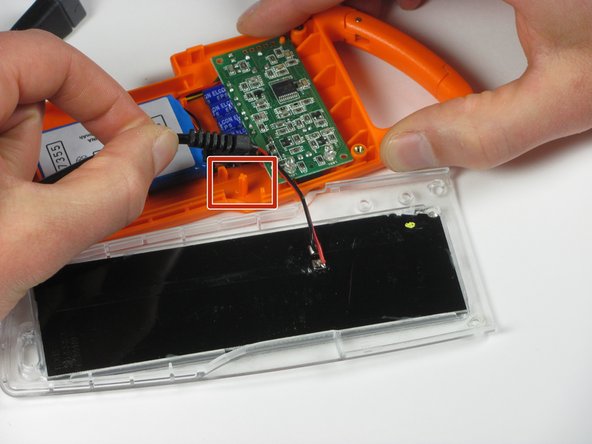
    • Lift the end of the USB cord out of the body.

    • The cord fits over an orange peg.

  6. Solio Rocsta Internal Components Replacement: 6 단계, 이미지 1/3 Solio Rocsta Internal Components Replacement: 6 단계, 이미지 2/3 Solio Rocsta Internal Components Replacement: 6 단계, 이미지 3/3
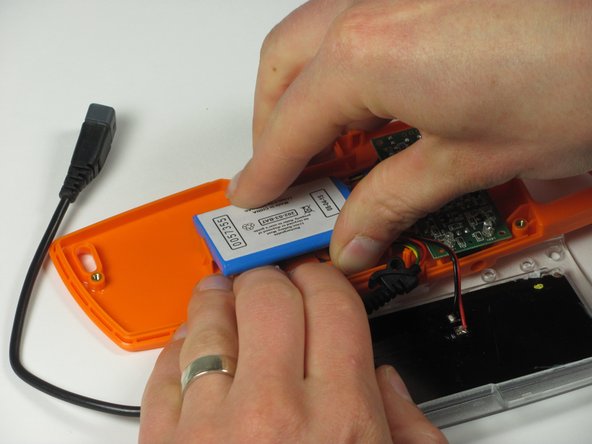
    • Lift up the battery with your fingers or with the flat end of the spudger.

    • Be prepared to use force because the battery is adhered to the body.

    • Do not try to remove the battery completely because the wiring connects to the motherboard.

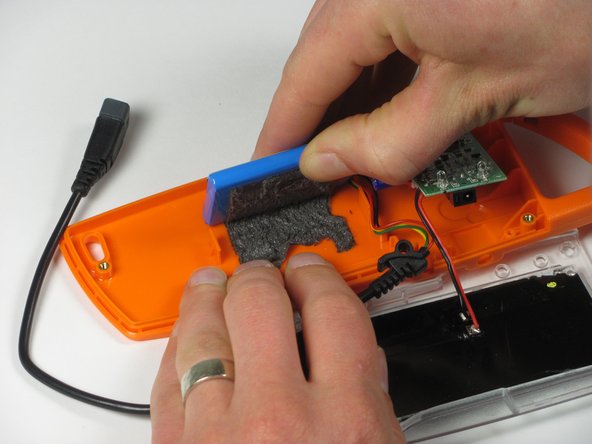
  7. Solio Rocsta Internal Components Replacement: 7 단계, 이미지 1/2 Solio Rocsta Internal Components Replacement: 7 단계, 이미지 2/2
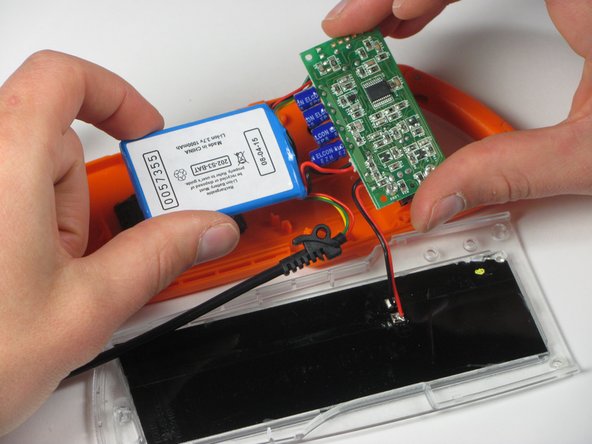
    • Remove the battery and the motherboard from the body.

결론

To reassemble your device, follow these instructions in reverse order.

다른 한 분이 해당 안내서를 완성하였습니다.

Aimee Whiteside

회원 가입일: 05/21/15

1 평판

안내서 1개 작성함

iFixit, Team 1-1, Goldberg SU 2015 iFixit, Team 1-1, Goldberg SU 2015 회원

FIX-GOLDBERG-SU15S1G1

3 회원들

안내서 1개 작성하였습니다

댓글 0개

댓글 쓰기

조회 통계:

24 시간 전: 0

7일 전: 0

30일 전: 0

전체 시간: 58