주요 콘텐츠로 건너뛰기

Sonos Play 3 Front Speaker Panel Replacement

단지 전제 조건
이 안내서는 다른 가이드의 선행 작업으로 사용하기 위한 것입니다. 그 자체로는 불완전합니다.

필요한 것

  1. Sonos Play 3 Front Speaker Panel Replacement, Front Speaker Panel: 1 단계, 이미지 1/2 Sonos Play 3 Front Speaker Panel Replacement, Front Speaker Panel: 1 단계, 이미지 2/2
    • Unscrew eight 1.5 inch Phillips #2 screws attaching the front speaker panel to the box.

    • Unscrew the single 1 inch Phillips #2 screw located on the left side of the panel. This may be hidden beneath the warranty void sticker that you'll want to remove.

    • Unscrew the single 3/4 inch Phillips #2 screw, which is the last thing holding the front panel to the casing.

  2. Sonos Play 3 Front Speaker Panel Replacement: 2 단계, 이미지 1/3 Sonos Play 3 Front Speaker Panel Replacement: 2 단계, 이미지 2/3 Sonos Play 3 Front Speaker Panel Replacement: 2 단계, 이미지 3/3
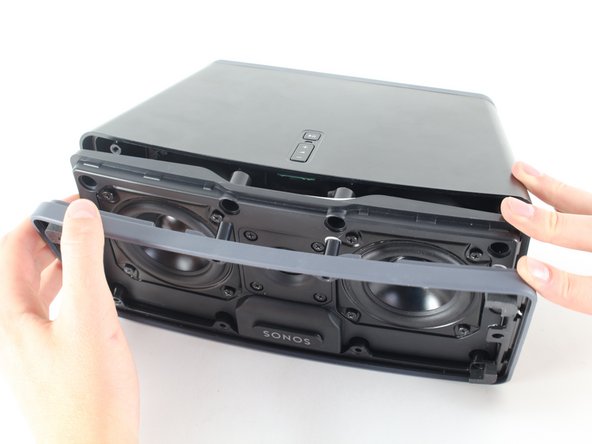
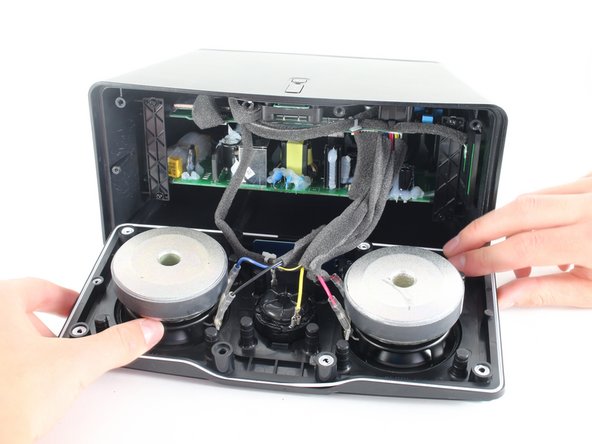
    • Remove the front panel carefully.

    • Note that there are two layers to the panel that should stay in their original order.

  3. Sonos Play 3 Front Speaker Panel Replacement: 3 단계, 이미지 1/2 Sonos Play 3 Front Speaker Panel Replacement: 3 단계, 이미지 2/2
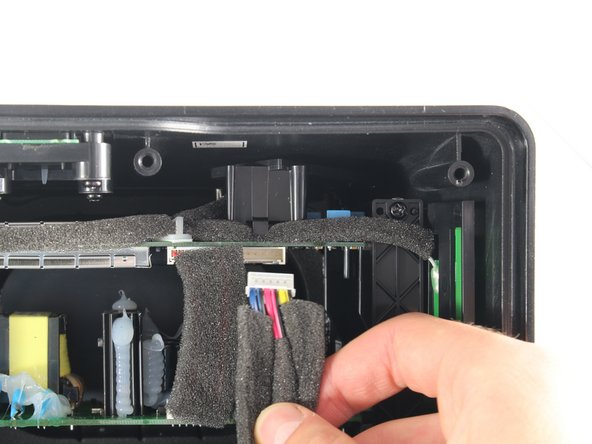
    • Disconnect the front panel from the motherboard by gently reaching in and pushing the tab underneath the wire connector and pulling towards you.

  4. Sonos Play 3 Front Speaker Panel Replacement: 4 단계, 이미지 1/2 Sonos Play 3 Front Speaker Panel Replacement: 4 단계, 이미지 2/2
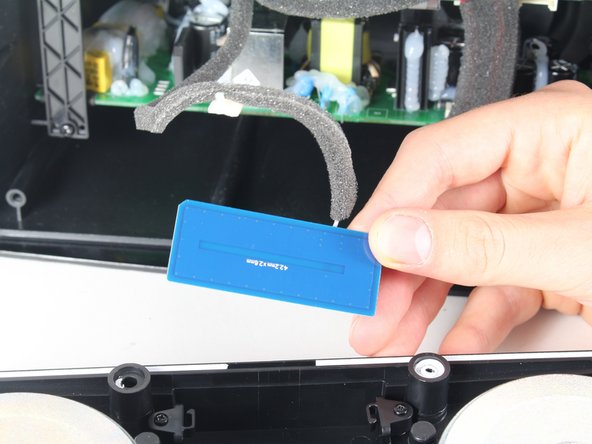
    • Gently remove the wireless card located at the bottom of the front speaker panel by pulling up and out with your index finger and thumb.

결론

To reassemble your device, follow these instructions in reverse order.

다른 한 분이 해당 안내서를 완성하였습니다.

Christina Santini

회원 가입일: 04/14/16

1,350 평판

안내서 7개 작성하였습니다

Cal Poly, Team 25-6, Maness Spring 2016 Cal Poly, Team 25-6, Maness Spring 2016 회원

CPSU-MANESS-S16S25G6

4 회원들

안내서 14개 작성하였습니다

댓글 0개

댓글 쓰기

조회 통계:

24 시간 전: 0

7일 전: 0

30일 전: 0

전체 시간: 85