이 버전에는 잘못된 편집 사항이 있을 수 있습니다. 최신 확인된 스냅샷으로 전환하십시오.
필요한 것
-
이 단계는 번역되지 않았습니다. 번역을 도와주십시오
-
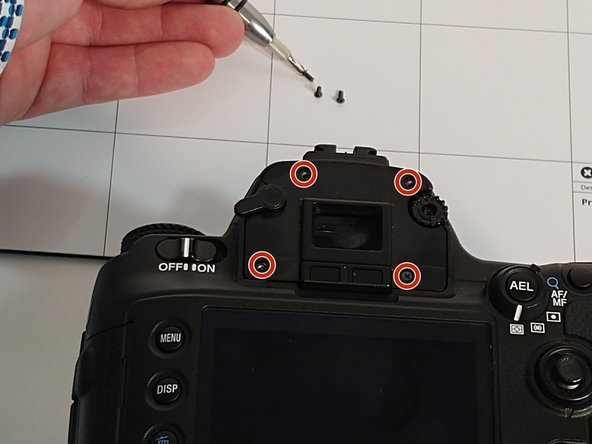
Find the rubber viewfinder cover on the upper rear of the camera, above the view screen.
-
-
-
이 단계는 번역되지 않았습니다. 번역을 도와주십시오
-
Once the rubber piece has been removed, inspect the area.
-
If everything looks fine, go ahead and slide the new rubber piece on the same way the old piece was slipped off.
-
-
이 단계는 번역되지 않았습니다. 번역을 도와주십시오
-
Grasp the side of the window with either a set of tweezers or your fingers. Lift upwards and slightly towards the base of the camera.
-


팀

University of Memphis, Team S2-G4, Kim Spring 2018 University of Memphis, Team S2-G4, Kim Spring 2018 회원
UM-KIM-S18S2G4
3 회원들
안내서 10개 작성하였습니다