주요 콘텐츠로 건너뛰기

Sony Bloggie 3D Player USB Drive Replacement

필요한 것

  1. Sony Bloggie 3D Player USB Drive Replacement, Front Cover: 1 단계, 이미지 1/1
    • Remove the two 2.5mm Phillips #00 screws using the Philips #00 screwdriver.

  2. Sony Bloggie 3D Player USB Drive Replacement: 2 단계, 이미지 1/2 Sony Bloggie 3D Player USB Drive Replacement: 2 단계, 이미지 2/2
    • Use a plastic opening tool to pry the cover open.

    • After the the cover is partly open as shown, remove the cover with your hands.

  3. Sony Bloggie 3D Player USB Drive Replacement, Back Cover: 3 단계, 이미지 1/2 Sony Bloggie 3D Player USB Drive Replacement, Back Cover: 3 단계, 이미지 2/2
    • Using your hand, or a pair of tweezers, remove the ZIF connector by gently pulling it out of the dock on the circuit board.

  4. Sony Bloggie 3D Player USB Drive Replacement: 4 단계, 이미지 1/2 Sony Bloggie 3D Player USB Drive Replacement: 4 단계, 이미지 2/2
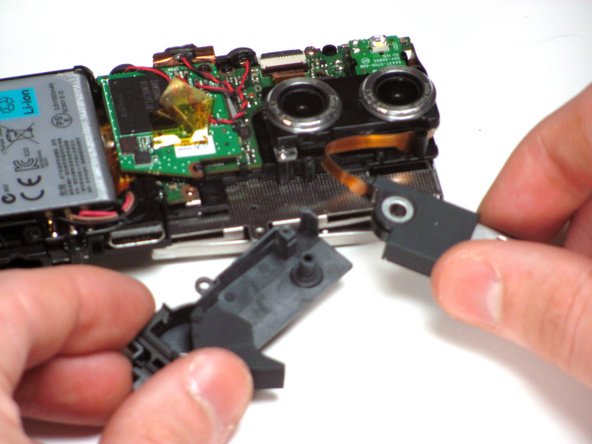
    • Use a plastic opening tool to loosen the back cover off the device.

    • Once the back cover is loose, remove it gently by hand.

  5. Sony Bloggie 3D Player USB Drive Replacement, USB Drive: 5 단계, 이미지 1/2 Sony Bloggie 3D Player USB Drive Replacement, USB Drive: 5 단계, 이미지 2/2
    • Once the back cover is removed, by using the opening tool, remove the following screws using a Phillips #00 screwdriver.

    • Two 4.0mm Phillips #00 screws

    • One 8.0mm Phillips #00 screw

    • One 9.5mm Phillips #00 screw

  6. Sony Bloggie 3D Player USB Drive Replacement: 6 단계, 이미지 1/2 Sony Bloggie 3D Player USB Drive Replacement: 6 단계, 이미지 2/2
    • Using a spudger, remove the clips of the metal casing from each end of the USB drive.

  7. Sony Bloggie 3D Player USB Drive Replacement: 7 단계, 이미지 1/2 Sony Bloggie 3D Player USB Drive Replacement: 7 단계, 이미지 2/2
    • Carefully lift the USB drive off of the peg that it is attached to.

  8. Sony Bloggie 3D Player USB Drive Replacement: 8 단계, 이미지 1/1
    • Now that the USB component is on its own, untangle the ribbon from inside the device.

  9. Sony Bloggie 3D Player USB Drive Replacement: 9 단계, 이미지 1/1
    • Now remove the ZIF connector from the device using a pair of tweezers.

결론

To reassemble your device, follow these instructions in reverse order.

Craig Sweet

회원 가입일: 01/11/13

1 평판

안내서 1개 작성함

Cal Poly, Team 7-12, Maness Winter 2013 Cal Poly, Team 7-12, Maness Winter 2013 회원

CPSU-MANESS-W13S7G12

5 회원들

안내서 12개 작성하였습니다

댓글 0개

댓글 쓰기

조회 통계:

24 시간 전: 0

7일 전: 0

30일 전: 1

전체 시간: 486