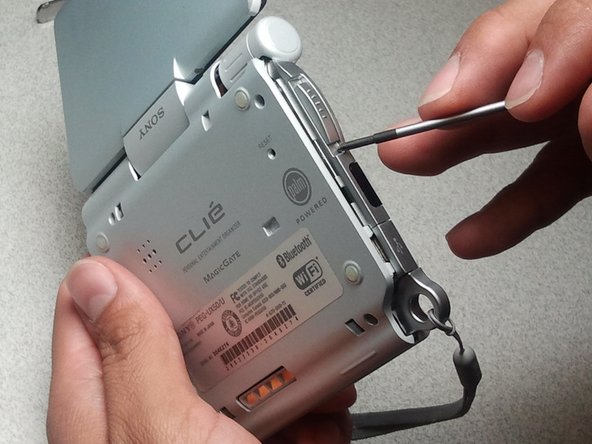
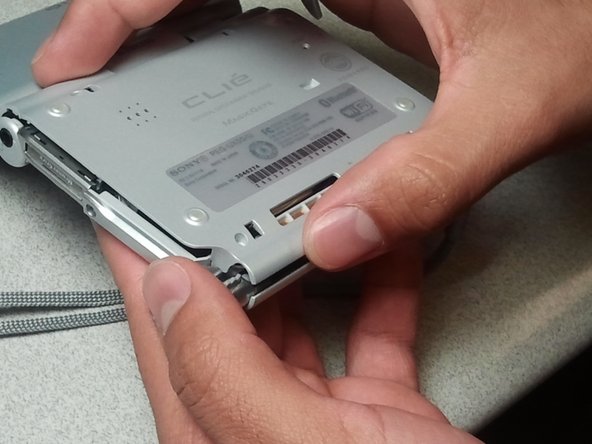
주요 콘텐츠로 건너뛰기
수리 커뮤니티 가입 - 계정 만들기

Sony Clie PEG-UX50 Rear Case Replacement

필요한 것

  1. Sony Clie PEG-UX50 Rear Case Replacement, Rear Cover Case: 1 단계, 이미지 3개 중 1개 Sony Clie PEG-UX50 Rear Case Replacement, Rear Cover Case: 1 단계, 이미지 3개 중 2개 Sony Clie PEG-UX50 Rear Case Replacement, Rear Cover Case: 1 단계, 이미지 3개 중 3개
    • Use the Phillips #1 screwdriver to remove the four screws from the back of the rear cover.

    • Use the Phillips #1 screwdriver to remove the screw on the right side of the rear cover.

    • Use the Phillips #1 screwdriver to remove the screw on the top of the rear cover.

  2. Sony Clie PEG-UX50 Rear Case Replacement: 2 단계, 이미지 2개 중 1개 Sony Clie PEG-UX50 Rear Case Replacement: 2 단계, 이미지 2개 중 2개
    • Gently pry the rear cover case off to remove both the USB port cover and the hold switch.

  3. Sony Clie PEG-UX50 Rear Case Replacement: 3 단계, 이미지 2개 중 1개 Sony Clie PEG-UX50 Rear Case Replacement: 3 단계, 이미지 2개 중 2개
    • Remove the side cover.

    • Slowly pull on the rear cover case to separate it from the rest of the device. The case should not come off completely.

    • To avoid wire breakage, do not pull hard on the speaker connection wire.

  4. Sony Clie PEG-UX50 Rear Case Replacement: 4 단계, 이미지 1개 중 1개
    • Gently remove the speaker wire from the device.

    • The rear cover case should now be completely separate from the device.

결론

To reassemble your device, follow these instructions in reverse order.

다른 한 분이 해당 안내서를 완성하였습니다.

작성자

8다른 기여자 명과 함께

Christopher M Garcia

회원 가입일: 04/28/11

26 평판

안내서 1개를 작성함

CSU Los Angeles, Team 1-4, Nelson Spring 2011 CSU Los Angeles, Team 1-4, Nelson Spring 2011 회원

CSULA-NELSON-S11S1G4

5 회원들

안내서 2개를 작성함

0가이드 댓글

댓글 쓰기

조회 통계:

지난 24시간: 3

지난 7일: 8

지난 30일: 34

전체 시간: 4,540