주요 콘텐츠로 건너뛰기

Sony Clie PEG-UX50 Tilt Screen Replacement

필요한 것

  1. Sony Clie PEG-UX50 Tilt Screen Replacement, Tilt Screen: 1 단계, 이미지 1/3 Sony Clie PEG-UX50 Tilt Screen Replacement, Tilt Screen: 1 단계, 이미지 2/3 Sony Clie PEG-UX50 Tilt Screen Replacement, Tilt Screen: 1 단계, 이미지 3/3
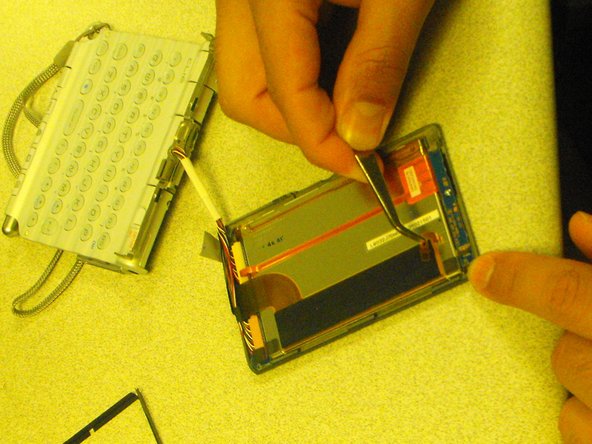
    • Take off the screws located on the two sides of the tilt screen.

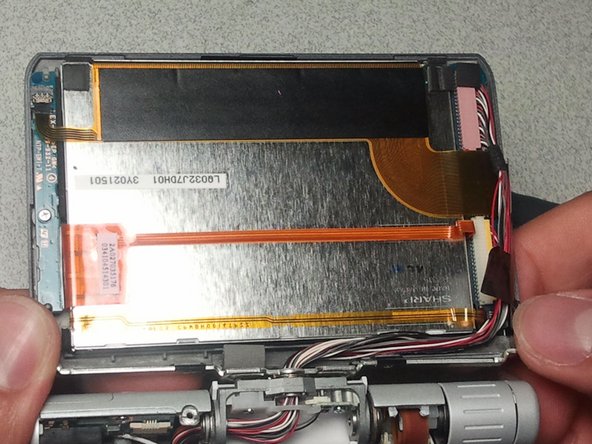
    • Unscrew the screw located at the tilt base of the screen.

  2. Sony Clie PEG-UX50 Tilt Screen Replacement: 2 단계, 이미지 1/3 Sony Clie PEG-UX50 Tilt Screen Replacement: 2 단계, 이미지 2/3 Sony Clie PEG-UX50 Tilt Screen Replacement: 2 단계, 이미지 3/3
    • Gently remove the back plate of the tilt screen by sliding it upward.

    • With caution, lift the wires from the track in the back plate.

  3. Sony Clie PEG-UX50 Tilt Screen Replacement: 3 단계, 이미지 1/2 Sony Clie PEG-UX50 Tilt Screen Replacement: 3 단계, 이미지 2/2
    • Disconnect the thin USB cable attached to the Integrated Circuit.

  4. Sony Clie PEG-UX50 Tilt Screen Replacement: 4 단계, 이미지 1/2 Sony Clie PEG-UX50 Tilt Screen Replacement: 4 단계, 이미지 2/2
    • Detach the plastic black frame from in between the plate and the LCD.

    • Do not disconnect the display from the board yet.

  5. Sony Clie PEG-UX50 Tilt Screen Replacement: 5 단계, 이미지 1/1
    • Disconnect the thin connector from the face plate using tweezers.

  6. Sony Clie PEG-UX50 Tilt Screen Replacement: 6 단계, 이미지 1/1
    • Quickly release and disconnect the thick cable with your hands.

결론

Follow these instructions in reverse order to reassemble your device.

Rishad R Rai

회원 가입일: 04/28/11

1 평판

안내서 1개 작성함

CSU Los Angeles, Team 1-4, Nelson Spring 2011 CSU Los Angeles, Team 1-4, Nelson Spring 2011 회원

CSULA-NELSON-S11S1G4

5 회원들

안내서 2개 작성하였습니다

댓글 0개

댓글 쓰기

조회 통계:

24 시간 전: 0

7일 전: 3

30일 전: 10

전체 시간: 2,727