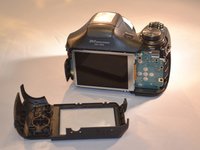
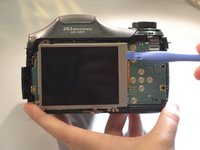
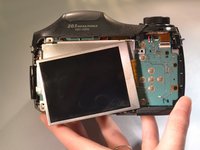
주요 콘텐츠로 건너뛰기

Sony Cyber-shot DSC-H200 LCD Screen Replacement

필요한 것

  1. Sony Cyber-shot DSC-H200 LCD Screen Replacement, LCD Screen: 1 단계, 이미지 1/3 Sony Cyber-shot DSC-H200 LCD Screen Replacement, LCD Screen: 1 단계, 이미지 2/3 Sony Cyber-shot DSC-H200 LCD Screen Replacement, LCD Screen: 1 단계, 이미지 3/3
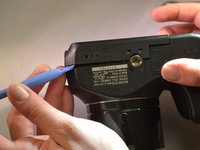
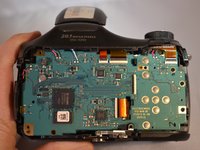
    • Using a screwdriver, remove the five 6mm screws located on the back panel.

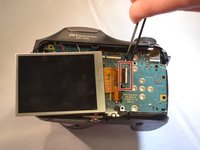
    • Using a screwdriver, remove the two 3mm screws located on the back panel.

  2. Sony Cyber-shot DSC-H200 LCD Screen Replacement: 2 단계, 이미지 1/1
    • Using a screwdriver, remove one 6mm screw on the front panel.

    • Using a screwdriver, remove two 3mm screws on the front panel.

  3. Sony Cyber-shot DSC-H200 LCD Screen Replacement: 3 단계, 이미지 1/1
    • Open the SD Door, unscrew and remove the single 6mm screw closest to "PUSH IN/OUT" under the SD card slot.

  4. Sony Cyber-shot DSC-H200 LCD Screen Replacement: 4 단계, 이미지 1/2 Sony Cyber-shot DSC-H200 LCD Screen Replacement: 4 단계, 이미지 2/2
    • Remove the back panel (the LCD and motherboard are exposed).

  5. Sony Cyber-shot DSC-H200 LCD Screen Replacement: 5 단계, 이미지 1/1
    • Using a screwdriver, remove the three 4mm screws that attach the LCD to the camera motherboard. (The LCD is contained in a holding plate, attached to the motherboard with a ribbon cable.)

  6. Sony Cyber-shot DSC-H200 LCD Screen Replacement: 6 단계, 이미지 1/1
    • Using a screwdriver, remove the single 4mm screw at the bottom of the holding plate.

  7. Sony Cyber-shot DSC-H200 LCD Screen Replacement: 7 단계, 이미지 1/2 Sony Cyber-shot DSC-H200 LCD Screen Replacement: 7 단계, 이미지 2/2
    • Lift the holding plate away from the motherboard and set aside.

  8. Sony Cyber-shot DSC-H200 LCD Screen Replacement: 8 단계, 이미지 1/1
    • Using tweezers, open the LCD ribbon port by lifting the black hinge. (The LCD ribbon cable will detach.)

  9. Sony Cyber-shot DSC-H200 LCD Screen Replacement: 9 단계, 이미지 1/3 Sony Cyber-shot DSC-H200 LCD Screen Replacement: 9 단계, 이미지 2/3 Sony Cyber-shot DSC-H200 LCD Screen Replacement: 9 단계, 이미지 3/3
    • Using tweezers, remove the LCD with the ribbon cable and set aside.

결론

To reassemble your device, follow these instructions in reverse order.

Elizabeth Morrison

회원 가입일: 04/08/15

287 평판

안내서 2개 작성하였습니다

댓글 한 개

Where can you purchase a new replacement monitor?

Butch Sullivan - 답글

댓글 쓰기

조회 통계:

24 시간 전: 0

7일 전: 3

30일 전: 13

전체 시간: 2,462