주요 콘텐츠로 건너뛰기

Sony Cyber-shot DSC-H300 Screen Replacement

필요한 것

  1. Sony Cyber-shot DSC-H300 Screen Replacement, Removing screws: 1 단계, 이미지 2개 중 1개 Sony Cyber-shot DSC-H300 Screen Replacement, Removing screws: 1 단계, 이미지 2개 중 2개
    • Remove the four 6mm Phillips #00 screws.

  2. Sony Cyber-shot DSC-H300 Screen Replacement, Removing screws: 2 단계, 이미지 2개 중 1개 Sony Cyber-shot DSC-H300 Screen Replacement, Removing screws: 2 단계, 이미지 2개 중 2개
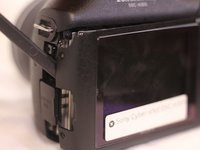
    • Remove the two 6mm Phillips #00 screws.

    • Remove the two 3mm Phillips #00 screws.

  3. Sony Cyber-shot DSC-H300 Screen Replacement: 3 단계, 이미지 3개 중 1개 Sony Cyber-shot DSC-H300 Screen Replacement: 3 단계, 이미지 3개 중 2개 Sony Cyber-shot DSC-H300 Screen Replacement: 3 단계, 이미지 3개 중 3개
    • Use the flat end of a plastic spudger to pry apart the rear cover from the body of the camera.

    • Be careful not to damage the three plastic clips securing the top edge of the rear cover.

  4. Sony Cyber-shot DSC-H300 Screen Replacement, Screen: 4 단계, 이미지 1개 중 1개
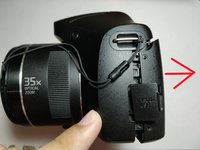
    • Remove the two 6 mm Phillips #00 screws securing the left side of the metal frame.

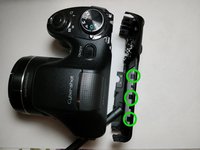
    • Gently pull the metal frame away from the screen.

    • Lift the screen with the spudger and flip it to the right.

  5. Sony Cyber-shot DSC-H300 Screen Replacement: 5 단계, 이미지 1개 중 1개
    • Remove the four 6mm Phillips #00 black screws.

    • Lift the metal plate away from the board.

  6. Sony Cyber-shot DSC-H300 Screen Replacement: 6 단계, 이미지 1개 중 1개
    • Disconnect the LCD cable.

결론

To reassemble your device, follow these instructions in reverse order.

다른 3명이 해당 안내서를 완성하였습니다.

작성자

5다른 기여자 명과 함께

Zachary Meyer

회원 가입일: 02/14/18

479 평판

안내서 3개를 작성함

USF Tampa, Team S1-G6, Nance Spring 2018 USF Tampa, Team S1-G6, Nance Spring 2018 회원

USFT-NANCE-S18S1G6

3 회원들

안내서 10개를 작성함

1가이드 댓글

where can i find the rear screen for sony dsc-h300

Michael Ramos - 답글

댓글 쓰기

조회 통계:

지난 24시간: 0

지난 7일: 13

지난 30일: 95

전체 시간: 2,621