주요 콘텐츠로 건너뛰기

Sony Cyber-shot DSC-HX80 Viewfinder Replacement

필요한 것

  1. Sony Cyber-shot DSC-HX80 Viewfinder Replacement, Viewfinder: 1 단계, 이미지 1/1
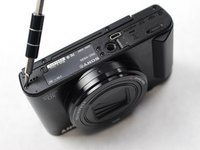
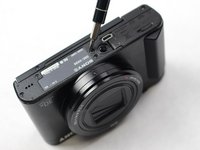
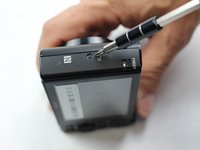
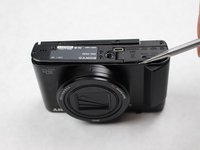
    • Before disassembling any part of the camera, turn off power by pressing down on the ON/OFF button. The ON/OFF button is located on top of the camera.

  2. Sony Cyber-shot DSC-HX80 Viewfinder Replacement: 2 단계, 이미지 1/2 Sony Cyber-shot DSC-HX80 Viewfinder Replacement: 2 단계, 이미지 2/2
    • Open the compartment located at the bottom of the camera. Slide the LOCK/OPEN switch to the OPEN side. Locate the small blue tab on the side. Pull it in direction away from the battery. Remove the battery and set it aside.

  3. Sony Cyber-shot DSC-HX80 Viewfinder Replacement: 3 단계, 이미지 1/2 Sony Cyber-shot DSC-HX80 Viewfinder Replacement: 3 단계, 이미지 2/2
    • Use the PH000 Phillips head screwdriver (from iFixit tool kit) to take the screws out. Begin unscrewing from the bottom of camera. At the end of this step there will be a total of five black 0.4 mm Phillips screws. Place them on a magnetic mat or a plastic bag.

  4. Sony Cyber-shot DSC-HX80 Viewfinder Replacement: 4 단계, 이미지 1/1
    • Do not remove the screws holding the LCD screen together.

  5. Sony Cyber-shot DSC-HX80 Viewfinder Replacement: 5 단계, 이미지 1/3 Sony Cyber-shot DSC-HX80 Viewfinder Replacement: 5 단계, 이미지 2/3 Sony Cyber-shot DSC-HX80 Viewfinder Replacement: 5 단계, 이미지 3/3
    • Keep working alongside the edge of camera until no screws are left in place. In addition to the five screws from the bottom, there will be a total of three more 0.4 mm black Phillips screws. Place them on the magnetic mat or plastic bag.

  6. Sony Cyber-shot DSC-HX80 Viewfinder Replacement: 6 단계, 이미지 1/3 Sony Cyber-shot DSC-HX80 Viewfinder Replacement: 6 단계, 이미지 2/3 Sony Cyber-shot DSC-HX80 Viewfinder Replacement: 6 단계, 이미지 3/3
    • Flip LCD screen upwards.

    • Use the PH000 Phillips head screwdriver to remove screws located under the LDC screen. For this step there will be an additional three 0.3 mm black Phillips screws. Place them on magnetic mat or plastic bag.

  7. Sony Cyber-shot DSC-HX80 Viewfinder Replacement: 7 단계, 이미지 1/3 Sony Cyber-shot DSC-HX80 Viewfinder Replacement: 7 단계, 이미지 2/3 Sony Cyber-shot DSC-HX80 Viewfinder Replacement: 7 단계, 이미지 3/3
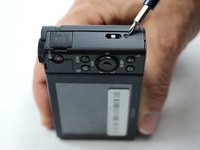
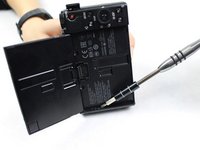
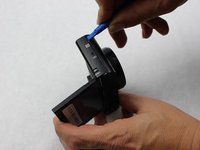
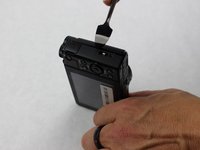
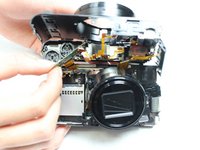
    • Use the plastic opening tools included in the iFixit tool kit first. If the shell/parts do not detach from each other, use metal spudger (from iFixit tool kit) to loosen/separate the plastic shell of the camera. Keep in mind there may be more screws holding parts together. Work delicately and separate sides evenly.

  8. Sony Cyber-shot DSC-HX80 Viewfinder Replacement: 8 단계, 이미지 1/1
    • After loosening the plastic edges of the camera, gently pull the LCD screen side upwards.

  9. Sony Cyber-shot DSC-HX80 Viewfinder Replacement: 9 단계, 이미지 1/2 Sony Cyber-shot DSC-HX80 Viewfinder Replacement: 9 단계, 이미지 2/2
    • Locate the two silver screws that hold the top piece in place.

    • Use the PH000 Phillips head screwdriver to remove screws. Place the two 0.3 mm silver Phillips screws on magnetic mat or plastic bag.

  10. Sony Cyber-shot DSC-HX80 Viewfinder Replacement: 10 단계, 이미지 1/1
    • Use metal spudger to detach top part off the rest of the camera. Be extremely careful as there is a thin golden film/plastic ribbon holding the top piece to the rest of the camera.

  11. Sony Cyber-shot DSC-HX80 Viewfinder Replacement: 11 단계, 이미지 1/1
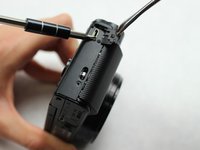
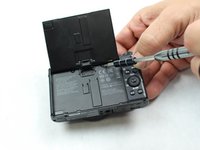
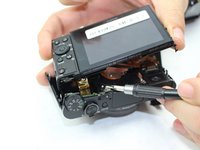
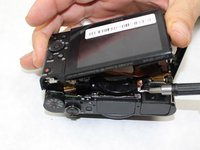
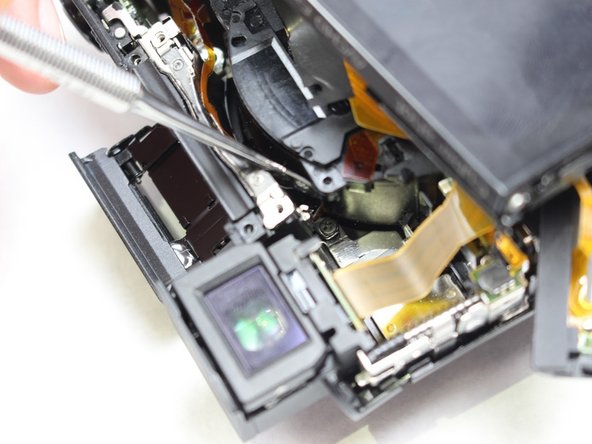
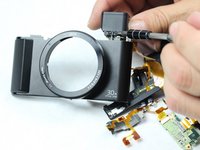
    • Look for the screws located on the circuit board. These screws are what allow the thin golden film/plastic ribbon to connect the top piece to the rest of the camera.

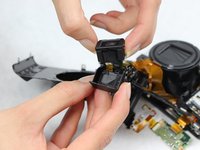
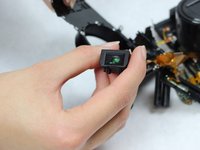
    • Remove circuit board screws by using the PH000 Phillips head screwdriver. Place the two 0.4 mm silver Phillips screws on magnetic mat or plastic bag.

  12. Sony Cyber-shot DSC-HX80 Viewfinder Replacement: 12 단계, 이미지 1/2 Sony Cyber-shot DSC-HX80 Viewfinder Replacement: 12 단계, 이미지 2/2
    • Gently pull the circuit board off the top piece of the camera. The top piece will be detached from the rest of the camera. Removing the top of the camera will make it easier to access the viewfinder.

  13. Sony Cyber-shot DSC-HX80 Viewfinder Replacement: 13 단계, 이미지 1/3 Sony Cyber-shot DSC-HX80 Viewfinder Replacement: 13 단계, 이미지 2/3 Sony Cyber-shot DSC-HX80 Viewfinder Replacement: 13 단계, 이미지 3/3
    • Locate the three 0.3 mm black Phillips screws around the viewfinder.

    • Remove screws by using the PH000 Phillips head screwdriver. Place the screws on magnetic mat or plastic bag.

  14. Sony Cyber-shot DSC-HX80 Viewfinder Replacement: 14 단계, 이미지 1/1
    • Find one additional 0.3 mm black Phillips screw located at the bottom of the viewfinder. This screw attaches the circuit board to the viewfinder.

    • Remove the screw with a PH000 Phillips head screwdriver. Place the screw on magnetic mat or plastic bag.

  15. Sony Cyber-shot DSC-HX80 Viewfinder Replacement: 15 단계, 이미지 1/1
    • Gently detach circuit board from viewfinder.

  16. Sony Cyber-shot DSC-HX80 Viewfinder Replacement: 16 단계, 이미지 1/1
    • After removing circuit board, find two 0.3 mm black Phillips screws located at the bottom of viewfinder. Remove the screws with PH000 Phillips head screwdriver. Place the screws on magnetic mat or plastic bag.

  17. Sony Cyber-shot DSC-HX80 Viewfinder Replacement: 17 단계, 이미지 1/2 Sony Cyber-shot DSC-HX80 Viewfinder Replacement: 17 단계, 이미지 2/2
    • Gently remove the viewfinder from the plastic shell.

    • Replace the viewfinder with new viewfinder piece.

결론

To reassemble your device, follow these instructions in reverse order.

Gordon Jones

회원 가입일: 10/02/18

1,057 평판

안내서 5개 작성하였습니다

Sam Houston State, Team S11-G1, Blackburne Fall 2018 Sam Houston State, Team S11-G1, Blackburne Fall 2018 회원

SHSU-BLACKBURNE-F18S11G1

4 회원들

안내서 11개 작성하였습니다

댓글 2개

Hi, what is the part number(viewfinder)?

Łukasz Szczypka - 답글

I would love it if someone could add a little piece here to show how to replace the flash unit as well.

Dick Osgood - 답글

댓글 쓰기

조회 통계:

24 시간 전: 0

7일 전: 3

30일 전: 20

전체 시간: 1,300