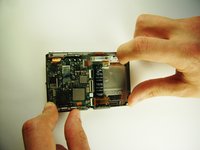
주요 콘텐츠로 건너뛰기

Sony Cyber-shot DSC-T1 LCD screen Replacement

필요한 것

  1. Sony Cyber-shot DSC-T1 LCD screen Replacement, Battery: 1 단계, 이미지 1개 중 1개
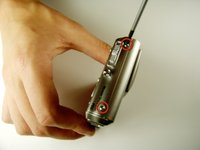
    • Locate the cover on the bottom of the camera.

    • Slide the cover towards the back of the camera.

    • Be careful—the battery can slide out on its own.

  2. Sony Cyber-shot DSC-T1 LCD screen Replacement: 2 단계, 이미지 1개 중 1개
    • Carefully remove the exposed battery.

    • If it is difficult to remove, flip over the camera and the battery will slide out.

  3. Sony Cyber-shot DSC-T1 LCD screen Replacement, Flash: 3 단계, 이미지 3개 중 1개 Sony Cyber-shot DSC-T1 LCD screen Replacement, Flash: 3 단계, 이미지 3개 중 2개 Sony Cyber-shot DSC-T1 LCD screen Replacement, Flash: 3 단계, 이미지 3개 중 3개
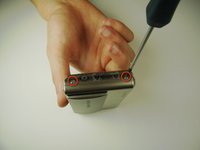
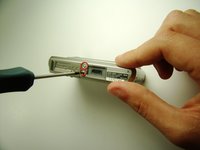
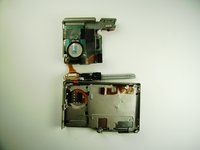
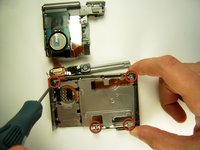
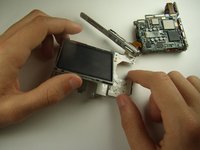
    • Locate and remove the 3mm screws on the top and sides of the camera with the size 00 screwdriver.

  4. Sony Cyber-shot DSC-T1 LCD screen Replacement: 4 단계, 이미지 1개 중 1개
    • Pull the two halves of the camera apart.

    • Place the two halves down with the insides facing you.

  5. Sony Cyber-shot DSC-T1 LCD screen Replacement: 5 단계, 이미지 1개 중 1개
    • Find the two clips holding the motherboard to the black lens box.

    • Slide the plastic opening tool in between the ribbon and the black part of the clip, then flip it. (If difficult, your fingernail can also be used)

  6. Sony Cyber-shot DSC-T1 LCD screen Replacement: 6 단계, 이미지 1개 중 1개
    • After releasing the clips, pull out black lens box.

  7. Sony Cyber-shot DSC-T1 LCD screen Replacement: 7 단계, 이미지 2개 중 1개 Sony Cyber-shot DSC-T1 LCD screen Replacement: 7 단계, 이미지 2개 중 2개
    • Use the plastic opening tool to flip the clip.

  8. Sony Cyber-shot DSC-T1 LCD screen Replacement: 8 단계, 이미지 2개 중 1개 Sony Cyber-shot DSC-T1 LCD screen Replacement: 8 단계, 이미지 2개 중 2개
    • Grab the white part and slide it to the right until it clicks.

    • This may require some force.

    • Pull out the flash.

  9. Sony Cyber-shot DSC-T1 LCD screen Replacement, LCD screen: 9 단계, 이미지 1개 중 1개
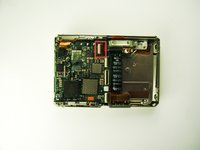
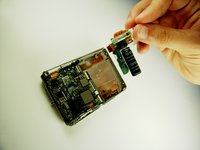
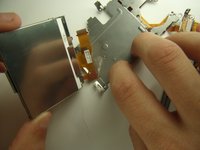
    • Use the plastic opening tool to flip the top clip that holds the ribbon to the motherboard unit.

  10. Sony Cyber-shot DSC-T1 LCD screen Replacement: 10 단계, 이미지 2개 중 1개 Sony Cyber-shot DSC-T1 LCD screen Replacement: 10 단계, 이미지 2개 중 2개
    • Flip the motherboard unit up to expose the metal plate beneath it.

    • Remove the four 3mm screws shown using the 00 screwdriver.

  11. Sony Cyber-shot DSC-T1 LCD screen Replacement: 11 단계, 이미지 1개 중 1개
    • Lift and remove the metal plate covering the LCD screen from the camera.

  12. Sony Cyber-shot DSC-T1 LCD screen Replacement: 12 단계, 이미지 3개 중 1개 Sony Cyber-shot DSC-T1 LCD screen Replacement: 12 단계, 이미지 3개 중 2개 Sony Cyber-shot DSC-T1 LCD screen Replacement: 12 단계, 이미지 3개 중 3개
    • Flip the LCD over to the other side of the camera.

    • Peel the tape connecting the LCD to the camera.

    • Remove LCD screen

결론

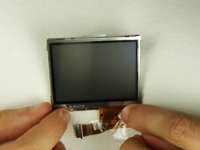
To reassemble your device, follow these instructions in reverse order.

다른 2명이 해당 안내서를 완성하였습니다.

작성자

6다른 기여자 명과 함께

Paul Elrich

회원 가입일: 04/12/12

45 평판

안내서 2개를 작성함

Cal Poly, Team 7-35, Maness Spring 2012 Cal Poly, Team 7-35, Maness Spring 2012 회원

CPSU-MANESS-S12S7G35

4 회원들

안내서 3개를 작성함

0가이드 댓글

댓글 쓰기

조회 통계:

지난 24시간: 0

지난 7일: 5

지난 30일: 53

전체 시간: 4,244