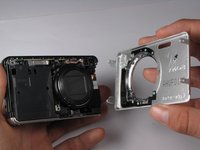
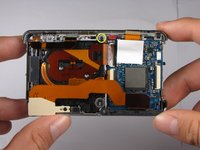
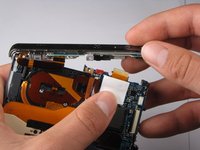
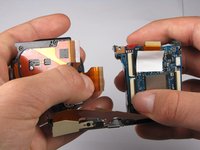
주요 콘텐츠로 건너뛰기

Sony Cyber-shot DSC-W290 Lens Assembly Replacement

필요한 것

  1. Sony Cyber-shot DSC-W290 Lens Assembly Replacement, Battery: 1 단계, 이미지 1개 중 1개
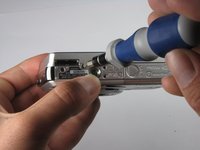
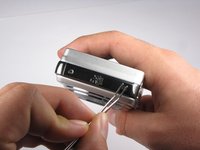
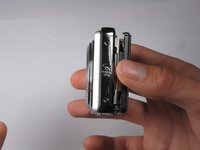
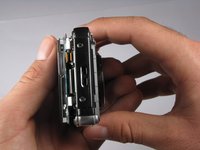
    • Find the hatch labeled "open" on the left side of the bottom of the camera.

    • Slide the hatch in the direction that the arrow is pointing. The hatch will open outward on its own.

  2. Sony Cyber-shot DSC-W290 Lens Assembly Replacement: 2 단계, 이미지 1개 중 1개
    • Slide the blue locking tab to release the battery.

    • Slide the battery out of the camera.

  3. Sony Cyber-shot DSC-W290 Lens Assembly Replacement, Outer Casing: 3 단계, 이미지 2개 중 1개 Sony Cyber-shot DSC-W290 Lens Assembly Replacement, Outer Casing: 3 단계, 이미지 2개 중 2개
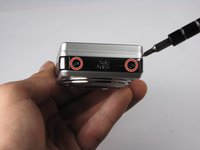
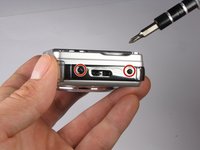
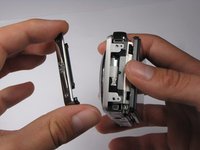
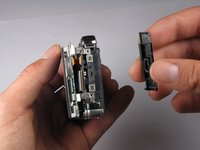
    • Replace hatch and rotate camera 180 degrees. You should still be looking at the bottom of the camera.

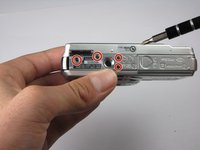
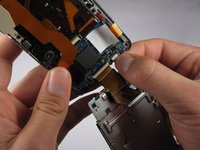
    • Remove the four 2.5mm Phillips #0 screws.

  4. Sony Cyber-shot DSC-W290 Lens Assembly Replacement: 4 단계, 이미지 3개 중 1개 Sony Cyber-shot DSC-W290 Lens Assembly Replacement: 4 단계, 이미지 3개 중 2개 Sony Cyber-shot DSC-W290 Lens Assembly Replacement: 4 단계, 이미지 3개 중 3개
    이 단계에 사용된 도구:
    Tweezers
    $4.99
    • Turn the camera so the left side-panel reading "5x Optical Zoom" faces you.

    • Remove the two 2.5mm Phillips #0 screws.

    • You may have to remove the screws with a pair of tweezers when the screws are almost out.

  5. Sony Cyber-shot DSC-W290 Lens Assembly Replacement: 5 단계, 이미지 3개 중 1개 Sony Cyber-shot DSC-W290 Lens Assembly Replacement: 5 단계, 이미지 3개 중 2개 Sony Cyber-shot DSC-W290 Lens Assembly Replacement: 5 단계, 이미지 3개 중 3개
    • Turn the camera so the right side faces you.

    • Remove the two 2.5mm Phillips #0 screws.

    • You may have to remove the screws with a pair of tweezers when the screws are almost out.

  6. Sony Cyber-shot DSC-W290 Lens Assembly Replacement: 6 단계, 이미지 1개 중 1개
    • Rotate camera so that the back is facing you.

    • Pull the back casing directly away from the LCD screen.

  7. Sony Cyber-shot DSC-W290 Lens Assembly Replacement: 7 단계, 이미지 2개 중 1개 Sony Cyber-shot DSC-W290 Lens Assembly Replacement: 7 단계, 이미지 2개 중 2개
    • Turn the camera so that the left side is facing you.

    • Pull the left side-panel off of the camera.

  8. Sony Cyber-shot DSC-W290 Lens Assembly Replacement: 8 단계, 이미지 2개 중 1개 Sony Cyber-shot DSC-W290 Lens Assembly Replacement: 8 단계, 이미지 2개 중 2개
    • Turn camera so that the front of the camera is facing you.

    • Pull the front casing directly away from the camera.

    • The right side panel may fall off when you take the front panel off.

  9. Sony Cyber-shot DSC-W290 Lens Assembly Replacement: 9 단계, 이미지 2개 중 1개 Sony Cyber-shot DSC-W290 Lens Assembly Replacement: 9 단계, 이미지 2개 중 2개
    • Turn the camera so that the right side is facing you.

    • Pull the right side-panel away from the rest of the camera.

  10. Sony Cyber-shot DSC-W290 Lens Assembly Replacement: 10 단계, 이미지 2개 중 1개 Sony Cyber-shot DSC-W290 Lens Assembly Replacement: 10 단계, 이미지 2개 중 2개
    • This is what your camera should look like now that you have removed the casing from all sides.

  11. Sony Cyber-shot DSC-W290 Lens Assembly Replacement, LCD Assembly: 11 단계, 이미지 1개 중 1개
    • Gently pull the LCD and its casing away from the motherboard as shown.

    • Be careful not to rip out any ribbon cables.

  12. Sony Cyber-shot DSC-W290 Lens Assembly Replacement: 12 단계, 이미지 2개 중 1개 Sony Cyber-shot DSC-W290 Lens Assembly Replacement: 12 단계, 이미지 2개 중 2개
    • Disconnect the small ribbon-wire by gently pulling on the small ribbon-wire where it connects with the motherboard.

    • Do not use excessive force to remove the wire because this may cause it to tear.

  13. Sony Cyber-shot DSC-W290 Lens Assembly Replacement: 13 단계, 이미지 2개 중 1개 Sony Cyber-shot DSC-W290 Lens Assembly Replacement: 13 단계, 이미지 2개 중 2개
    • Disconnect the large ribbon-wire by pulling on the large ribbon-wire where it connects to the motherboard.

  14. Sony Cyber-shot DSC-W290 Lens Assembly Replacement: 14 단계, 이미지 1개 중 1개
    • Pull the LCD and its casing away from the rest of the camera.

  15. Sony Cyber-shot DSC-W290 Lens Assembly Replacement, Flash Bulb Assembly: 15 단계, 이미지 2개 중 1개 Sony Cyber-shot DSC-W290 Lens Assembly Replacement, Flash Bulb Assembly: 15 단계, 이미지 2개 중 2개
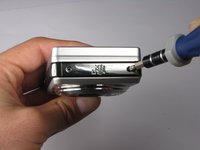
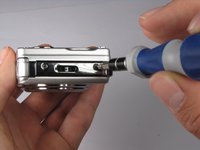
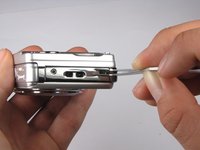
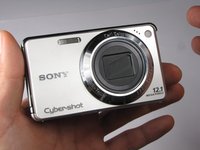
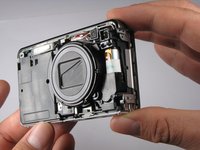
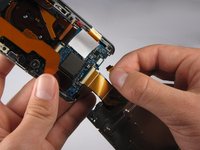
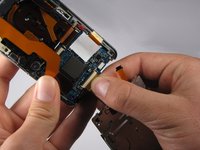
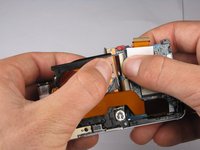
    • Turn the camera so the back is facing you.

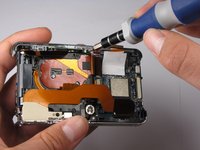
    • Remove the 2.5mm Philips #0 screw at the top of the camera.

  16. Sony Cyber-shot DSC-W290 Lens Assembly Replacement: 16 단계, 이미지 3개 중 1개 Sony Cyber-shot DSC-W290 Lens Assembly Replacement: 16 단계, 이미지 3개 중 2개 Sony Cyber-shot DSC-W290 Lens Assembly Replacement: 16 단계, 이미지 3개 중 3개
    • Tilt top casing up and towards you.

    • Carefully remove the right ribbon-wire from the top camera panel by pulling where the wire connects to the top.

    • Make sure to hold the camera with your thumb on the white square to ensure the ribbon-wire is not disconnected from the motherboard.

    • Carefully remove the left ribbon-wire from the top camera panel by pulling where the wire connects to the top.

  17. Sony Cyber-shot DSC-W290 Lens Assembly Replacement, Lens Assembly: 17 단계, 이미지 3개 중 1개 Sony Cyber-shot DSC-W290 Lens Assembly Replacement, Lens Assembly: 17 단계, 이미지 3개 중 2개 Sony Cyber-shot DSC-W290 Lens Assembly Replacement, Lens Assembly: 17 단계, 이미지 3개 중 3개
    • Flash capacitors are dangerous! Be extremely careful when removing the capacitor from the camera. You can get shocked BADLY!

    • Remove the flash capacitor from the lens assembly.

    • Carefully place the flash capacitor away from where you are working.

  18. Sony Cyber-shot DSC-W290 Lens Assembly Replacement: 18 단계, 이미지 3개 중 1개 Sony Cyber-shot DSC-W290 Lens Assembly Replacement: 18 단계, 이미지 3개 중 2개 Sony Cyber-shot DSC-W290 Lens Assembly Replacement: 18 단계, 이미지 3개 중 3개
    • Carefully disconnect the top ribbon-wire from the motherboard by pulling where the wire connects to the motherboard.

  19. Sony Cyber-shot DSC-W290 Lens Assembly Replacement: 19 단계, 이미지 3개 중 1개 Sony Cyber-shot DSC-W290 Lens Assembly Replacement: 19 단계, 이미지 3개 중 2개 Sony Cyber-shot DSC-W290 Lens Assembly Replacement: 19 단계, 이미지 3개 중 3개
    • Disconnect the top remaining ribbon-wire by carefully pulling at the base of where the wire connects to the motherboard.

  20. Sony Cyber-shot DSC-W290 Lens Assembly Replacement: 20 단계, 이미지 3개 중 1개 Sony Cyber-shot DSC-W290 Lens Assembly Replacement: 20 단계, 이미지 3개 중 2개 Sony Cyber-shot DSC-W290 Lens Assembly Replacement: 20 단계, 이미지 3개 중 3개
    • Pull the Lens Assembly away from the motherboard.

    • You have now removed the Lens Assembly from the camera.

결론

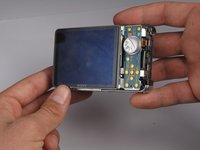
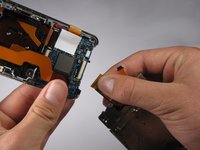
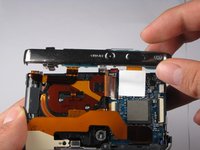
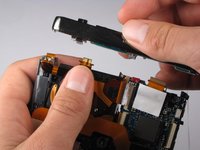
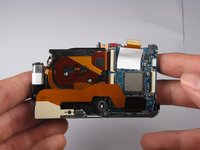
To reassemble your device, follow these instructions in reverse order.

다른 6명이 해당 안내서를 완성하였습니다.

작성자

6다른 기여자 명과 함께

William Schill

회원 가입일: 10/04/10

225 평판

안내서 3개를 작성함

Cal Poly, Team 7-54, Amido Fall 2010 Cal Poly, Team 7-54, Amido Fall 2010 회원

CPSU-AMIDO-F10S7G54

4 회원들

안내서 16개를 작성함

0가이드 댓글

댓글 쓰기

조회 통계:

지난 24시간: 0

지난 7일: 5

지난 30일: 19

전체 시간: 16,355