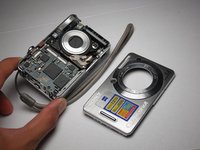
주요 콘텐츠로 건너뛰기

Sony Cyber-shot DSC-W55 Lens Replacement

필요한 것

  1. Sony Cyber-shot DSC-W55 Lens Replacement, Battery: 1 단계, 이미지 2개 중 1개 Sony Cyber-shot DSC-W55 Lens Replacement, Battery: 1 단계, 이미지 2개 중 2개
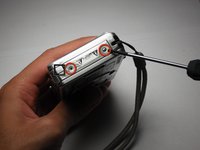
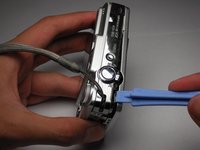
    • Slide the battery cover in the direction the arrow points.

    • Pull the battery cover towards you.

  2. Sony Cyber-shot DSC-W55 Lens Replacement: 2 단계, 이미지 2개 중 1개 Sony Cyber-shot DSC-W55 Lens Replacement: 2 단계, 이미지 2개 중 2개
    • Flick the blue switch for the battery to pop out.

    • Remove the battery from the camera.

  3. Sony Cyber-shot DSC-W55 Lens Replacement, Back Case: 3 단계, 이미지 2개 중 1개 Sony Cyber-shot DSC-W55 Lens Replacement, Back Case: 3 단계, 이미지 2개 중 2개
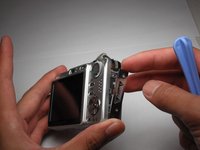
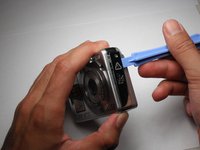
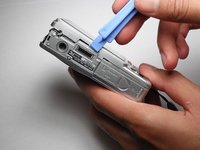
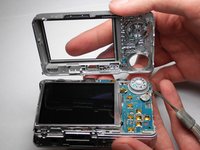
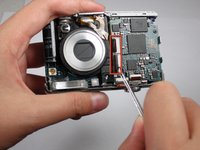
    • Using the Phillips #00 screwdriver, remove the two screws from the caution panel.

    • Remove that panel.

    • Careful for falling pieces.

  4. Sony Cyber-shot DSC-W55 Lens Replacement: 4 단계, 이미지 2개 중 1개 Sony Cyber-shot DSC-W55 Lens Replacement: 4 단계, 이미지 2개 중 2개
    • Remove the screw with a Phillips #00 screwdriver from the left side of the camera (with '3x optical zoom' engraved on the side panel).

    • Remove the panel.

  5. Sony Cyber-shot DSC-W55 Lens Replacement: 5 단계, 이미지 1개 중 1개
    • Remove the screw using the Phillips #00 screwdriver from the bottom of the camera, closest to the back cover.

  6. Sony Cyber-shot DSC-W55 Lens Replacement: 6 단계, 이미지 2개 중 1개 Sony Cyber-shot DSC-W55 Lens Replacement: 6 단계, 이미지 2개 중 2개
    • Gently remove the back cover.

    • It may be a bit stiff, so use some force to remove it. Proceed with caution.

  7. Sony Cyber-shot DSC-W55 Lens Replacement, Front Case: 7 단계, 이미지 1개 중 1개
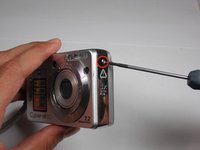
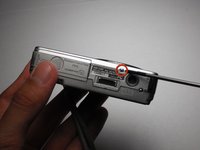
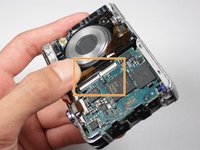
    • Remove the screw using a Phillips #00 screwdriver on the right side (where the caution panel used to be).

  8. Sony Cyber-shot DSC-W55 Lens Replacement: 8 단계, 이미지 3개 중 1개 Sony Cyber-shot DSC-W55 Lens Replacement: 8 단계, 이미지 3개 중 2개 Sony Cyber-shot DSC-W55 Lens Replacement: 8 단계, 이미지 3개 중 3개
    • Remove the small screw using a Phillips #00 screwdriver on the bottom of the camera attached to the front cover.

    • Gently remove the front cover.

    • Put a little force to pop off the case. Proceed with caution.

  9. Sony Cyber-shot DSC-W55 Lens Replacement, Lens: 9 단계, 이미지 2개 중 1개 Sony Cyber-shot DSC-W55 Lens Replacement, Lens: 9 단계, 이미지 2개 중 2개
    이 단계에 사용된 도구:
    Tweezers
    $4.99
    • Flip the black secure locks off. Tweezers may be necessary.

    • Detach the two orange cables.

  10. Sony Cyber-shot DSC-W55 Lens Replacement: 10 단계, 이미지 2개 중 1개 Sony Cyber-shot DSC-W55 Lens Replacement: 10 단계, 이미지 2개 중 2개
    • Gently pull the lens container out of the camera.

결론

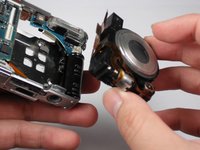
To reassemble your device, follow these instructions in reverse order.

다른 15명이 해당 안내서를 완성하였습니다.

작성자

8다른 기여자 명과 함께

kkfong91

회원 가입일: 10/11/10

350 평판

안내서 2개를 작성함

Cal Poly, Team 9-20, Regan Fall 2010 Cal Poly, Team 9-20, Regan Fall 2010 회원

CPSU-REGAN-F10S9G20

5 회원들

안내서 18개를 작성함

댓글 2개

Thanks for this guide !

unfortunatly I thinks that my lens is broken (doesn't open anymore, it may have sand inside it)

Do you know where an if I can buy a new lens ?

Erwann Robin - 답글

Thanks for info..

Need a broken lens unit as my lens cable is broken, email me if any one wants to sell a broken lens unit. at barrettoagnelo@yahoo.com

agnelobarretto - 답글

댓글 쓰기

조회 통계:

지난 24시간: 3

지난 7일: 52

지난 30일: 144

전체 시간: 23,312