주요 콘텐츠로 건너뛰기

Sony DVP-FX730 Screen Replacement

필요한 것

  1. Sony DVP-FX730 Screen Replacement, Monitor: 1 단계, 이미지 1/2 Sony DVP-FX730 Screen Replacement, Monitor: 1 단계, 이미지 2/2
    • Use your hand to remove the small back cover by gently pulling upward.

  2. Sony DVP-FX730 Screen Replacement: 2 단계, 이미지 1/1
    • Using a screwdriver, remove the two 12 mm pan head screws.

  3. Sony DVP-FX730 Screen Replacement: 3 단계, 이미지 1/1
    • The screen should now detach from the primary device.

    • The wires, indicated with a blue box, will still connect the screen.

  4. Sony DVP-FX730 Screen Replacement: 4 단계, 이미지 1/2 Sony DVP-FX730 Screen Replacement: 4 단계, 이미지 2/2
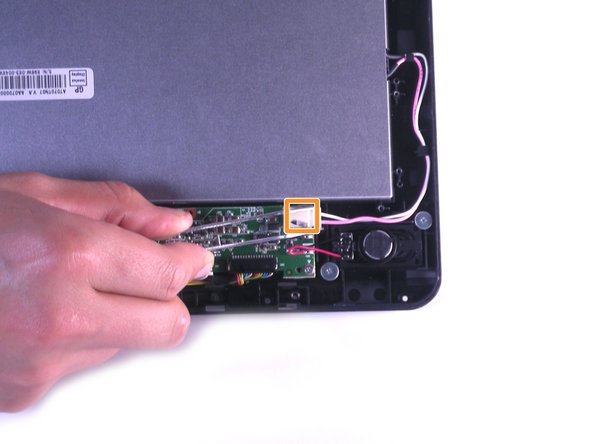
    • Remove the wires attached to the white base using tweezers to pull them up.

  5. Sony DVP-FX730 Screen Replacement: 5 단계, 이미지 1/2 Sony DVP-FX730 Screen Replacement: 5 단계, 이미지 2/2
    • Referring back to Step 8, do the same with the wires attached to the black base.

  6. Sony DVP-FX730 Screen Replacement: 6 단계, 이미지 1/1
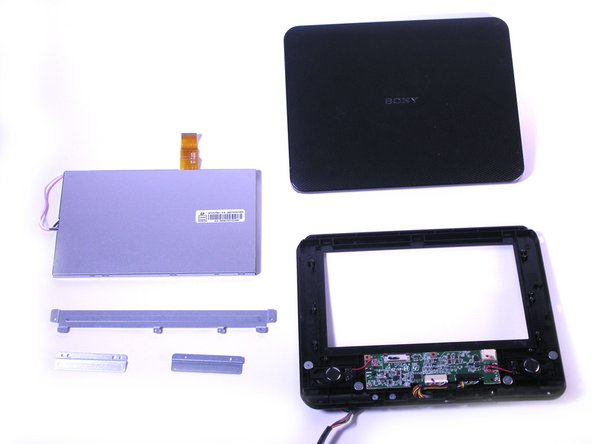
    • The screen should now be completely separated from the main device.

  7. Sony DVP-FX730 Screen Replacement, Screen: 7 단계, 이미지 1/1
    • Remove the four rubber feet and the screws beneath.

    • Remove the two exposed screws on the left side.

    • Pull back the cables until the screw is visible.

  8. Sony DVP-FX730 Screen Replacement: 8 단계, 이미지 1/1
    • Using the spudger, separate the top and bottom covers.

  9. Sony DVP-FX730 Screen Replacement: 9 단계, 이미지 1/1
    • Identify the gray back of the screen.

  10. Sony DVP-FX730 Screen Replacement: 10 단계, 이미지 1/1
    • Remove the screws.

  11. Sony DVP-FX730 Screen Replacement: 11 단계, 이미지 1/1
    • Remove the metal plates.

  12. Sony DVP-FX730 Screen Replacement: 12 단계, 이미지 1/2 Sony DVP-FX730 Screen Replacement: 12 단계, 이미지 2/2
    • Using spudger, push the lock clips to unlock the ribbon cable.

    • Using tweezers, pull the connector loose.

  13. Sony DVP-FX730 Screen Replacement: 13 단계, 이미지 1/2 Sony DVP-FX730 Screen Replacement: 13 단계, 이미지 2/2
    • Place your hand on the front of the screen and push upwards.

결론

To reassemble your device, follow these instructions in reverse order.

다른 2명이 해당 안내서를 완성하였습니다.

Oliver Woolsoncroft

회원 가입일: 01/20/12

78 평판

안내서 2개 작성하였습니다

Cal Poly, Team 11-21, Maness Winter 2012 Cal Poly, Team 11-21, Maness Winter 2012 회원

CPSU-MANESS-W12S11G21

4 회원들

안내서 5개 작성하였습니다

댓글 0개

댓글 쓰기

조회 통계:

24 시간 전: 0

7일 전: 5

30일 전: 16

전체 시간: 2,714