소개
Follow this guide to replace the light guide on a Sony PlayStation 5 DualSense controller.
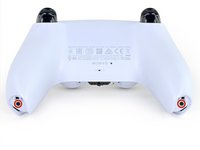
Note: This guide is for DualSense controllers with an FCC ID ending in 1. Check the back of your controller to verify your model. If yours ends in A, there will be differences in the internal design.
필요한 것
-
-
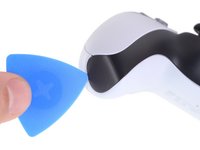
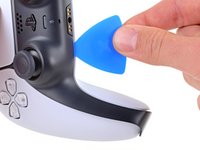
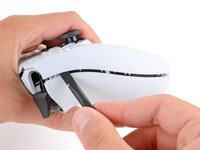
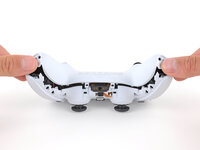
Insert an opening pick underneath the middle trim at the bottom-right corner of the controller to release the clips securing it to the case.
 FixBot에 문의하기
-
-
-
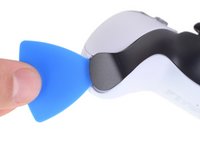
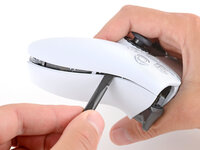
Slide the opening pick along the lower-right edge of the middle trim to release the clips securing it to the case.
-
-
-
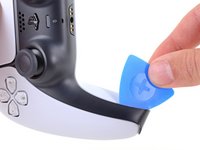
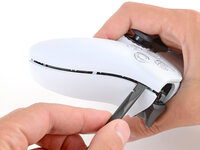
Insert an opening pick underneath the middle trim at the bottom-left corner of the controller to release the clips securing it to the case.
-
-
-
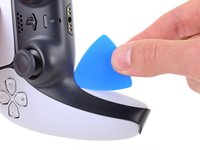
Slide the opening pick along the lower-left edge of the middle trim to release the clips securing it to the case.
-
-
-
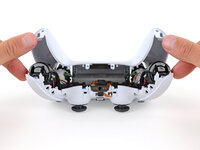
Use your fingers to lift up the bottom edge of the middle trim to release the remaining clips.
-
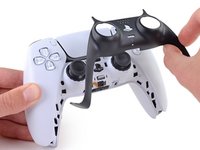
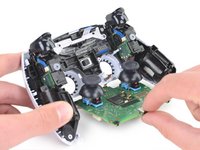
Lift the middle trim over the joysticks to remove it.
-
-
-
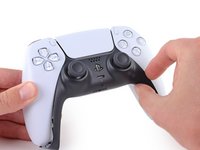
With one hand, grip the controller and use your thumb to hold down the left trigger.
-
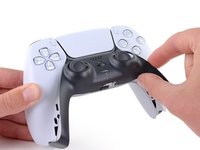
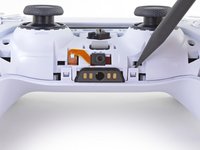
With your free hand, insert the flat end of a spudger between the L1 and L2 buttons.
-
Use the spudger to gently pry the L1 button away from the controller and remove it, holding your finger over the button so it doesn't eject.
-
-
-
Use a Phillips screwdriver to remove the two 6.4 mm screws securing the bottom corners of the lower case.
-
-
-
Use a Phillips screwdriver to remove the two 6.4 mm screws behind the L1 and R1 buttons.
-
-
-
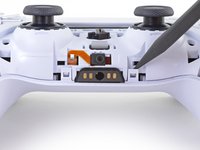
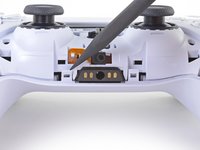
Use the point of a spudger to release the two clips on either side of the headset jack.
-
-
-
-
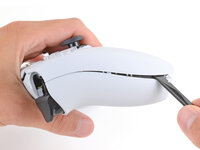
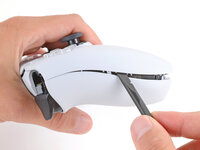
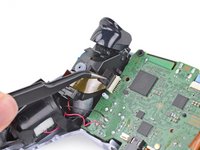
Insert the flat end of a spudger between the front and rear shells near the bottom of the left edge.
-
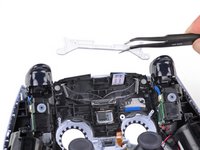
Slide the spudger along the left edge and gently pry the shells apart to release the clips.
-
-
-
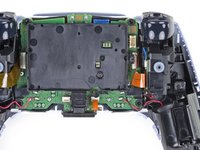
Lay your controller upside down so the joysticks are on your work surface.
-
Hold the controller down with your fingers and use your thumbs to lift the rear case away from the controller to fully separate it.
-
-
이 단계에 사용된 도구:Tweezers$4.99
-
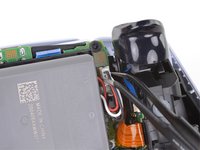
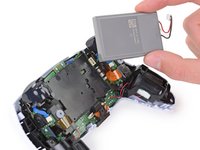
Use a pair of tweezers or your fingers to disconnect the battery from the motherboard.
-
-
이 단계에 사용된 도구:Tweezers$4.99
-
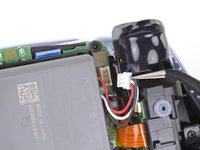
Grab the lower microphone ribbon cable pull tab with your fingers or a pair of tweezers and disconnect it from the motherboard.
-
-
-
Use a Phillips screwdriver to remove the 6.4 mm screw securing the battery bracket.
-
-
-
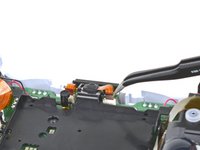
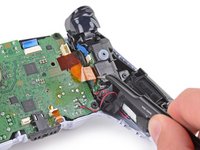
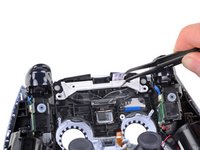
Grip the right trigger assembly ribbon cable pull tab with a pair of tweezers or your fingers and pull up to disconnect it from the motherboard.
-
-
-
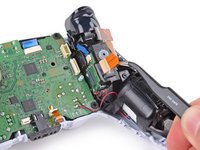
Grip the right trigger assembly ribbon cable pull tab with a pair of tweezers or your fingers, and pull up to disconnect it from the trigger assembly.
-
Remove the ribbon cable.
-
-
-
Grip the left trigger assembly ribbon cable pull tab with a pair of tweezers or your fingers and pull up to disconnect it from the motherboard.
-
-
-
Grip the left trigger assembly ribbon cable pull tab with a pair of tweezers or your fingers, and pull up to disconnect it from the trigger assembly.
-
Remove the ribbon cable.
-
-
-
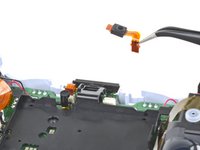
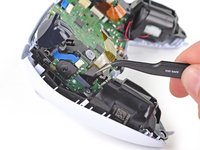
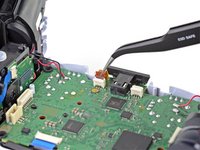
Use a pair of tweezers or your fingers to grip the upper microphone ribbon cable pull tab, and pull up to disconnect it from the motherboard.
-
-
-
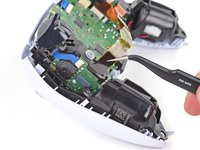
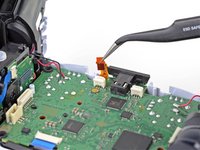
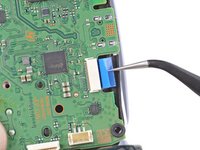
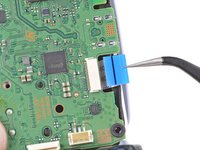
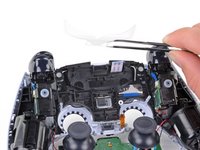
Use a pair of tweezers or your fingers to grip the touchpad ribbon cable pull tab, and pull it straight out of the motherboard connector.
-
-
-
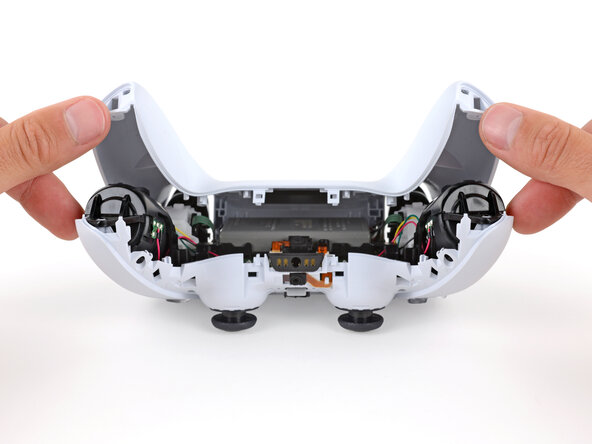
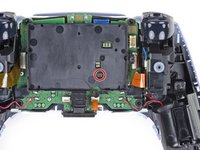
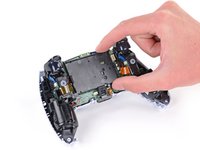
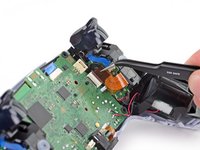
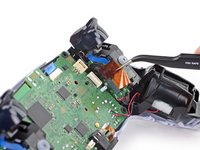
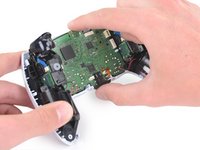
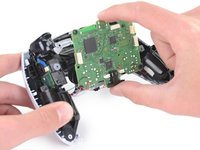
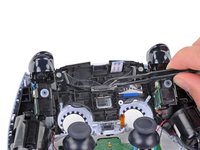
Carefully guide the joysticks through the front case and lift the motherboard out.
-
The motherboard is held down by two clips. One between the motherboard itself and the right trigger assembly, and one between the motherboard itself and the left trigger assembly. Gently push on either clip to release the motherboard from its restraints.
-
-
-
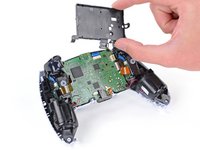
Use a Phillips screwdriver to remove the two 8.5 mm screws securing the light guide.
-
-
이 단계에 사용된 도구:Tweezers$4.99
-
Use a pair of tweezers or your fingers to remove the light guide bracket.
-


To reassemble your device, follow the above steps in reverse order.
Take your e-waste to an R2 or e-Stewards certified recycler.
Repair didn’t go as planned? Try some basic troubleshooting, or ask our Answers community for help.
다른 2명이 해당 안내서를 완성하였습니다.
