주요 콘텐츠로 건너뛰기

Sony Ericsson QuickShare T630 Keypad Maintenance and Replacement

필요한 것

  1. Sony Ericsson QuickShare T630 Keypad Maintenance and Replacement, Sony Ericsson QuickShare T630 Phone Enclosure: 1 단계, 이미지 1/1
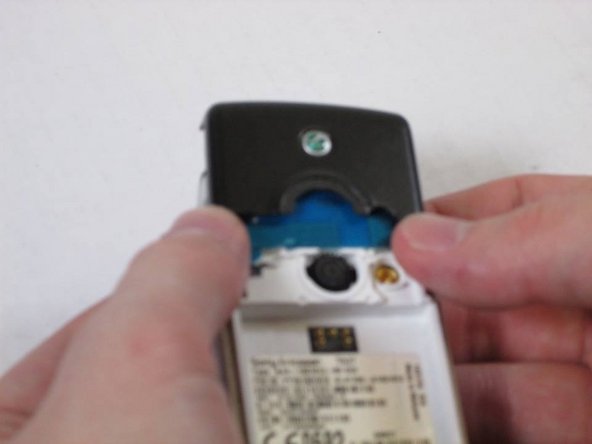
    • Begin the disassembly by placing your Sony Ericsson QuickShare T630 on a flat surface.

  2. Sony Ericsson QuickShare T630 Keypad Maintenance and Replacement: 2 단계, 이미지 1/2 Sony Ericsson QuickShare T630 Keypad Maintenance and Replacement: 2 단계, 이미지 2/2
    • Slide the protective panel on the backside of the phone downward and remove it entirely, revealing the battery underneath.

  3. Sony Ericsson QuickShare T630 Keypad Maintenance and Replacement: 3 단계, 이미지 1/1
    • Slide the battery upward to remove.

  4. Sony Ericsson QuickShare T630 Keypad Maintenance and Replacement: 4 단계, 이미지 1/2 Sony Ericsson QuickShare T630 Keypad Maintenance and Replacement: 4 단계, 이미지 2/2
    • Remove the rubber plug located near the camera by gently prying upward with your fingers.

    • Gently lift the camera shield after removal of the rubber plug.

  5. Sony Ericsson QuickShare T630 Keypad Maintenance and Replacement: 5 단계, 이미지 1/2 Sony Ericsson QuickShare T630 Keypad Maintenance and Replacement: 5 단계, 이미지 2/2
    • Pry the remaining panel to loosen its contact to the phone using a spudger.

    • Slide the panel upward to remove it completely.

    • These steps will require a slight appliance of force.

  6. Sony Ericsson QuickShare T630 Keypad Maintenance and Replacement: 6 단계, 이미지 1/1
    • Slide the aerial upward to remove it.

  7. Sony Ericsson QuickShare T630 Keypad Maintenance and Replacement: 7 단계, 이미지 1/2 Sony Ericsson QuickShare T630 Keypad Maintenance and Replacement: 7 단계, 이미지 2/2
    • Remove the four screws located at each corner of the device.

  8. Sony Ericsson QuickShare T630 Keypad Maintenance and Replacement: 8 단계, 이미지 1/2 Sony Ericsson QuickShare T630 Keypad Maintenance and Replacement: 8 단계, 이미지 2/2
    • Gently lift and remove the front panel of the phone after removing the screws.

  9. Sony Ericsson QuickShare T630 Keypad Maintenance and Replacement: 9 단계, 이미지 1/3 Sony Ericsson QuickShare T630 Keypad Maintenance and Replacement: 9 단계, 이미지 2/3 Sony Ericsson QuickShare T630 Keypad Maintenance and Replacement: 9 단계, 이미지 3/3
    • This step is NOT required for joystick maintenance or keypad maintenance and replacement! Continue on to step 10 if you are attempting to achieve either of these goals.

    • Slowly lift the screen to reveal the green circuit ribbon connecting the screen to the phone.

    • Gently pull the ribbon from the circuit.

    • Remove the now disconnected screen.

  10. Sony Ericsson QuickShare T630 Keypad Maintenance and Replacement: 10 단계, 이미지 1/3 Sony Ericsson QuickShare T630 Keypad Maintenance and Replacement: 10 단계, 이미지 2/3 Sony Ericsson QuickShare T630 Keypad Maintenance and Replacement: 10 단계, 이미지 3/3
    • Remove the keyboard by slowly pulling it away from the circuit board.

    • There are no direct connections between the keyboard and phone.

    • These are all of the parts covered in this disassembly that make up the Sony Ericsson QuickShare T630.

  11. Sony Ericsson QuickShare T630 Keypad Maintenance and Replacement, Sony Ericsson QuickShare T630 Keypad Maintenance and Replacement: 11 단계, 이미지 1/2 Sony Ericsson QuickShare T630 Keypad Maintenance and Replacement, Sony Ericsson QuickShare T630 Keypad Maintenance and Replacement: 11 단계, 이미지 2/2
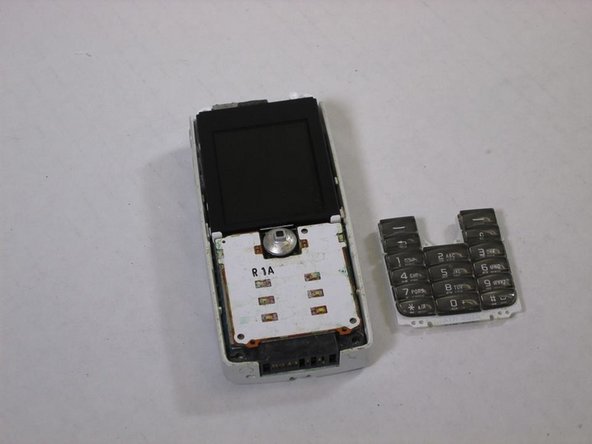
    • After wetting the cotton swab with the rubbing alcohol, rub the keypad with the swab until the buttons are clean.

    • Dry out the keypad by placing it on a flat surface before reassembling the device.

  12. Sony Ericsson QuickShare T630 Keypad Maintenance and Replacement: 12 단계, 이미지 1/1
결론

To reassemble your device, follow these instructions in reverse order.

Kelsey

회원 가입일: 10/28/13

107 평판

안내서 1개 작성함

University of Maine, Team 1-1, Diaz Fall 2013 University of Maine, Team 1-1, Diaz Fall 2013 회원

UMAINE-DIAZ-F13S1G1

4 회원들

안내서 6개 작성하였습니다

댓글 0개

댓글 쓰기

조회 통계:

24 시간 전: 0

7일 전: 1

30일 전: 7

전체 시간: 719