주요 콘텐츠로 건너뛰기

Sony Ericsson W810I Keypad Replacement

보관된 가이드
해당 안내서는 단지 역사적인 목적으로 보관됩니다. 최신 버전 안내서를 사용하여 수리 하십시오.

필요한 것

  1. Sony Ericsson W810I Keypad Replacement, Keypad: 1 단계, 이미지 1/1
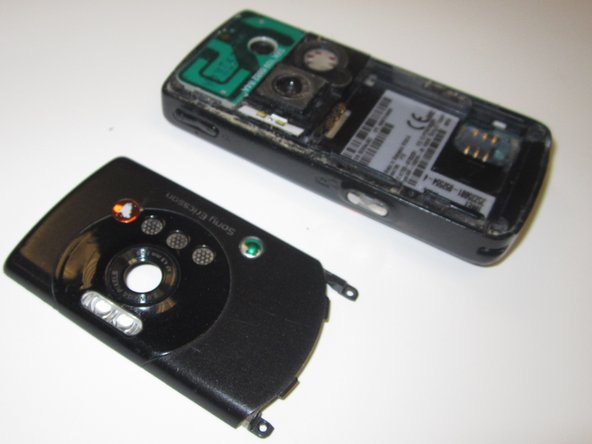
    • Make sure phone is off, and press down firmly against the Cingular icon with your thumb

    • Slide the panel down and remove latch

  2. Sony Ericsson W810I Keypad Replacement: 2 단계, 이미지 1/2 Sony Ericsson W810I Keypad Replacement: 2 단계, 이미지 2/2
    • Lift and Pull battery out

    • Remove the SIM card too if you have one

  3. Sony Ericsson W810I Keypad Replacement: 3 단계, 이미지 1/1
    • Remove the two outer screws using a T-7 head for a screwdriver

  4. Sony Ericsson W810I Keypad Replacement: 4 단계, 이미지 1/1
    • Remove the two smaller inner screws with the Mini-Phillips screwdriver head

  5. Sony Ericsson W810I Keypad Replacement: 5 단계, 이미지 1/2 Sony Ericsson W810I Keypad Replacement: 5 단계, 이미지 2/2
    • Remove the Back (camera side) Faceplate with the blue hand-wedge

  6. Sony Ericsson W810I Keypad Replacement: 6 단계, 이미지 1/3 Sony Ericsson W810I Keypad Replacement: 6 단계, 이미지 2/3 Sony Ericsson W810I Keypad Replacement: 6 단계, 이미지 3/3
    • Flip phone over and pry off the Front (Keypad side) Faceplate with multiple blue hand-wedges

    • Separate keypad from logic board by turning it upside down and allowing it to fall off

결론

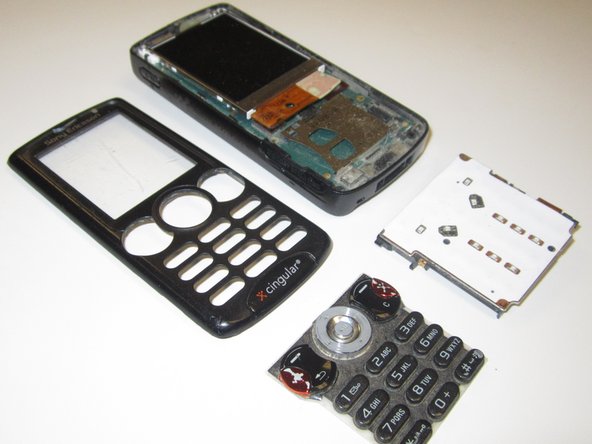
To reassemble your device, follow these instructions in reverse order.

다른 한 분이 해당 안내서를 완성하였습니다.

Ben Micucci

회원 가입일: 10/14/11

186 평판

안내서 5개 작성하였습니다

James Madison, Team 2-2, Allen Fall 2011 James Madison, Team 2-2, Allen Fall 2011 회원

JMU-ALLEN-F11S2G2

2 회원들

안내서 10개 작성하였습니다

댓글 0개

댓글 쓰기

조회 통계:

24 시간 전: 0

7일 전: 0

30일 전: 0

전체 시간: 1,572