주요 콘텐츠로 건너뛰기

Sony Ericsson Xperia X10 Display Assembly Replacement

필요한 것

  1. Sony Ericsson Xperia X10 Display Assembly Replacement, Display Assembly: 1 단계, 이미지 1/1
    • Place the phone with the back facing up. Remove the back cover and the battery.

  2. Sony Ericsson Xperia X10 Display Assembly Replacement: 2 단계, 이미지 1/1
    • Remove the 5mm screws from back of the phone, image indicates where they are. There should be 8 screws. Use a T-6 bit.

  3. Sony Ericsson Xperia X10 Display Assembly Replacement: 3 단계, 이미지 1/1
    • Use a case opening tool to release clips holding together the case. It should be easier starting at the bottom right side of the phone, as indicated in the image. Insert the tool and run it down the side of the phone, using a prying motion to pull it apart.

  4. Sony Ericsson Xperia X10 Display Assembly Replacement: 4 단계, 이미지 1/1
    • Case should be in two pieces. Take the side indicated in the left side of the image and put it out of the way.

  5. Sony Ericsson Xperia X10 Display Assembly Replacement: 5 단계, 이미지 1/1
    • Insert a flat head screw driver under the two clips and pry up. The chip should come loose with just a ribbon cable holding it to the rest of the phone.

  6. Sony Ericsson Xperia X10 Display Assembly Replacement: 6 단계, 이미지 1/1
    • Flip the chip to the left and remove the ribbon cable from the rest of the phone using a flat head screw driver. Gently insert the screw driver under the cable and pry up.

  7. Sony Ericsson Xperia X10 Display Assembly Replacement: 7 단계, 이미지 1/2 Sony Ericsson Xperia X10 Display Assembly Replacement: 7 단계, 이미지 2/2
    • If the volume rocker and camera button haven't fallen off yet, remove them and put them off to the side. Using your fingers or a screwdriver, pull off the black plastic piece on the very top of the phone. This is the audio jack.

  8. Sony Ericsson Xperia X10 Display Assembly Replacement: 8 단계, 이미지 1/1
    • Using a flat head screw driver, undo the ribbon cables connected to the phone. There should be two on the left, one on the right, and one on the top.

  9. Sony Ericsson Xperia X10 Display Assembly Replacement: 9 단계, 이미지 1/1
    • Gently insert a flat head screw driver under the logic board and pry to remove it from the phone casing. There should be a notch where a screw driver can fit as indicated in the image.

  10. Sony Ericsson Xperia X10 Display Assembly Replacement: 10 단계, 이미지 1/1
    • Logic board should be removed from the phone. Put it off to the side.

  11. Sony Ericsson Xperia X10 Display Assembly Replacement: 11 단계, 이미지 1/2 Sony Ericsson Xperia X10 Display Assembly Replacement: 11 단계, 이미지 2/2
    • Using a flat head screw driver, disconnect the glue holding the left ribbon cable to the phone. Once unglued, the cable should flip back and still be connected to the phone. Pull up the black plastic piece being pointed to in the image.

  12. Sony Ericsson Xperia X10 Display Assembly Replacement: 12 단계, 이미지 1/2 Sony Ericsson Xperia X10 Display Assembly Replacement: 12 단계, 이미지 2/2
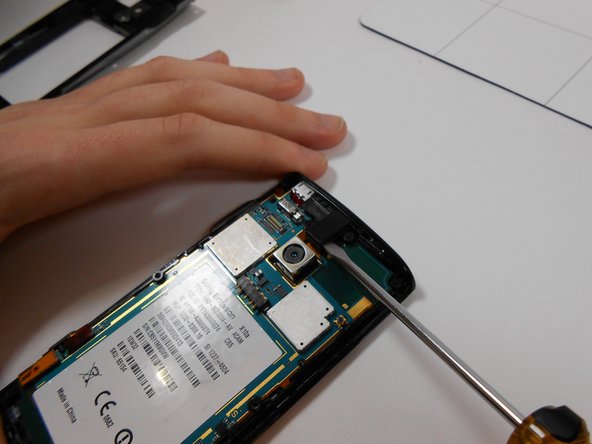
    • Using a flat head screwdriver, pry up the board. Should have to pry from the left and from the right. Nothing is holding in the power button on the top of the phone, go ahead and remove it.

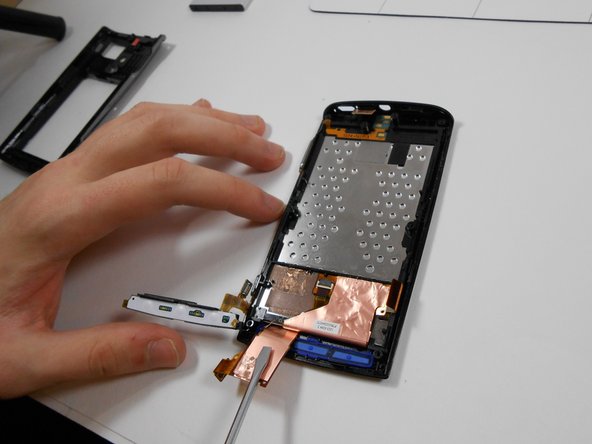
    • The piece on the right side of the picture is the LCD screen. It appears that the speakers and other components are directly attached to the LCD and must be replace as one unit.

결론

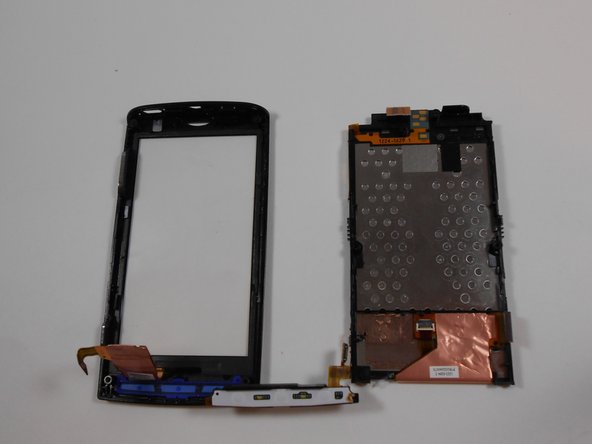
To reassemble your device, follow these instructions in reverse order. The pieces need to be placed exactly back into the phone as they came out or else they won't fit together correctly.

다른 3명이 해당 안내서를 완성하였습니다.

Matt

회원 가입일: 10/29/13

319 평판

안내서 2개 작성하였습니다

UMass Dartmouth, Team 1-5, Shastany Fall 2013 UMass Dartmouth, Team 1-5, Shastany Fall 2013 회원

UMASSD-SHASTANY-F13S1G5

2 회원들

안내서 3개 작성하였습니다

댓글 0개

댓글 쓰기

조회 통계:

24 시간 전: 1

7일 전: 3

30일 전: 13

전체 시간: 3,919