주요 콘텐츠로 건너뛰기

Sony Ericsson s710a Motherboard Replacement

필요한 것

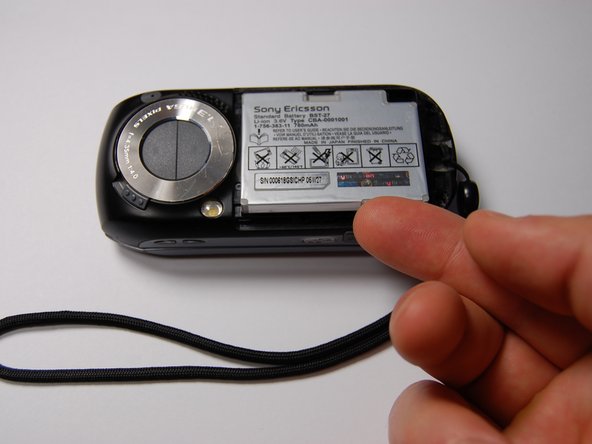
  1. Sony Ericsson s710a Motherboard Replacement, Battery: 1 단계, 이미지 1/1
    • Remove the back cover by sliding it off.

  2. Sony Ericsson s710a Motherboard Replacement: 2 단계, 이미지 1/1
    • Pull the battery out using your finger.

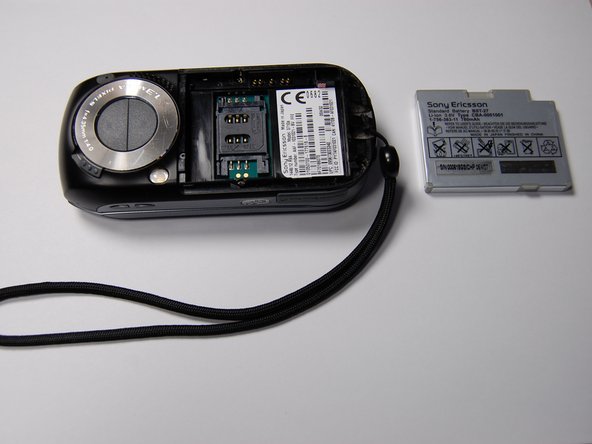
  3. Sony Ericsson s710a Motherboard Replacement: 3 단계, 이미지 1/1
    • The battery can now be replaced.

    • The battery is a 780 mAh rechargeable Lithium Ion battery.

  4. Sony Ericsson s710a Motherboard Replacement, Motherboard: 4 단계, 이미지 1/1
    • Locate the four 6mm screws on the back of the phone.

    • Using a small Phillips head screwdriver, remove the four screws.

  5. Sony Ericsson s710a Motherboard Replacement: 5 단계, 이미지 1/2 Sony Ericsson s710a Motherboard Replacement: 5 단계, 이미지 2/2
    • Flip the phone over and slide it open.

    • Using the prying tool, remove the plastic piece covering the microphone.

    • Locate and remove the two 6mm screws located under the plastic piece and remove them using a small Phillips screwdriver.

  6. Sony Ericsson s710a Motherboard Replacement: 6 단계, 이미지 1/3 Sony Ericsson s710a Motherboard Replacement: 6 단계, 이미지 2/3 Sony Ericsson s710a Motherboard Replacement: 6 단계, 이미지 3/3
    • Use the plastic opening tool to remove the black plastic cover from the rest of the phone.

    • It is best to start from the bottom of the phone by the memory card slot.

    • The cover should pop out of place by the four corners of the phone. There is no need to use excessive force as this may cause the plastic to break.

  7. Sony Ericsson s710a Motherboard Replacement: 7 단계, 이미지 1/1
    • Once the back cover is removed, remove the small black piece shown in the picture.

  8. Sony Ericsson s710a Motherboard Replacement: 8 단계, 이미지 1/1
    • Using the plastic opening tool, slide around the motherboard to loosen it.

    • Lift the motherboard up but not completely because in order to remove the motherboard you need to lift and pull it out.

  9. Sony Ericsson s710a Motherboard Replacement: 9 단계, 이미지 1/2 Sony Ericsson s710a Motherboard Replacement: 9 단계, 이미지 2/2
    • Using the plastic opening tool, separate the connectors to the screen.

    • Make sure to note the orientation and location of each cable before disconnecting. This will ensure that the motherboard will be reconnected properly.

    • Once the old motherboard is removed insert the new one if desired, and then reassemble the phone.

결론

To reassemble your device, follow these instructions in reverse order.

Mike

회원 가입일: 11/21/11

31 평판

안내서 2개 작성하였습니다

University of Maryland, Team 1-1, Calloway Fall 2011 University of Maryland, Team 1-1, Calloway Fall 2011 회원

UMD-CALLOWAY-F11S1G1

3 회원들

안내서 14개 작성하였습니다

댓글 0개

댓글 쓰기

조회 통계:

24 시간 전: 1

7일 전: 1

30일 전: 2

전체 시간: 1,368