주요 콘텐츠로 건너뛰기

Sony Ericsson xPeria Active Camera Replacement

필요한 것

  1. Sony Ericsson xPeria Active Camera Replacement, Remove the back cover.: 1 단계, 이미지 1/3 Sony Ericsson xPeria Active Camera Replacement, Remove the back cover.: 1 단계, 이미지 2/3 Sony Ericsson xPeria Active Camera Replacement, Remove the back cover.: 1 단계, 이미지 3/3
    • Open the flaps and remove the back cover using the plastic opening device.

  2. Sony Ericsson xPeria Active Camera Replacement, Remove inside plastic battery cover.: 2 단계, 이미지 1/2 Sony Ericsson xPeria Active Camera Replacement, Remove inside plastic battery cover.: 2 단계, 이미지 2/2
    • Remove the battery shield with the plastic opening device.

  3. Sony Ericsson xPeria Active Camera Replacement, Remove the battery: 3 단계, 이미지 1/2 Sony Ericsson xPeria Active Camera Replacement, Remove the battery: 3 단계, 이미지 2/2
    • Remove the battery.

  4. Sony Ericsson xPeria Active Camera Replacement, Unfastening The Motherboard Cover: 4 단계, 이미지 1/1
    • Unscrew the 5mm screws with the T5 head.

    • Unscrew the 6mm screw with the T6 head.

  5. Sony Ericsson xPeria Active Camera Replacement, Removing The Motherboard Cover: 5 단계, 이미지 1/2 Sony Ericsson xPeria Active Camera Replacement, Removing The Motherboard Cover: 5 단계, 이미지 2/2
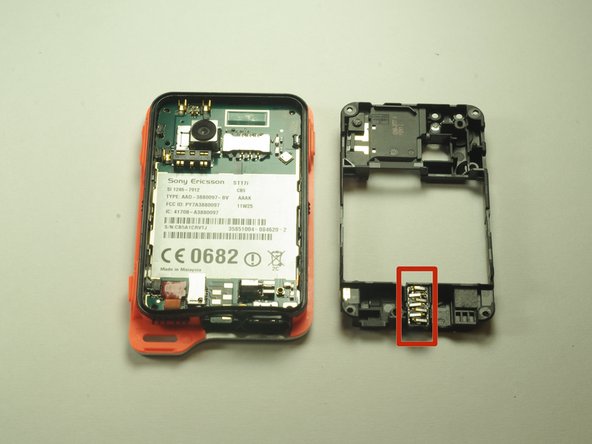
    • Remove the black cover with the plastic opening tool.

    • Remove the headphone jack from its slot.

  6. Sony Ericsson xPeria Active Camera Replacement, Unplug the back motherboard plug.: 6 단계, 이미지 1/2 Sony Ericsson xPeria Active Camera Replacement, Unplug the back motherboard plug.: 6 단계, 이미지 2/2
    • Unplug the plug from the motherboard.

  7. Sony Ericsson xPeria Active Camera Replacement, Remove motherboard from device case.: 7 단계, 이미지 1/1
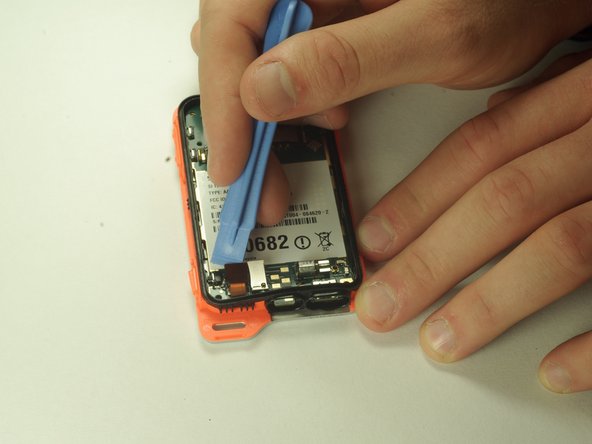
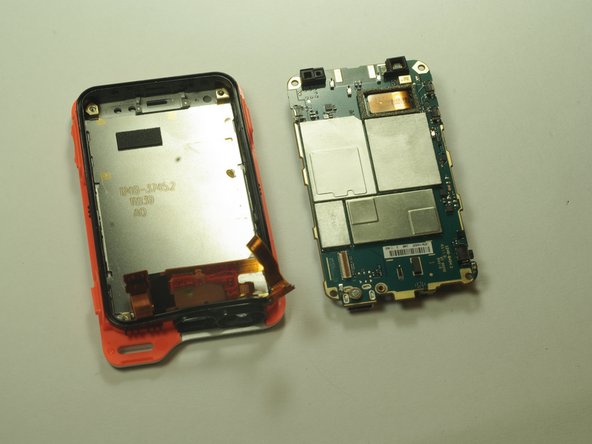
    • Using the plastic opening tool, carefully pry up on the edges of the motherboard, opposite of the jacks.

  8. Sony Ericsson xPeria Active Camera Replacement, Remove the display ribbon cable: 8 단계, 이미지 1/2 Sony Ericsson xPeria Active Camera Replacement, Remove the display ribbon cable: 8 단계, 이미지 2/2
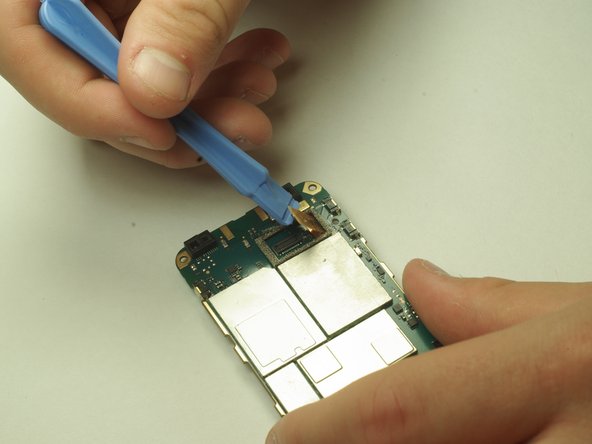
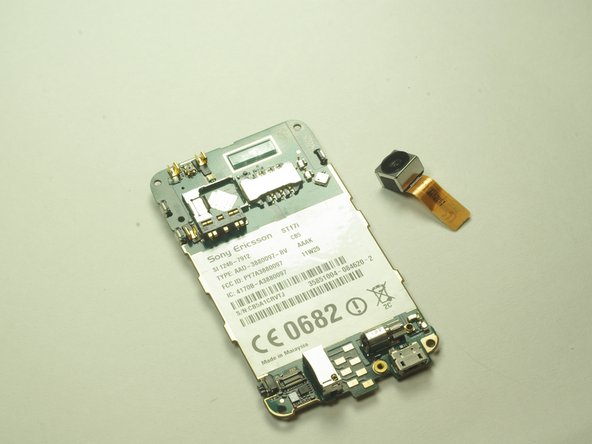
    • Carefully pry up on the tab holding down the display ribbon cable and remove the ribbon cable.

  9. Sony Ericsson xPeria Active Camera Replacement: 9 단계, 이미지 1/2 Sony Ericsson xPeria Active Camera Replacement: 9 단계, 이미지 2/2
    • Use the plastic opening tool to pry the ribbon cable away from the motherboard.

  10. Sony Ericsson xPeria Active Camera Replacement, Remove camera from device: 10 단계, 이미지 1/2 Sony Ericsson xPeria Active Camera Replacement, Remove camera from device: 10 단계, 이미지 2/2
    • Pull the camera out through the front of the motherboard.

결론

To reassemble your device, follow these instructions in reverse order.

다른 한 분이 해당 안내서를 완성하였습니다.

Alex Tobin

회원 가입일: 10/06/14

406 평판

안내서 3개 작성하였습니다

USF Tampa, Team 14-5, Leahy Fall 2014 USF Tampa, Team 14-5, Leahy Fall 2014 회원

USFT-LEAHY-F14S14G5

3 회원들

안내서 5개 작성하였습니다

댓글 0개

댓글 쓰기

조회 통계:

24 시간 전: 0

7일 전: 1

30일 전: 4

전체 시간: 773