주요 콘텐츠로 건너뛰기

Sony Ericsson xPeria Active Speaker Replacement

필요한 것

  1. Sony Ericsson xPeria Active Speaker Replacement, Remove the back cover.: 1 단계, 이미지 1/3 Sony Ericsson xPeria Active Speaker Replacement, Remove the back cover.: 1 단계, 이미지 2/3 Sony Ericsson xPeria Active Speaker Replacement, Remove the back cover.: 1 단계, 이미지 3/3
    • Open the flaps and remove the back cover using the plastic opening device.

  2. Sony Ericsson xPeria Active Speaker Replacement, Remove inside plastic battery cover.: 2 단계, 이미지 1/2 Sony Ericsson xPeria Active Speaker Replacement, Remove inside plastic battery cover.: 2 단계, 이미지 2/2
    • Remove the battery shield with the plastic opening device.

  3. Sony Ericsson xPeria Active Speaker Replacement, Remove the battery: 3 단계, 이미지 1/2 Sony Ericsson xPeria Active Speaker Replacement, Remove the battery: 3 단계, 이미지 2/2
    • Remove the battery.

  4. Sony Ericsson xPeria Active Speaker Replacement, Unfastening The Motherboard Cover: 4 단계, 이미지 1/1
    • Unscrew the 5mm screws with the T5 head.

    • Unscrew the 6mm screw with the T6 head.

  5. Sony Ericsson xPeria Active Speaker Replacement, Removing The Motherboard Cover: 5 단계, 이미지 1/2 Sony Ericsson xPeria Active Speaker Replacement, Removing The Motherboard Cover: 5 단계, 이미지 2/2
    • Remove the black cover with the plastic opening tool.

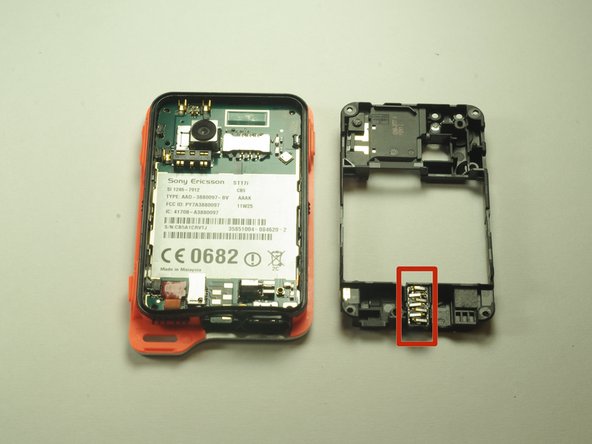
    • Remove the headphone jack from its slot.

  6. Sony Ericsson xPeria Active Speaker Replacement, Speaker: 6 단계, 이미지 1/2 Sony Ericsson xPeria Active Speaker Replacement, Speaker: 6 단계, 이미지 2/2
    • Carefully pry the power cable away from the motherboard.

  7. Sony Ericsson xPeria Active Speaker Replacement: 7 단계, 이미지 1/1
    • Pry the motherboard out of the case.

  8. Sony Ericsson xPeria Active Speaker Replacement: 8 단계, 이미지 1/1
    • Remove the power cable from the backside of the motherboard.

  9. Sony Ericsson xPeria Active Speaker Replacement: 9 단계, 이미지 1/1
    • The speaker can be seen in the top middle area on the reverse of the screen.

  10. Sony Ericsson xPeria Active Speaker Replacement: 10 단계, 이미지 1/1
    • Use the plastic opening tool to carefully pry the speaker away from the phone.

결론

To reassemble your device, follow these instructions in reverse order.

다른 2명이 해당 안내서를 완성하였습니다.

Daniel

회원 가입일: 10/13/14

437 평판

안내서 2개 작성하였습니다

USF Tampa, Team 14-5, Leahy Fall 2014 USF Tampa, Team 14-5, Leahy Fall 2014 회원

USFT-LEAHY-F14S14G5

3 회원들

안내서 5개 작성하였습니다

댓글 0개

댓글 쓰기

조회 통계:

24 시간 전: 0

7일 전: 1

30일 전: 2

전체 시간: 852