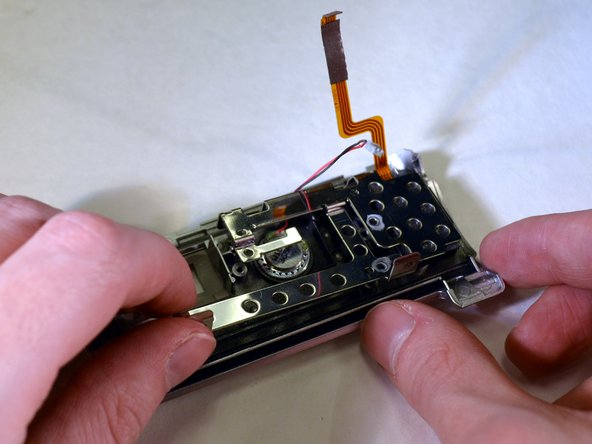
주요 콘텐츠로 건너뛰기

Sony Handycam DCR-SR68 Speaker Replacement

필요한 것

  1. Sony Handycam DCR-SR68 Speaker Replacement, Speaker: 1 단계, 이미지 1/2 Sony Handycam DCR-SR68 Speaker Replacement, Speaker: 1 단계, 이미지 2/2
    • Remove battery before working on device.

    • Undo hand strap.

    • Get iFixit screwdriver and a JIOS Philips head bit.

  2. Sony Handycam DCR-SR68 Speaker Replacement: 2 단계, 이미지 1/2 Sony Handycam DCR-SR68 Speaker Replacement: 2 단계, 이미지 2/2
    • Place device on left side with lens facing right.

    • Using the screwdriver, unscrew the left middle screw.

    • Open the "DC IN" tab.

    • Second screw is revealed.

    • Unscrew this screw.

  3. Sony Handycam DCR-SR68 Speaker Replacement: 3 단계, 이미지 1/1
    • Turn device onto it's top with the lens facing right.

    • Unscrew the top left and top right screws.

    • Right side casing is now free.

  4. Sony Handycam DCR-SR68 Speaker Replacement: 4 단계, 이미지 1/2 Sony Handycam DCR-SR68 Speaker Replacement: 4 단계, 이미지 2/2
    • Remove the right side casing by pulling away.

    • HDD is now revealed.

  5. Sony Handycam DCR-SR68 Speaker Replacement: 5 단계, 이미지 1/3 Sony Handycam DCR-SR68 Speaker Replacement: 5 단계, 이미지 2/3 Sony Handycam DCR-SR68 Speaker Replacement: 5 단계, 이미지 3/3
    • Using your fingers, lift the HDD by it's right end, pivoting on it's left end.

    • HDD ribbon wire is now exposed.

  6. Sony Handycam DCR-SR68 Speaker Replacement: 6 단계, 이미지 1/2 Sony Handycam DCR-SR68 Speaker Replacement: 6 단계, 이미지 2/2
    • Using your fingers, pull the ribbon wire out of it's socket.

    • HDD is now free from device.

    • Set HDD aside

  7. Sony Handycam DCR-SR68 Speaker Replacement: 7 단계, 이미지 1/2 Sony Handycam DCR-SR68 Speaker Replacement: 7 단계, 이미지 2/2
    • Using your fingers, remove the A/V tab.

  8. Sony Handycam DCR-SR68 Speaker Replacement: 8 단계, 이미지 1/3 Sony Handycam DCR-SR68 Speaker Replacement: 8 단계, 이미지 2/3 Sony Handycam DCR-SR68 Speaker Replacement: 8 단계, 이미지 3/3
    • On the bottom of the device, unscrew the right and middle bottom 3mm Philips screws.

    • Remove panel.

  9. Sony Handycam DCR-SR68 Speaker Replacement: 9 단계, 이미지 1/2 Sony Handycam DCR-SR68 Speaker Replacement: 9 단계, 이미지 2/2
    • Using the screwdriver, unscrew the top two black 3mm Philips screws.

    • Lift out the grey tray, being careful when feeding the large ribbon wire though the slot.

  10. Sony Handycam DCR-SR68 Speaker Replacement: 10 단계, 이미지 1/2 Sony Handycam DCR-SR68 Speaker Replacement: 10 단계, 이미지 2/2
    • Using the black pointed spudger, carefully pop op the latch on the large ribbon wire's port.

    • Set large ribbon wire aside.

  11. Sony Handycam DCR-SR68 Speaker Replacement: 11 단계, 이미지 1/3 Sony Handycam DCR-SR68 Speaker Replacement: 11 단계, 이미지 2/3 Sony Handycam DCR-SR68 Speaker Replacement: 11 단계, 이미지 3/3
    • Using the blunt tweezers, unplug the red and black wires.

    • Using the blunt tweezers, unplug the small ribbon wire.

  12. Sony Handycam DCR-SR68 Speaker Replacement: 12 단계, 이미지 1/1
    • Unscrew the top 3 3mm Philips screws from right to left.

  13. Sony Handycam DCR-SR68 Speaker Replacement: 13 단계, 이미지 1/1
    • On the back of the device, unscrew the top 3mm Philips screw.

  14. Sony Handycam DCR-SR68 Speaker Replacement: 14 단계, 이미지 1/2 Sony Handycam DCR-SR68 Speaker Replacement: 14 단계, 이미지 2/2
    • On the left side of the device, unscrew the top 2 3mm Philips screws.

    • The top of the device is now free.

  15. Sony Handycam DCR-SR68 Speaker Replacement: 15 단계, 이미지 1/2 Sony Handycam DCR-SR68 Speaker Replacement: 15 단계, 이미지 2/2
    • Remove the top of the device by lifting it upwards.

    • Be careful of the wires becoming snagged on the frame.

  16. Sony Handycam DCR-SR68 Speaker Replacement: 16 단계, 이미지 1/3 Sony Handycam DCR-SR68 Speaker Replacement: 16 단계, 이미지 2/3 Sony Handycam DCR-SR68 Speaker Replacement: 16 단계, 이미지 3/3
    • With the top of the device in hand, remove the 4 visible 3mm Philips screws.

    • Remove the frame by lifting away.

  17. Sony Handycam DCR-SR68 Speaker Replacement: 17 단계, 이미지 1/2 Sony Handycam DCR-SR68 Speaker Replacement: 17 단계, 이미지 2/2
    • The speaker is the object on the right with a ribbon wire connecting to it.

    • Remove the broken speaker with your fingers.

    • Replace with new speaker.

결론

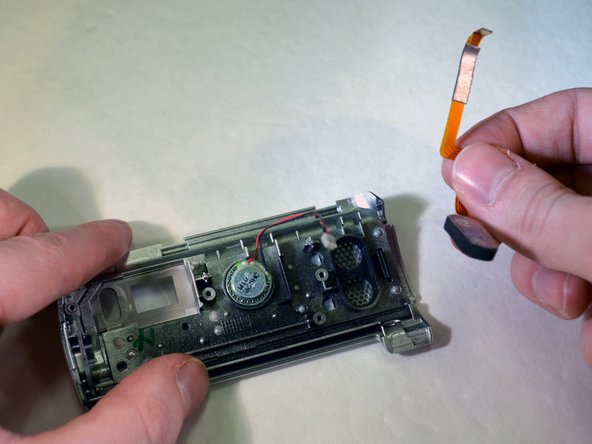
To reassemble your device, follow these instructions in reverse order.

alejandro zuniga

회원 가입일: 01/06/16

736 평판

안내서 4개 작성하였습니다

댓글 0개

댓글 쓰기

조회 통계:

24 시간 전: 0

7일 전: 2

30일 전: 3

전체 시간: 294