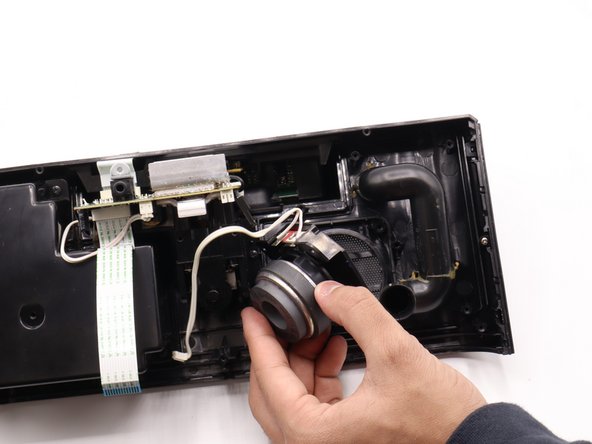
주요 콘텐츠로 건너뛰기

Sony ICF-C1iPMK2 Speaker Replacement

필요한 것

  1. Sony ICF-C1iPMK2 Speaker Replacement, Speaker: 1 단계, 이미지 1/2 Sony ICF-C1iPMK2 Speaker Replacement, Speaker: 1 단계, 이미지 2/2
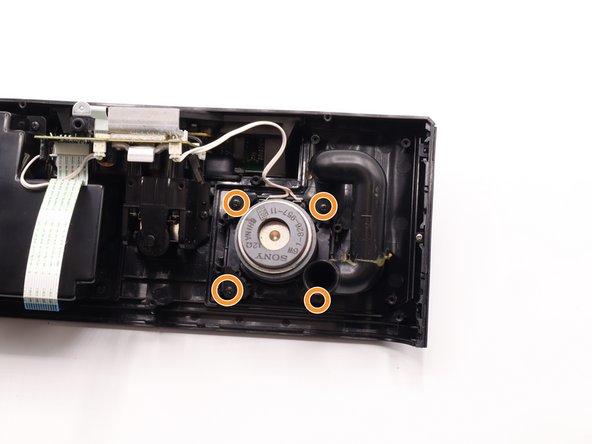
    • Unscrew the 1 cm Phillips #00 screws.

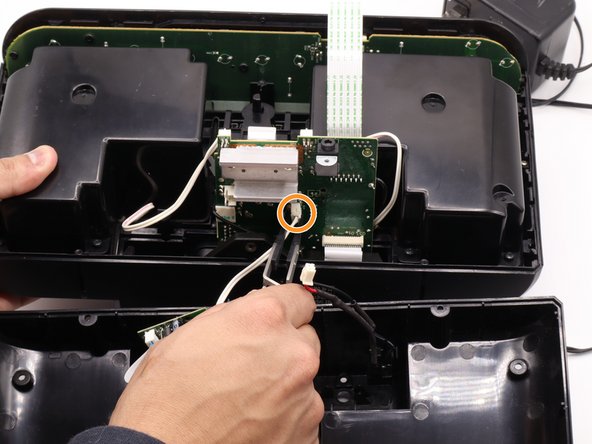
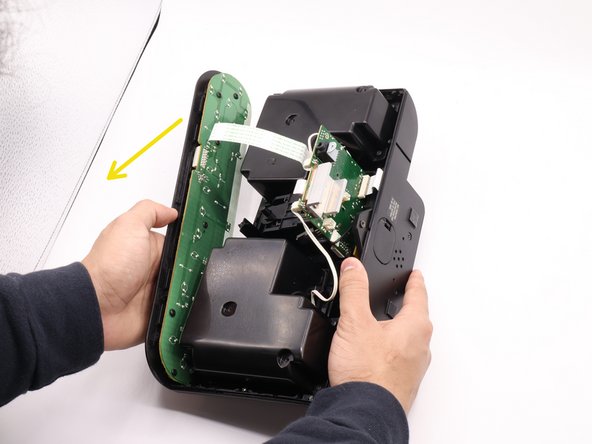
    • Use spudger to loosen the back panel of the device.

  2. Sony ICF-C1iPMK2 Speaker Replacement: 2 단계, 이미지 1/3 Sony ICF-C1iPMK2 Speaker Replacement: 2 단계, 이미지 2/3 Sony ICF-C1iPMK2 Speaker Replacement: 2 단계, 이미지 3/3
    • This step contains ribbon cables. Be careful to not bend or rip these fragile cables, to protect your device.

    • Slowly pull the back panel off until it separated from the main panel.

    • Carefully unplug all of the ribbon cables connecting the back panel to the main panel.

  3. Sony ICF-C1iPMK2 Speaker Replacement: 3 단계, 이미지 1/3 Sony ICF-C1iPMK2 Speaker Replacement: 3 단계, 이미지 2/3 Sony ICF-C1iPMK2 Speaker Replacement: 3 단계, 이미지 3/3
    이 단계에 사용된 도구:
    Tweezers
    $4.99
    구매
    • Remove the power connector with a pair of ESD safe tweezers.

    • Remove the Aux port connector with a pair of ESD safe tweezers.

    • Slide the button panels out of the chassis.

  4. Sony ICF-C1iPMK2 Speaker Replacement: 4 단계, 이미지 1/3 Sony ICF-C1iPMK2 Speaker Replacement: 4 단계, 이미지 2/3 Sony ICF-C1iPMK2 Speaker Replacement: 4 단계, 이미지 3/3
    • Unscrew the four 1 cm Phillips #00 screws and remove the speaker cover.

    • Unscrew the 1 cm Phillips #00 screws holding the speaker in place.

    • Remove the old speaker and insert the new one.

결론

To reassemble your device, follow these instructions in reverse order.

KyndleGabel

회원 가입일: 09/15/23

530 평판

안내서 3개 작성하였습니다

University of North Texas, Team 6-5, Kilpatrick Fall 2023 University of North Texas, Team 6-5, Kilpatrick Fall 2023 회원

UNT-KILPATRICK-F23S6G5

5 회원들

안내서 5개 작성하였습니다

댓글 0개

댓글 쓰기

조회 통계:

24 시간 전: 1

7일 전: 1

30일 전: 7

전체 시간: 82