이 버전에는 잘못된 편집 사항이 있을 수 있습니다. 최신 확인된 스냅샷으로 전환하십시오.
필요한 것
-
이 단계는 번역되지 않았습니다. 번역을 도와주십시오
-
Find the arrow on the battery cover on the back of the device.
-
While pressing down on the arrow, slide the cover towards the bottom of the recorder until it clicks.
-
-
-
이 단계는 번역되지 않았습니다. 번역을 도와주십시오
-
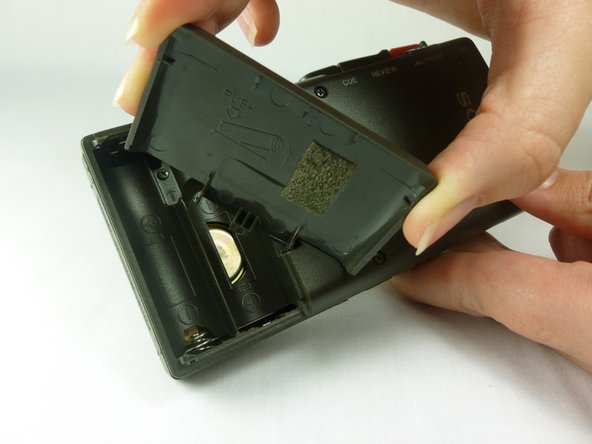
Remove the battery cover by first tilting it so it is at a right angle with the rest of the device.
-
Next, twist it to the side as shown in the second picture. The lid should simply snap off.
-
-
이 단계는 번역되지 않았습니다. 번역을 도와주십시오
-
Use a #00 Phillips head screwdriver to remove the four (1.7x16 mm) screws from the back case.
-
Next, use the same screwdriver to unscrew the (1.7X5 mm) screw, which is located inside the battery compartment.
-
-
이 단계는 번역되지 않았습니다. 번역을 도와주십시오
-
Use a spudger to push in the two tabs located on the bottom of the device.
-
It works best to push the tabs at an upward angle (towards the top of the battery compartment)
-
It may take a decent amount of force in order to push in the tabs.
-
-
이 단계는 번역되지 않았습니다. 번역을 도와주십시오
-
With a firm grip on the larger half, remove the back cover by lifting first on the battery area.
-
The back cover should lift cleanly off.
-


다른 한 분이 해당 안내서를 완성하였습니다.

팀

Cal Poly, Team 10-34, Amido Winter 2012 Cal Poly, Team 10-34, Amido Winter 2012 회원
CPSU-AMIDO-W12S10G34
4 회원들
안내서 7개 작성하였습니다