주요 콘텐츠로 건너뛰기

Sony NWZ-E473 Audio Jack Replacement

필요한 것

  1. Sony NWZ-E473 Audio Jack Replacement, Back Panel: 1 단계, 이미지 1/1
    • Use a Phillips #00 screwdriver to unscrew the two 5 mm screws located on the bottom of the back of the device.

  2. Sony NWZ-E473 Audio Jack Replacement: 2 단계, 이미지 1/1
    • Use a plastic opening tool to loosen the bottom portion of device.

  3. Sony NWZ-E473 Audio Jack Replacement: 3 단계, 이미지 1/1
    • Use a plastic opening tool to loosen the top panel of the device.

  4. Sony NWZ-E473 Audio Jack Replacement: 4 단계, 이미지 1/1
    • Use a Phillips #00 screwdriver to remove the two 3 mm screws located on the portion under the top panel of the device.

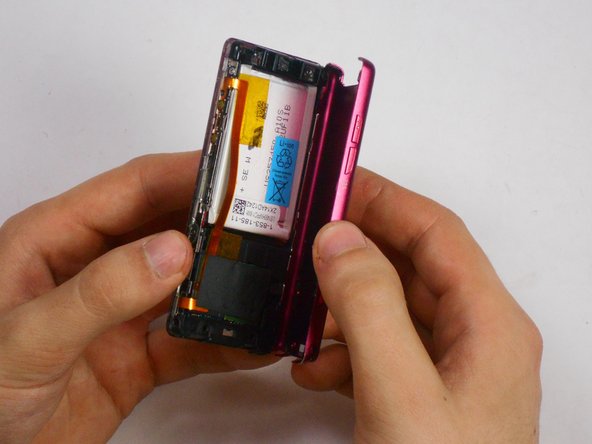
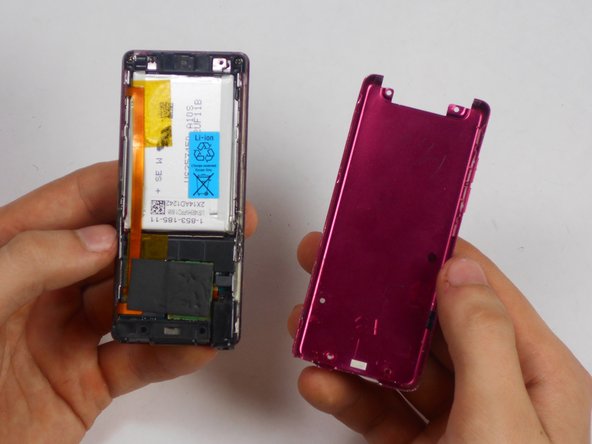
  5. Sony NWZ-E473 Audio Jack Replacement: 5 단계, 이미지 1/3 Sony NWZ-E473 Audio Jack Replacement: 5 단계, 이미지 2/3 Sony NWZ-E473 Audio Jack Replacement: 5 단계, 이미지 3/3
    • Remove the back plate from the device.

  6. Sony NWZ-E473 Audio Jack Replacement, Audio Jack: 6 단계, 이미지 1/1
    • Unscrew one 2.5 mm screw using a Phillips #00 screwdriver on bottom right portion of device located near audio jack.

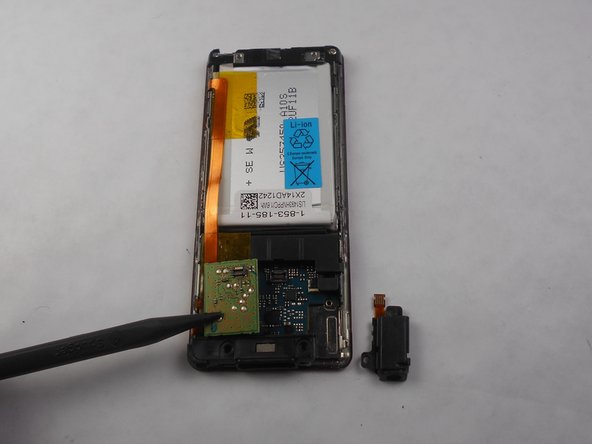
  7. Sony NWZ-E473 Audio Jack Replacement: 7 단계, 이미지 1/2 Sony NWZ-E473 Audio Jack Replacement: 7 단계, 이미지 2/2
    • Disconnect the headphone jack connection from the motherboard using any tool to remove black audio piece that needs to be replaced.

결론

To reassemble your device, follow these instructions in reverse order.

다른 한 분이 해당 안내서를 완성하였습니다.

Chaz

회원 가입일: 01/16/15

119 평판

안내서 1개 작성함

USF Tampa, Team 17-6, Watkins Winter 2015 USF Tampa, Team 17-6, Watkins Winter 2015 회원

USFT-WATKINS-W15S17G6

4 회원들

안내서 7개 작성하였습니다

댓글 0개

댓글 쓰기

조회 통계:

24 시간 전: 0

7일 전: 3

30일 전: 5

전체 시간: 1,066